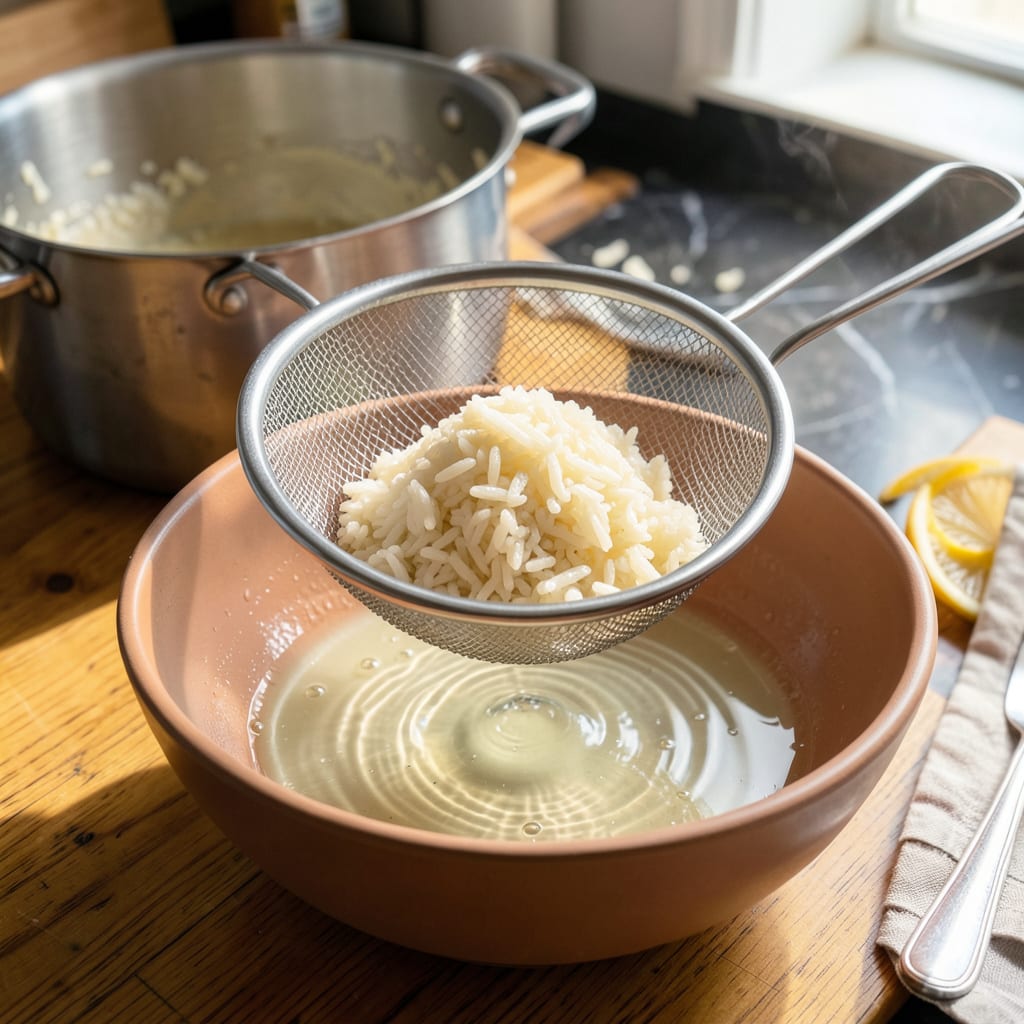
We’ve all been there—lifting the lid to find rice that’s more like porridge than perfect grains. Don’t toss it yet! I’ve rescued countless batches of mushy rice with simple stovetop tricks that actually work. The key is acting fast before the grains turn to complete mush.
First, drain any excess water immediately—this stops the cooking process and removes the main culprit. Then we’ll use heat to evaporate moisture and restore texture. I learned this method after ruining three pots of rice in one week (yes, it was a rough time). The science is simple: too much water or low heat breaks down starches, but we can reverse some of that damage.
You’ll be amazed how quickly this works. Within minutes, you can transform that sad, soggy rice into something salvageable—maybe even delicious. I’ve turned mushy rice into perfect fried rice, crispy rice cakes, and creamy congee when all seemed lost. The stove is your best tool here, not the microwave.
Fair warning: this isn’t about making it perfect, but making it edible and maybe even enjoyable. Sometimes kitchen failures lead to the best discoveries—I once turned overcooked rice into my favorite breakfast porridge by accident. Let’s fix that rice!
📚 In This Guide
- What You’ll Need
- Instructions
- Tips and Common Mistakes
What Youll Need
- ● Mushy rice – 1–4 cups (the amount you need to fix 😅).
- ● Stovetop pot or pan – A wide, heavy-bottomed pot (like stainless steel or cast iron) works best for even heat.
- ● Strainer or colander – Fine-mesh preferred to avoid losing grains.
- ● Paper towels or clean kitchen towel – 2–3 sheets (for drying rice if needed).
- ● Water – ½–1 cup (room temperature for rinsing or steaming).
- ● Fork or rice paddle – For gentle fluffing (no spoons—they crush grains!).
- ● Timer – Your phone or a kitchen timer (precision matters! ⏰).
- ● Cheesecloth or thin cotton cloth – For wrapping rice if extra drying is needed.
- ● Lemon juice or vinegar – 1 tsp (white vinegar works best to restore texture).
- ● Butter or oil – 1 tbsp (adds richness if reheating).
- ● Steamer basket – Fits your pot for the steam-dry method.
Instructions for Fixing Mushy Rice on the Stove
Don’t panic—these simple steps will transform your mushy rice into perfect, fluffy grains in no time!
Immediately Drain the Excess Moisture
As soon as you realize your rice is mushy, grab a fine-mesh strainer and gently pour the rice into it. Shake it lightly to remove all excess water—this is the fastest way to stop the cooking process and prevent the grains from absorbing more moisture. Don’t press or squeeze the rice, as this will make it stick together even more.
Let the rice sit in the strainer for about 1 minute to allow any trapped steam to escape. You’ll notice the grains start to firm up slightly as they cool. This step is crucial because it removes the primary cause of mushiness: too much water.
Spread the Rice to Dry and Cool
Line a baking sheet with parchment paper or a clean kitchen towel. Spread the drained rice out in a single, even layer—this maximizes surface area so moisture can evaporate quickly. Use a fork to gently separate any clumps, but don’t overwork it or you’ll break the grains.
Let the rice sit at room temperature for 5-10 minutes. You’ll see the surface start to look drier and the grains will become more distinct. For even faster results, place the baking sheet near an open window or under a gentle ceiling fan to encourage airflow. The goal is to remove just enough moisture to restore texture without drying it out completely.
Reheat Gently with a Dry Method
Heat a clean, dry skillet or nonstick pan over medium-low heat for about 2 minutes. Add the rice in a single layer—don’t overcrowd the pan or it will steam instead of drying. Let it cook undisturbed for 2-3 minutes until you hear a subtle sizzling sound and the bottom layer becomes slightly crispy.
Gently flip the rice with a spatula, breaking up any remaining clumps. Cook for another 2-3 minutes, stirring occasionally, until the grains are heated through and have regained their individual texture. Watch closely—you want to dry the rice, not brown it. The grains should separate easily when pressed with your spatula.
Revive with Steam for Perfect Texture
Here’s the secret to restoring that just-cooked fluffiness: Transfer the rice to a clean bowl and cover it with a damp paper towel. Place a plate or lid over the bowl and let it sit for 3-5 minutes. The trapped steam will gently rehydrate the outer layers of the grains without making them soggy again.
After steaming, fluff the rice with a fork from the bottom up, lifting and separating the grains. You’ll notice they spring back to life with a tender yet distinct texture. Taste a few grains—they should be soft but not mushy, with no gummy residue. If needed, repeat the steaming process for another 2 minutes.
Optional Crispy Finish for Extra Texture
For those who love a little crunch, heat 1 tablespoon of neutral oil in a skillet over medium heat. Add the revived rice and press it down lightly with a spatula. Cook undisturbed for 3-4 minutes until you see golden brown crust forming on the bottom.
Flip sections of the rice to crisp the other side, breaking up any large pieces. Cook for another 2-3 minutes until you achieve your desired level of crispiness. This step isn’t just for texture—it adds a delicious nutty flavor that makes your saved rice taste intentional, not salvaged. Serve immediately while the contrast between crispy and fluffy grains is at its best.
Tips and Common Mistakes for Perfectly Revived Rice
Here’s what I’ve learned from rescuing countless batches of mushy rice—these small details make all the difference between gummy disappointment and restaurant-quality grains.
The Draining Secret: In Step 1, that 1 minute in the strainer isn’t just about removing water—it’s about letting the rice grains “breathe.” I’ve found that gently tapping the strainer against the sink edge (don’t shake aggressively!) helps release trapped steam faster. You’ll actually see the grains plump up slightly as they cool—this is your first sign the texture is improving. The rice should feel slightly firmer to the touch but not dry when you proceed to Step 2.
Heat Control Matters: When reheating in Step 3, medium-low heat is absolutely critical. I can’t tell you how many times I’ve seen people crank the heat trying to speed things up, only to end up with burnt edges and still-mushy centers. You want to hear that subtle sizzle after 2-3 minutes—it should sound like quiet rain on a hot pan, not aggressive frying. If your rice starts popping or smoking, you’ve gone too far. Remove it immediately and reduce the heat.
Steam Revival Technique: The 3-5 minutes of steaming in Step 4 is where the magic happens, but here’s what nobody tells you: the paper towel should be damp, not soaking wet. Squeeze it out thoroughly after running it under water—you want it to release gentle steam, not create a sauna. I like to use warm (not hot) water for the paper towel because it creates more consistent steam. When you lift the lid after steaming, the rice should glisten slightly but not be wet to the touch.
Crispy Finish Pro Tip: For the optional crispy step, that 1 tablespoon of neutral oil makes all the difference in texture. Don’t eyeball it—actually measure! Too much oil will fry the rice, while too little leads to uneven crisping. I prefer avocado oil for its high smoke point and neutral flavor. Press down firmly with your spatula when creating the crust—you should feel resistance from the rice. That pressure helps form an even golden layer during the 3-4 minutes of cooking.
Pro Tips for Fix Mushy Rice On Stove
- Here’s what I’ve learned from rescuing countless batches of mushy rice—these small details make all the difference be…
- The Draining Secret: In Step 1, that 1 minute in the strainer isn’t just about removing water—it’s about letting the …
- Heat Control Matters: When reheating in Step 3, medium-low heat is absolutely critical. I can’t tell you how many tim…
Frequently Asked Questions
Can I fix mushy rice after it’s already overcooked?
If your rice is already mushy, spread it on a baking sheet and bake at 350°F (175°C) for 5–10 minutes to evaporate excess moisture. Alternatively, rinse it gently under cold water to remove excess starch, then reheat with a splash of water in a pan.
How long does it take to fix mushy rice on the stove?
Most fixes take 5–15 minutes. Draining and toasting the rice in a dry pan takes about 5 minutes, while the “paper towel trick” (covering with a towel to absorb steam) adds 10–15 minutes of resting time. Patience is key for the best texture!
What’s the fastest way to salvage mushy rice?
The quickest method is the dry-toast technique: Drain excess water, then cook the rice in a dry pan over medium heat for 3–5 minutes, stirring constantly. This removes moisture fast but watch closely to avoid burning!
Can I turn mushy rice into fried rice instead?
Yes! Mushy rice works great for fried rice. Heat oil in a pan, add the rice, and stir-fry on high heat to crisp it up. Toss in veggies, protein, and soy sauce—just break up clumps first for even cooking.
Why does my rice keep turning mushy, even when I measure the water?
Common culprits include:
- Lifting the lid too often (releases steam).
- Using the wrong rice-to-water ratio (1:1.5 for white rice, 1:2 for brown).
- Cooking at too low a heat (simmer, don’t boil gently).
- Skipping the rinse (extra starch = stickier rice).
Don’t let mushy rice ruin your meal—salvaging it is easier than you think! Whether you spread it out to dry, repurpose it into fried rice, or adjust your cooking technique next time, these simple fixes can turn a kitchen mishap into a delicious win. 🎉
Now that you’ve got the know-how, try one of these methods right away or bookmark this guide for future rice rescues. Ready to nail perfect rice every time? Check out our foolproof stovetop rice recipe next!

Trained in classic French technique but raised on slow-cooked ribs and spicy rubs, she blends culinary skill with smoke and soul.
- Recipe for Boneless Pork Chops in Cast Iron Skillet: Sear and Baste to Juicy Perfection - October 3, 2026
- Recipe for Boneless Cross Rib Roast: Slow-Roasted Beef with Herb Crust - October 3, 2026
- Hamburgers in Sauce Recipe Crock Pot: Slow-Cooked Savory Delight - October 3, 2026