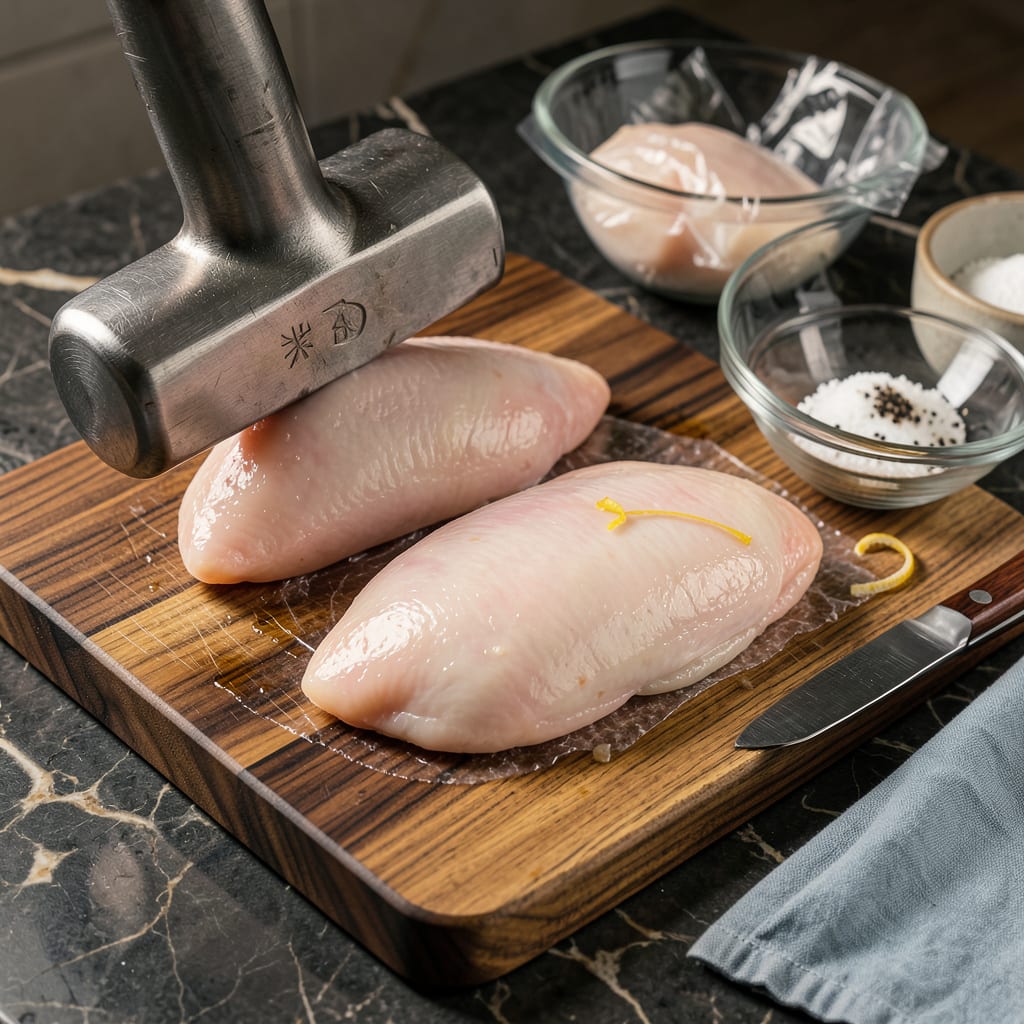
I’ll be real with you—flattening chicken breast changed my cooking game completely. No more dry edges with raw centers, no more guessing if it’s done. This simple technique ensures even cooking every time, whether you’re making quick weeknight dinners or fancy stuffed chicken rolls. I learned it the hard way after ruining one too many chicken dishes.
All you need is a meat mallet (or a heavy pan), some plastic wrap, and 2 minutes of effort. The goal is uniform thickness—about ½ inch—so the chicken cooks through at the same rate. No special skills required, just a little patience and the right approach. I use this method for everything from Chicken Piccata to crispy cutlets.
Here’s why it matters: flattened chicken cooks faster and more evenly, stays juicy, and absorbs flavors better. That means no more dry, rubbery meat or worrying about food safety. The first time I tried it, I couldn’t believe how much easier dinner became. Now it’s my go-to prep step for any chicken recipe.
Whether you’re grilling, pan-searing, or stuffing, this technique makes all the difference. Stick with me—I’ll show you exactly how to do it right, plus share my favorite recipes where it really shines. No more chicken cooking frustrations, just perfect results every time.
📚 In This Guide
- What You’ll Need
- Instructions
- Tips and Common Mistakes
What Youll Need
- ● Chicken breast: 1–2 boneless, skinless breasts (6–8 oz each, thawed if frozen)
- ● Plastic wrap or parchment paper: 2 large sheets (12×12 inches) to prevent mess
- ○ Meat mallet or rolling pin: 1 (flat side for even pounding; textured side optional for tenderizing)
- ● Cutting board: 1 sturdy, non-slip surface (wood or plastic)
- ● Sharp knife: 1 (chef’s or boning knife for trimming fat)
- ○ Kitchen shears: 1 pair (optional, for quick trimming)
- ● Paper towels: 2–3 sheets (to pat chicken dry for better texture)
- ○ Meat thermometer: 1 (optional but highly recommended for perfect doneness)
- ● Salt & pepper: To taste (for seasoning before or after flattening)
Instructions for Flattening Chicken Breast
Let me walk you through the simple process that guarantees perfectly even chicken every time.
Prepare Your Workspace and Chicken
Start by setting up a clean, stable work surface. I like to use a large cutting board that won’t slip around. Place your boneless, skinless chicken breasts on the board one at a time. You’ll notice they’re naturally thicker on one end and taper toward the other—that’s exactly what we’re going to fix.
Pat each breast completely dry with paper towels. This isn’t just about cleanliness—dry chicken won’t slide around as you work, and it helps the plastic wrap stick better in the next step. I always keep extra paper towels handy because moisture is the enemy of good technique here.
Protect the Chicken with Plastic Wrap
Tear off two sheets of plastic wrap, each about 12 inches long. Place one sheet on your work surface, then position a chicken breast in the center. Cover with the second sheet of plastic wrap, pressing it gently against the chicken. The plastic creates a barrier that prevents cross-contamination and keeps the meat from sticking to your tools.
Make sure the plastic extends beyond the chicken on all sides—you’ll need that extra overhang to keep everything contained. I like to press down lightly on the plastic to remove any air pockets between the wrap and the chicken. This helps create an even surface for pounding and prevents the plastic from tearing during the process.
Pound to an Even Thickness
Using a meat mallet, rolling pin, or even a heavy skillet, begin pounding the chicken breast. Start at the thickest part and work your way toward the thinner end. Use firm, even strokes—don’t just whack it randomly. I prefer the flat side of a meat mallet because it gives me more control over the thickness.
Aim for a uniform thickness of about ½ inch throughout. You’ll know you’re doing it right when the chicken breast lies flat without any bulges. Check your progress frequently by lifting the plastic wrap. The goal is even thickness, not necessarily making it as thin as possible. Remember to pound the edges too—they often need extra attention to create that perfect uniform shape.
Inspect and Make Final Adjustments
Carefully peel back the plastic wrap and examine your chicken breast. Run your fingers gently over the surface to check for any thick spots you might have missed. If you find any uneven areas, simply recover with the plastic wrap and give those spots a few more targeted pounds.
You should end up with a chicken breast that’s uniformly ½ inch thick from edge to edge. This even thickness is what ensures your chicken cooks uniformly, eliminating those frustrating dry edges and undercooked centers. I like to compare all my breasts side by side at this point to make sure they’re consistent—this way, they’ll all finish cooking at the same time.
Proceed with Your Recipe
Now that your chicken breasts are perfectly even, you can season them immediately or cover and refrigerate them for up to 24 hours before cooking. The uniform thickness means they’ll cook in about half the time of unflattened breasts, and you’ll never have to cut into one to check for doneness in the thickest part again.
When you cook them, you’ll notice they brown more evenly and stay juicier throughout. This technique works for any cooking method—grilling, pan-searing, baking, or even air frying. The even thickness also makes them ideal for stuffing, rolling, or cutting into cutlets for dishes like chicken parmesan or piccata. You’ve just solved one of the biggest challenges in cooking chicken breast!
Tips and Common Mistakes
Mastering this technique will transform your chicken dishes—here’s what I’ve learned from years of practice.
Plastic Wrap Secret: In Step 2, make sure your plastic wrap extends well beyond the chicken on all sides. I use sheets about 12 inches long as specified, but if your chicken breasts are particularly large, don’t hesitate to use longer pieces. The extra overhang prevents tearing when pounding and keeps everything contained. Press out any air bubbles between the wrap and chicken—they can cause uneven pounding and make the process more difficult.
Even Pounding Technique: When working through Step 3, start with gentle taps to gradually flatten the chicken rather than using full force immediately. Focus on the thickest part first, then work outward in smooth, overlapping strokes. I find it helpful to visualize the chicken as a map—methodically cover every area rather than randomly pounding. Remember to check your progress frequently by lifting the plastic wrap to ensure you’re achieving that perfect ½ inch thickness throughout.
Thickness Check: During Step 4, don’t rely solely on visual inspection. Run your fingers gently over the entire surface to detect any subtle thick spots you might have missed. Pay special attention to the edges, which often need extra attention. I like to hold the chicken up to a light source—any thicker areas will be more apparent. For perfect consistency, compare all your breasts side by side before proceeding to cooking.
Make-Ahead Strategy: You can prepare flattened chicken breasts up to 24 hours in advance, just as mentioned in Step 5. Stack them between sheets of parchment paper in an airtight container to prevent them from sticking together. When ready to cook, let them sit at room temperature for about 15 minutes before seasoning. This brief resting time helps the seasoning adhere better and ensures more even cooking.
Pro Tips for Flatten Chicken Breast
- Mastering this technique will transform your chicken dishes—here’s what I’ve learned from years of practice.
- Plastic Wrap Secret: In Step 2, make sure your plastic wrap extends well beyond the chicken on all sides. I use sheet…
- Even Pounding Technique: When working through Step 3, start with gentle taps to gradually flatten the chicken rather …
Frequently Asked Questions
How long should I pound chicken breast to flatten it?
Aim for 2–5 minutes per breast, depending on thickness. Pound until it’s an even ½-inch thick for most recipes. Over-pounding can tear the meat—stop once it’s uniform! Use a meat mallet’s flat side for control.
Can I flatten chicken without a meat mallet?
Try these hacks:
- A rolling pin (wrap chicken in plastic first)
- A heavy skillet or saucepan
- A wine bottle (clean, of course!)
Just avoid sharp edges to prevent shredding.
Why does my chicken breast dry out after flattening?
Flattening exposes more surface area, so it cooks faster. To keep it juicy:
- Brining (15 mins in saltwater) before pounding
- Cooking just to 165°F (use a thermometer!)
- Letting it rest 5 minutes post-cooking
Pro tip: Don’t overcrowd the pan!
Do I need to flatten chicken for stir-fry or grilling?
For stir-fry, yes! Thin, even slices cook in a flash. For grilling, flattening prevents dry edges but isn’t mandatory—just adjust heat zones. Thicker cuts work if you sear then move to indirect heat.
Can I flatten frozen chicken breast?
No! Thaw it first in the fridge or cold water. Pounding frozen meat can:
- Damage muscle fibers (hello, mush!)
- Create uneven thickness
- Risk bone fragments if not fully boneless
Wait for softness—patience pays off!
Now you’ve got the secret to perfectly flattened chicken breast—no more dry edges or undercooked centers! 🎯 Whether you use a rolling pin, meat mallet, or even a skillet, the key is even thickness for juicy, tender results every time. Ready to put your new skills to the test?
Fire up that stove and try a simple recipe like chicken piccata or stuffed chicken breast—your flattened cuts will cook faster and more evenly than ever. Happy cooking! 🍳

Trained in classic French technique but raised on slow-cooked ribs and spicy rubs, she blends culinary skill with smoke and soul.
- Recipe for Boneless Pork Chops in Cast Iron Skillet: Sear and Baste to Juicy Perfection - October 3, 2026
- Recipe for Boneless Cross Rib Roast: Slow-Roasted Beef with Herb Crust - October 3, 2026
- Hamburgers in Sauce Recipe Crock Pot: Slow-Cooked Savory Delight - October 3, 2026