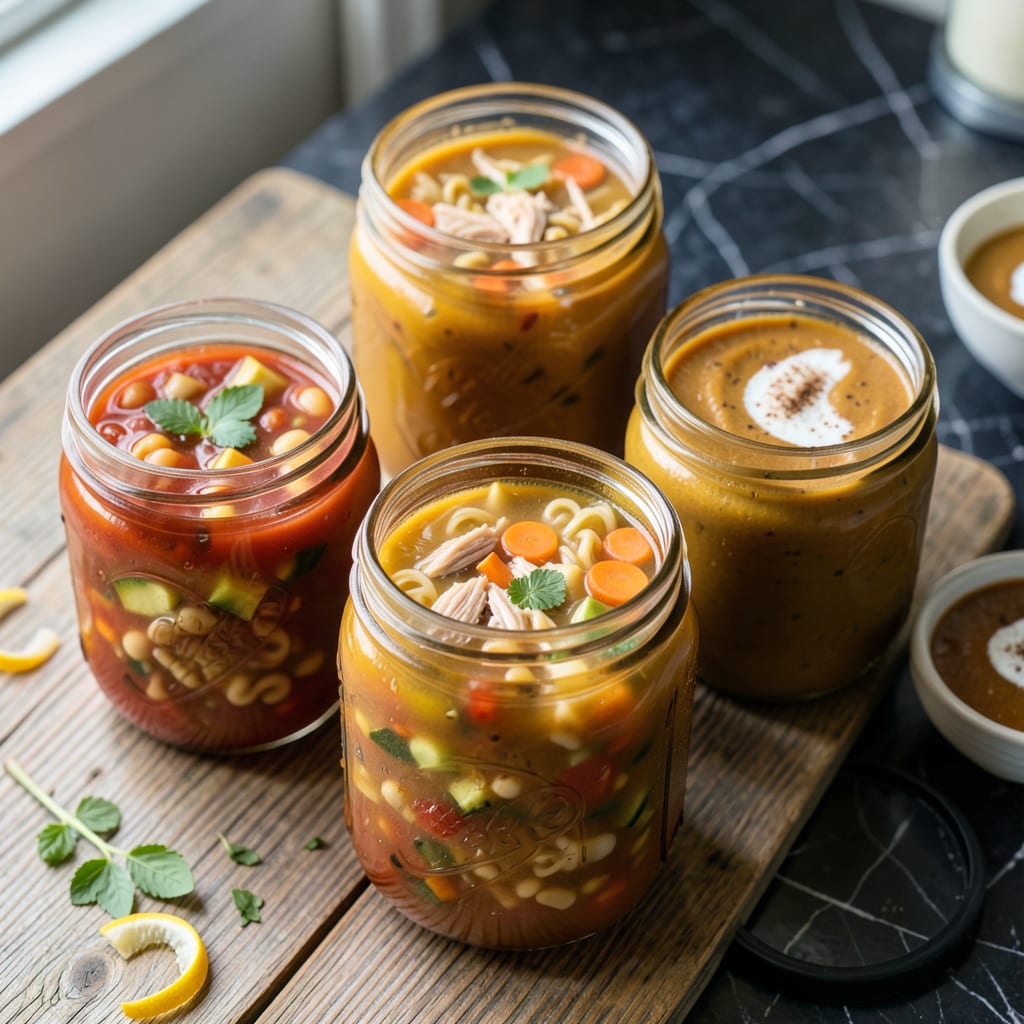
Freezing soup in mason jars is a game-changer for meal prep, but doing it wrong can lead to cracked glass and wasted food. After years of perfecting my method, I’ve developed a foolproof approach that prevents spills, breakage, and freezer burn. The key lies in proper cooling, jar selection, and leaving the right amount of headspace—small details that make all the difference.
This technique works for any soup, from hearty chilis to delicate broths. I always use wide-mouth jars for easy filling and cooling, and I never skip the step of letting soup cool completely before freezing. Thermal shock is the enemy here—hot liquid in cold glass is a recipe for disaster. A simple ice bath speeds up cooling without compromising safety.
Once frozen, these soups maintain their flavor and texture for up to three months. The method is so reliable that I now keep a rotating stock of favorites like classic chicken noodle and smoky lentil stew. When you’re ready to eat, thawing overnight in the fridge ensures even reheating without separating or scorching.
Master this process, and you’ll never waste soup again. No more last-minute dinner stress, no more throwing out leftovers—just perfectly preserved meals ready whenever you need them. Here’s exactly how to do it right.
📚 In This Guide
- What You’ll Need
- Instructions
- Tips and Common Mistakes
What Youll Need
- ● Mason jars: 4–6 wide-mouth pint (16 oz) or quart (32 oz) jars with airtight lids (Ball or Kerr brands recommended). Avoid narrow-mouth jars—they’re harder to fill! ❄️
- ● Soup: 2–3 quarts of cooled (not piping hot!) soup—leave 1–1.5 inches of headspace to prevent cracks.
- ● Ladle or measuring cup: For spill-free pouring (a heatproof 2-cup measure works great).
- ● Permanent marker: To label jars with the soup type and date (trust us, you’ll forget!).
- ● Freezer-safe tray or baking sheet: To hold jars upright while freezing (prevents tipping!).
- ○ Plastic wrap or parchment paper (optional): Press a square on top of the soup before sealing to minimize freezer burn.
- ○ Jar lifter or oven mitts (optional): Helps grip hot jars if filling while warm (but cooling first is safer!).
- ● Freezer space: Clear a flat shelf—jars need to freeze upright for 24 hours before stacking.
Step-by-Step Instructions for Freezing Soup in Mason Jars
This method is simpler than you think—just follow these careful steps for perfect results every time.
Choose the Right Jars and Prep Them
Start with clean, wide-mouth mason jars in either pint or quart sizes. I prefer wide-mouth because they’re easier to fill and empty, especially when dealing with chunky soups. Make sure your jars are free from any cracks or chips—even small imperfections can lead to breakage during freezing.
Wash the jars and lids in hot, soapy water and rinse thoroughly. You don’t need to sterilize them since we’re freezing, not canning, but they should be completely clean. Let them air dry upside down on a clean towel to prevent any water spots that could affect the seal.
Cool Your Soup Completely Before Jarring
This is the most important step—never put hot soup directly into jars. Transfer your cooked soup to a wide, shallow container and let it cool at room temperature for about 30 minutes. Then, place it in the refrigerator to chill completely, which usually takes 2-3 hours depending on the quantity.
I like to stir the soup occasionally during cooling to help it chill evenly. You’ll know it’s ready when there’s no steam rising and the soup feels cool to the touch. Trying to freeze warm soup will cause the jars to break from thermal shock and can create unsafe conditions in your freezer.
Fill Jars Properly to Prevent Spills
Once your soup is completely cold, it’s time to fill the jars. Use a ladle and a canning funnel to minimize spills. Fill each jar, leaving exactly 1-inch of headspace at the top—this expansion room is crucial as liquids expand when frozen.
For chunky soups, pack the solid ingredients first, then pour in enough broth to cover. Wipe the rims clean with a damp paper towel to ensure a good seal. Any food particles on the rim can prevent the lid from sealing properly, leading to freezer burn.
Seal and Freeze with Care
Place the lids on the jars and screw on the bands until they’re fingertip tight—don’t overtighten. The lids should be snug but not strained. I’ve found that slightly loosening the bands after the first hour of freezing helps prevent vacuum seal issues that can cause breakage.
Set your jars in the freezer on a flat surface, leaving space between them at first. Once completely frozen (after about 24 hours), you can stack them to save space. The soup will keep for 3-6 months in the freezer, though I find the quality is best when used within 3 months.
Thaw and Reheat Safely
When you’re ready to use the soup, transfer a jar to the refrigerator to thaw overnight. Never thaw at room temperature, as this can promote bacterial growth. If you’re in a hurry, you can place the sealed jar in a bowl of cold water to speed up thawing.
Once thawed, remove the lid and reheat the soup gently on the stovetop over medium-low heat, stirring occasionally. If the soup seems too thick after freezing, you can thin it with a little broth or water. Always bring it to a full boil for at least 1 minute before serving to ensure food safety.
Tips and Common Mistakes
After years of freezing soups, I’ve learned these key details make all the difference between perfect jars and messy freezer disasters.
Cooling Technique: The 30-minute room temperature cooling in Step 2 is non-negotiable—this prevents thermal shock that cracks jars. I place my soup container in an ice bath during this phase to speed cooling without compromising safety. Stirring every 10 minutes helps distribute heat evenly, so you’ll hit that completely cool state faster than the 2-3 hours mentioned.
Headspace Precision: That 1-inch headspace in Step 3 isn’t arbitrary—it accounts for liquid expansion during freezing. I use a ruler to measure the first few times until you develop an eye for it. For creamy soups, leave 1.25 inches since dairy expands more than broth-based soups. Wipe rims with vinegar on a paper towel for extra insurance against freezer burn.
Freezing Strategy: The 24-hour initial freeze in Step 4 creates a solid block that prevents leaks when stacking. I place jars on a baking sheet during this period to catch any condensation that might form. After 24 hours, remove the bands before stacking—this prevents them from freezing shut and makes retrieval easier.
Reheating Safety: When reheating over medium-low heat in Step 5, add a splash of water or broth before bringing to a boil. This compensates for moisture loss during freezing. I always use a thermometer to confirm the soup reaches 165°F after boiling for that full 1 minute—this ensures any potential bacteria are eliminated without overcooking.
Pro Tips for Freeze Soup In Mason Jars
- After years of freezing soups, I’ve learned these key details make all the difference between perfect jars and messy …
- Cooling Technique: The 30-minute room temperature cooling in Step 2 is non-negotiable—this prevents thermal shock tha…
- Headspace Precision: That 1-inch headspace in Step 3 isn’t arbitrary—it accounts for liquid expansion during freezing…
Frequently Asked Questions
Got questions about freezing soup in mason jars? You’re not alone! Here are the most common concerns—and quick answers—to help you store your soups like a pro.
Can I freeze soup in any mason jar?
No! Only use wide-mouth, straight-sided jars made for canning (like Ball or Kerr). Avoid decorative or thin-glass jars—they can crack under freezing temps. Stick to pint or quart sizes for best results.
How long does frozen soup last in mason jars?
Most soups stay fresh for 3–6 months in the freezer. Cream-based soups (like chowders) last closer to 1–2 months since dairy can separate. Always label jars with the date!
Do I need to leave headspace in the jar?
Yes! Leave 1–1.5 inches of headspace for liquids to expand. Overfilling = cracked jars or messy freezer explosions. Pro tip: Use a canning funnel to avoid spills while filling.
Can I freeze soup with pasta or rice in it?
It’s risky! Pasta/rice turns mushy when thawed. Freeze the broth/veggies separately, then add cooked pasta or rice after reheating. Or try undercooking grains slightly before freezing.
What if my jar cracks in the freezer?
Toss the soup (safety first!). Prevent cracks by:
- Using tempered glass jars (check for “freezer-safe” labels).
- Avoiding extreme temp changes (cool soup before freezing).
- Placing jars on a towel in the freezer for insulation.
Freezing soup in mason jars is a game-changer for meal prep—no spills, no waste, and no stress! 🎉 With the right jars, proper headspace, and a slow cooling trick, you’ll lock in flavor and freshness for months. Whether you’re batch-cooking or saving leftovers, this method keeps your soups ready to enjoy anytime.
Now that you’ve mastered the technique, why not try freezing your favorite soup recipe this week? Stock your freezer, and thank yourself later when a homemade meal is just a thaw away! ❄️🍲

Trained in classic French technique but raised on slow-cooked ribs and spicy rubs, she blends culinary skill with smoke and soul.
- Recipe for Boneless Pork Chops in Cast Iron Skillet: Sear and Baste to Juicy Perfection - October 3, 2026
- Recipe for Boneless Cross Rib Roast: Slow-Roasted Beef with Herb Crust - October 3, 2026
- Hamburgers in Sauce Recipe Crock Pot: Slow-Cooked Savory Delight - October 3, 2026