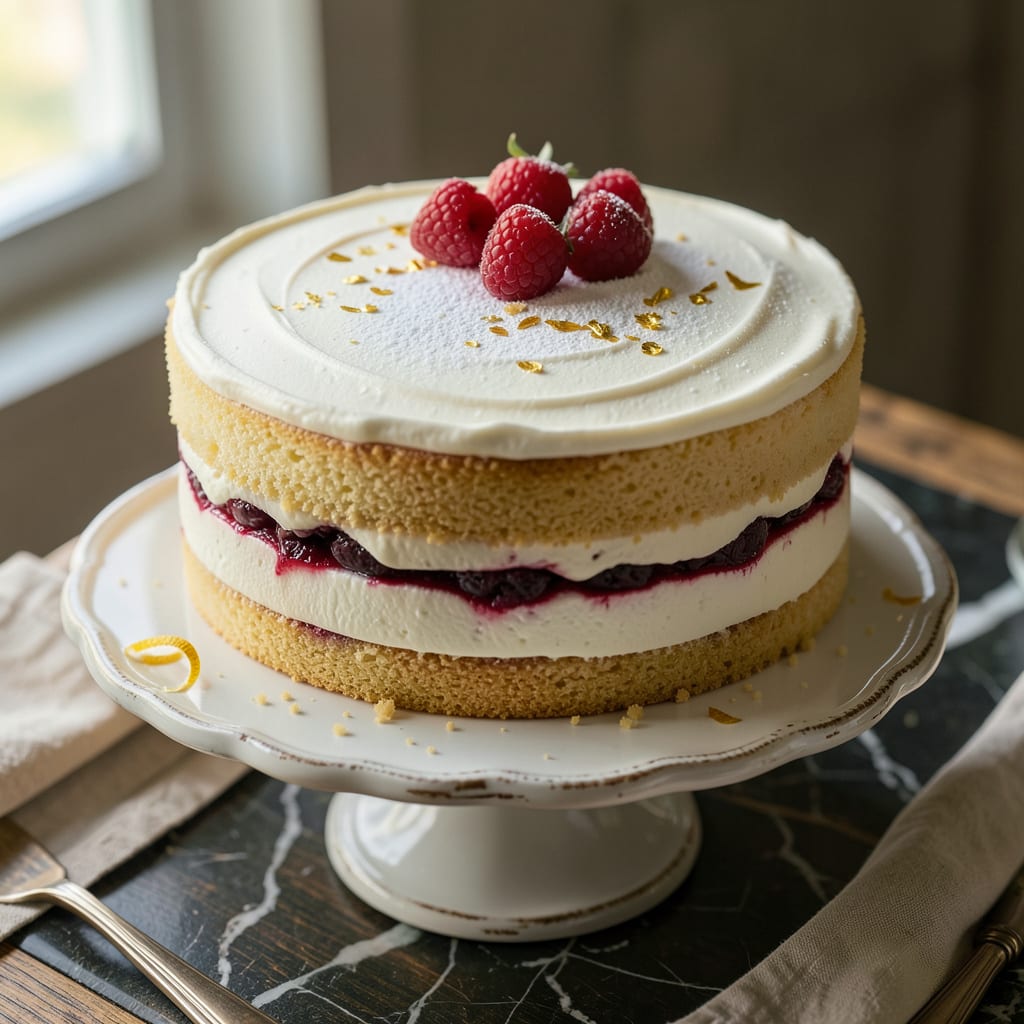
Achieving a perfectly smooth cake finish without tearing the delicate crumb layer is a skill that separates amateur bakers from professionals. After years of perfecting this technique in my French pastry training, I’ve developed a foolproof method that works with any cake and frosting combination. The key lies in proper preparation and understanding the science behind cake structure and frosting consistency.
Most cake-tearing issues stem from three common mistakes: dry cake layers, improper crumb coating, or frosting that’s either too warm or too stiff. My approach addresses each of these through a systematic process that begins before you even pick up your spatula. You’ll need just a few essential tools – an offset spatula, a turntable (or lazy Susan), and patience – to transform your cakes from homemade to bakery-quality.
The foundation of this technique is the crumb coat – a thin layer of frosting that seals in loose crumbs before the final application. What many don’t realize is that the cake must be properly chilled between coats, allowing the frosting to set and create a stable base. This simple step makes all the difference between a torn, messy cake and one with sharp edges and a flawless finish.
Whether you’re working with delicate vanilla layers or rich chocolate cakes, this method adapts to any recipe. The result is a professional-looking cake with smooth sides and clean edges – the kind that makes people ask if you bought it from a specialty bakery. Let’s break down each step to ensure your next cake turns out perfectly every time.
📚 In This Guide
- What You’ll Need
- Instructions
- Tips and Common Mistakes
What Youll Need
- ● Baked & cooled cake layers – 2-3 layers (9″ or 10″ rounds), fully cooled (at least 2 hours at room temp or 1 hour in the fridge) 🍰
- ● Frosting – 4-5 cups (buttercream, cream cheese, or ganache), slightly softer than spreading consistency
- ● Turntable (cake stand) – Rotating for smooth application (or a flat plate + lazy Susan hack!)
- ● Offset spatula – 9″-10″ long, stainless steel for precision (or a butter knife in a pinch)
- ● Bench scraper – 8″-10″ straight edge, stainless steel or acrylic (game-changer for sharp edges!)
- ○ Parchment paper strips – 3″-4″ wide, taped under cake for clean edges (optional but highly recommended)
- ● Crumb coat frosting – ½ cup thin frosting (or jam/glaze) to seal crumbs before final layer
- ● Serrated knife – 8″-10″ for leveling domed layers (if needed)
- ○ Cake comb – Adjustable or fixed-height for textured designs (optional)
- ● Spray bottle – Water mist for smoothing fondant (if using) or reviving dry frosting
- ● Paper towels – Dampened to wipe tools mid-process (keeps frosting smooth!)
- ● Patience & a steady hand – No shortcuts here, friend! ⏳✨
Step-by-Step Instructions for Frosting a Cake Without Tearing It
Here’s my foolproof method that guarantees a smooth, professional finish every time.
Prepare Your Cake Layers Properly
Start by ensuring your cake layers are completely cooled to room temperature. I like to let mine cool for at least 2 hours after baking, or you can refrigerate them for 30 minutes to speed up the process. Warm cake layers are the number one cause of tearing and crumbling when frosting.
Once cooled, level the tops if needed using a serrated knife. I always place a piece of parchment paper under each layer when leveling to catch crumbs. Brush away any loose crumbs with a pastry brush – these little bits will ruin your smooth finish if they get mixed into the frosting.
Apply a Crumb Coat Layer
Place your first cake layer on a cake stand or turntable. Spread a thin layer of frosting – about 1/4 inch thick – over the entire cake. This initial layer, called a crumb coat, catches all the loose crumbs and creates a smooth base for your final frosting layer.
Use an offset spatula for this step and don’t worry about making it perfect. The key is to cover the entire cake with a thin, even layer. Once applied, refrigerate the cake for 15-20 minutes to let this layer set. You’ll notice the difference this makes when applying your final frosting layer.
Use the Right Frosting Consistency
Your frosting consistency is crucial for a tear-free application. For buttercream, I aim for a consistency that holds a soft peak when you pull a spatula through it. If it’s too stiff, it will pull at the cake. If it’s too runny, it won’t hold its shape.
To test, dip your spatula into the frosting and pull it out. The frosting should form a peak that holds its shape but slowly slumps over. If needed, adjust by adding small amounts of powdered sugar to stiffen or milk to thin. Always mix thoroughly between adjustments to maintain a smooth texture.
Apply the Final Frosting Layer
Start with a generous dollop of frosting on top of your chilled, crumb-coated cake. Using your offset spatula, spread the frosting from the center outward, then work your way down the sides. I like to hold the spatula at about a 45-degree angle to the cake for smooth application.
Apply even pressure as you rotate the turntable. For the sides, hold the spatula vertically and smooth from bottom to top. Don’t press too hard – let the spatula glide over the surface. If you notice any tears starting to form, stop and let that area chill for 5 minutes before continuing.
Smooth and Perfect the Finish
For an ultra-smooth finish, I use the “paper towel method.” After applying your final frosting layer, gently press a piece of parchment paper or a paper towel against the sides and top of the cake. The slight texture will help smooth out any imperfections as you rotate the turntable.
Remove the paper and use a bench scraper held perpendicular to the cake for final smoothing. Chill the cake for 30 minutes before serving to let the frosting set completely. This final chill ensures clean slices and prevents any smudging when you add decorations or serve the cake.
Tips and Common Mistakes
After years of frosting cakes (and making plenty of mistakes along the way), I’ve learned these key lessons that make all the difference.
Cooling is Critical: I can’t stress enough how important the 2 hours of cooling time is in Step 1. I’ve tried rushing this by only refrigerating for 30 minutes, and while it works in a pinch, the cake still feels slightly fragile. For best results, let your layers cool completely at room temperature first, then refrigerate if you’re short on time. The difference in stability is remarkable.
Crumb Coat Wisdom: When applying that 1/4 inch thick crumb coat in Step 2, use slightly more pressure than you think you need. This thin layer should fully seal the cake. I like to use a small offset spatula for better control. Don’t skip the 15-20 minutes of chilling – this is what transforms a crumbly mess into a smooth canvas for your final layer.
Temperature Matters: The 5 minutes of chilling mentioned in Step 4 when you notice tears forming is a game-changer. I used to try to power through, but now I know that brief pause lets the frosting set just enough to prevent further damage. Keep a timer handy – it’s easy to forget when you’re in the middle of decorating.
Final Chill Importance: That last 30 minutes of chilling in Step 5 isn’t just for show. I’ve served cakes immediately after frosting, and while they look fine, the first slice always smudges. This final chill sets the frosting completely, making transport easier and slices cleaner. It’s worth the wait, I promise.
Pro Tips for Frost A Cake Without Tearing It
- After years of frosting cakes (and making plenty of mistakes along the way), I’ve learned these key lessons that make…
- Cooling is Critical: I can’t stress enough how important the 2 hours of cooling time is in Step 1. I’ve tried rushing…
- Crumb Coat Wisdom: When applying that 1/4 inch thick crumb coat in Step 2, use slightly more pressure than you think …
Frequently Asked Questions
Can I frost a cake while it’s still warm?
No! Always let your cake cool completely (at least 2 hours) before frosting. Warm cakes cause frosting to melt, slide, or tear the crumb layer. For best results, chill the cake in the fridge for 30 minutes after cooling to room temperature—this firms up the structure.
What’s the best frosting type for a tear-free finish?
Buttercream (American or Swiss) is the easiest for beginners—it’s forgiving and spreads smoothly. Ganache or cream cheese frosting work too, but may require a crumb coat. Avoid runny glaze or whipped cream unless stabilized with gelatin or powdered sugar.
How do I fix tears after they happen?
Don’t panic! Use a small offset spatula to gently “patch” the tear with extra frosting, then smooth it with a bench scraper. For larger gaps, chill the cake for 15 minutes to set the frosting before re-smoothing. A light dusting of cornstarch on the tear can help frosting adhere better.
Do I really need a crumb coat?
Yes—it’s your secret weapon! A thin crumb coat (a base layer of frosting) seals in loose crumbs and creates a clean canvas. Chill it for 15–20 minutes before adding the final layer. Skip this step, and you risk dragging crumbs through your frosting (hello, messy cake!).
Can I use a knife instead of a bench scraper?
You can, but it’s trickier! A long, straight knife (like a bread knife) works in a pinch—dip it in hot water, wipe it dry, and glide it around the cake. However, a bench scraper gives sharper edges and smoother sides. Pro tip: Rotate the cake stand (not your wrist) for even results!
Frosting a cake without tears—literally!—is all about patience and the right technique. Chill your cake, use a crumb coat, and work with smooth, confident strokes to achieve that bakery-worthy finish. Remember, even pros started somewhere, so don’t stress over small imperfections!
Now that you’ve got the basics down, why not put your skills to the test? Grab your favorite recipe, a fresh batch of frosting, and give it a try. Happy baking—your flawless cake awaits! 🎂✨

Trained in classic French technique but raised on slow-cooked ribs and spicy rubs, she blends culinary skill with smoke and soul.
- Recipe for Boneless Pork Chops in Cast Iron Skillet: Sear and Baste to Juicy Perfection - October 3, 2026
- Recipe for Boneless Cross Rib Roast: Slow-Roasted Beef with Herb Crust - October 3, 2026
- Hamburgers in Sauce Recipe Crock Pot: Slow-Cooked Savory Delight - October 3, 2026