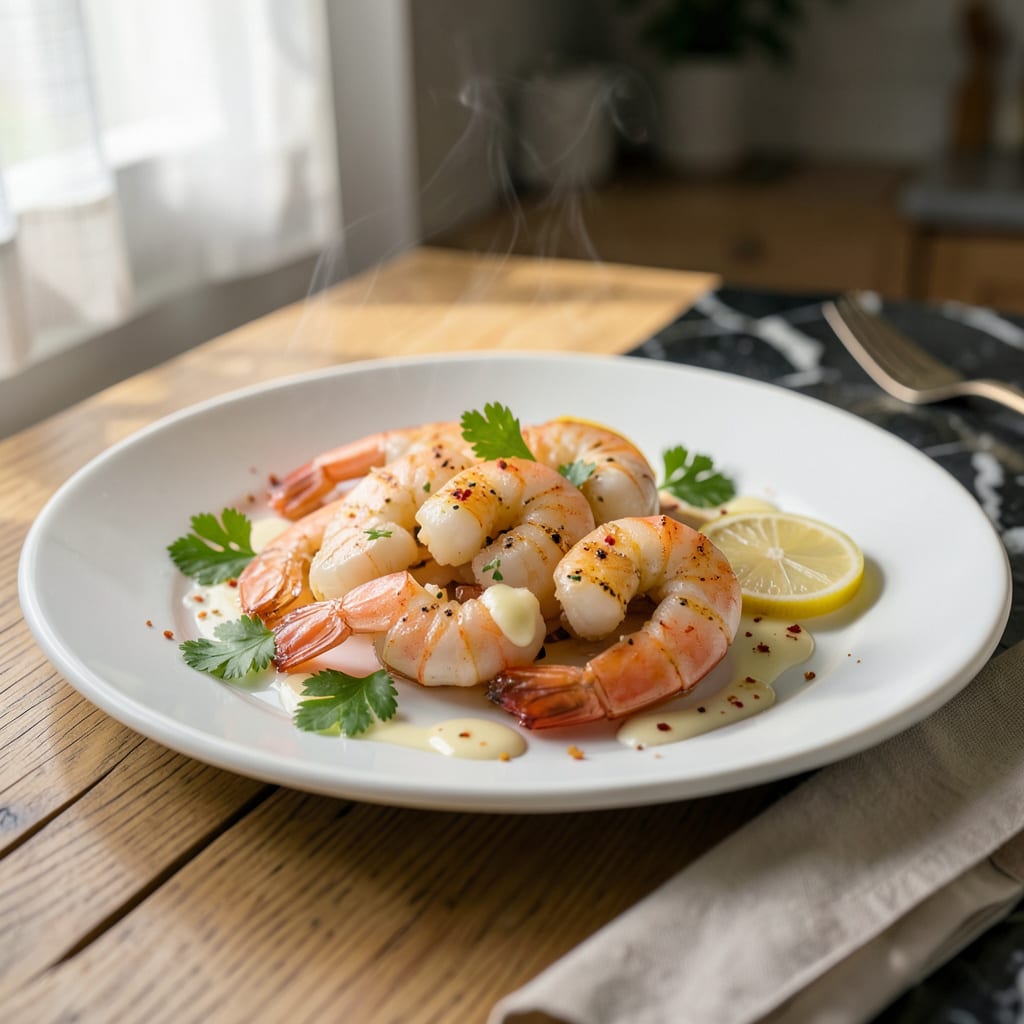
Here’s the thing—reheating shrimp without turning it into rubbery little bullets is easier than you think. I’ve burned through more batches of shrimp than I’d like to admit (literally, in my early pitmaster days) trying to get this right. The secret isn’t fancy equipment or complicated techniques—it’s about gentle heat and timing.
What works best? A quick sear in a hot pan with a splash of liquid (water, broth, or even white wine) for just 1-2 minutes. This method keeps the shrimp juicy while adding a touch of flavor. Microwave works in a pinch too, but you’ve got to use the 50% power trick to avoid overcooking. I’ll walk you through both methods so you can pick what fits your kitchen setup.
The real game-changer is what you add after reheating. A pat of garlic butter, squeeze of lemon, or sprinkle of fresh herbs transforms good shrimp into restaurant-quality bites. I always keep pre-cooked shrimp in my freezer for exactly these moments—when I need a protein boost fast without sacrificing flavor or texture.
Fair warning: Overheating is the enemy here. We’re talking 5 minutes max from start to finish, including prep. Once you nail this technique, you’ll be tossing perfect shrimp into tacos, pastas, or salads without a second thought. Let’s get those shrimp heating the right way.
📚 In This Guide
- What You’ll Need
- Instructions
- Tips and Common Mistakes
What Youll Need
- ● Pre-cooked shrimp: 1 lb (thawed if frozen) – peeled, deveined, tail-on or off 🍤
- ● Cooking oil or butter: 1–2 tbsp – olive, avocado, or unsalted butter for best flavor
- ● Non-stick skillet or pan: 10–12 inches – medium-heat safe
- ● Tongs or spatula: 1 – for gentle flipping
- ● Paper towels: 2–3 sheets – to pat shrimp dry
- ○ Lemon wedges (optional): 2–3 – for brightening flavor
- ○ Garlic (optional): 1–2 cloves – minced, for extra aroma
- ○ Salt & pepper (optional): to taste – if shrimp isn’t pre-seasoned
- ● Microwave-safe dish (alternative method): 1 – with damp paper towel cover
- ● Oven-safe tray (alternative method): 1 – for broiling
Instructions
Here’s the foolproof way to warm your shrimp without drying them out or turning rubbery.
Choose Your Heating Method
Start by deciding whether you’ll use the stovetop, microwave, or oven. For 4 servings of pre-cooked shrimp, I recommend the stovetop for best texture control. The microwave works in a pinch, but requires extra care to prevent overcooking.
If using the stovetop, grab a nonstick skillet—it distributes heat evenly and prevents sticking. For the microwave, use a microwave-safe dish with a loose-fitting lid to trap just enough steam. The oven method works best when reheating larger quantities.
Prepare Shrimp for Even Heating
Pat the shrimp completely dry with paper towels before heating. This simple step makes a huge difference—excess moisture creates steam that can make shrimp soggy instead of juicy. Arrange them in a single layer with space between each piece so they heat evenly.
If your shrimp are frozen, thaw them first in cold water for 10-15 minutes until just pliable. Never heat frozen shrimp directly—they’ll cook unevenly and lose that perfect tender texture we’re after. For extra flavor, I like to toss them with a tiny bit of olive oil or butter before heating.
Heat Gently Using Your Chosen Method
For stovetop: Warm a skillet over medium-low heat for 1 minute, then add shrimp in a single layer. Heat for 1-2 minutes per side until just warmed through—they’re done when they turn from translucent to opaque and feel slightly firm to the touch.
For microwave: Place shrimp in a dish with 1 tablespoon water, cover loosely, and heat in 30-second bursts at 50% power. Stir between bursts until they reach 130°F internally. The oven method takes longer—spread on a baking sheet and warm at 275°F for 5-7 minutes, checking frequently.
Check Doneness and Serve Immediately
Remove shrimp from heat as soon as they’re warmed through—they should be just opaque throughout with no grayish centers. Overheating is the number one cause of rubbery shrimp, so pull them off the heat before they curl tightly or turn completely white.
Serve immediately while hot. The residual heat will finish warming them perfectly as they sit. If you’ve heated them properly, they’ll have that same snappy texture and sweet flavor as freshly cooked shrimp. Any leftovers should be cooled quickly and stored in the fridge for up to 2 days.
Optional Flavor Boost (Recommended)
For extra juiciness, toss the warmed shrimp with 1 teaspoon lemon juice or a sprinkle of Old Bay seasoning. The acidity brightens the flavor while the seasoning adds depth. If you’re serving them in a dish, add them at the very end of cooking to preserve texture.
Remember that pre-cooked shrimp only need to be warmed, not cooked through. They’re already fully cooked, so we’re just bringing them up to serving temperature. This gentle approach guarantees that juicy, tender result every time without any guesswork.
Tips and Common Mistakes
Here’s what I’ve learned from years of heating shrimp—small details that make a big difference in texture and flavor.
Heat Control: The medium-low heat mentioned in Step 3 is absolutely critical. Too high and you’ll cook the shrimp further instead of just warming them, turning that perfect tender texture rubbery in seconds. I always preheat my skillet for exactly 1 minute as directed—this creates an even surface temperature that gently warms without overcooking. Trust me, patience with that 1-2 minutes per side timing prevents disappointment.
Moisture Management: Step 2’s advice about patting shrimp dry isn’t just suggestion—it’s the secret to avoiding soggy results. I use three layers of paper towels and press gently but firmly to remove all surface moisture. This prevents steam from forming in the pan, which would otherwise make your shrimp waterlogged instead of juicy. For frozen shrimp, that 10-15 minute cold water thaw is non-negotiable; rushing with warm water starts cooking the edges prematurely.
Temperature Precision: When using the microwave method, that 130°F internal temperature is your golden number. I check with an instant-read thermometer inserted into the thickest part of the shrimp. The 30-second bursts at 50% power might seem tedious, but they give you complete control—no guesswork, no overcooking. For the oven method, 275°F is the sweet spot; any higher and you risk drying out the edges before the centers warm through.
Visual Doneness Cues: The instruction to remove shrimp when they’re “just opaque” in Step 4 needs elaboration. Look for the color to change from translucent gray to milky white, but stop before they curl into tight C-shapes. I pull mine off when they’ve just lost that last bit of translucency in the center—they’ll continue warming from residual heat. This timing usually aligns perfectly with that 1-2 minutes per side window if your heat is properly controlled.
Pro Tips for Heat Up Pre Cooked Shrimp
- Here’s what I’ve learned from years of heating shrimp—small details that make a big difference in texture and flavor.
- Heat Control: The medium-low heat mentioned in Step 3 is absolutely critical. Too high and you’ll cook the shrimp fur…
- Moisture Management: Step 2’s advice about patting shrimp dry isn’t just suggestion—it’s the secret to avoiding soggy…
Frequently Asked Questions
Can I microwave pre-cooked shrimp, or will it make them rubbery?
Yes, you can microwave pre-cooked shrimp—just do it right! Use a damp paper towel over the shrimp, heat in 10-15 second bursts on medium power, and stop once warm (about 30-60 seconds total). Overheating is the real culprit for rubbery texture, so check frequently!
How long does it take to heat shrimp on the stovetop?
Stovetop heating is fast and foolproof! Toss shrimp in a skillet with a splash of oil or butter over medium-low heat for 2-3 minutes, stirring often. They’re done when just warmed through—no need to cook further since they’re already pre-cooked.
What’s the best way to reheat shrimp without drying them out?
Steam is your best friend! Place shrimp in a colander over 1 inch of simmering water (or use a steamer basket) for 1-2 minutes. The gentle heat keeps them moist. Avoid boiling water—it’ll turn them tough.
Can I eat pre-cooked shrimp cold, or does it need reheating?
Cold shrimp is safe and delicious in salads, ceviche, or with cocktail sauce. Reheat only if you prefer them warm. Just ensure they’ve been stored properly (below 40°F) and smell fresh before eating.
Why does my reheated shrimp taste bland? How can I fix it?
Pre-cooked shrimp often loses flavor during reheating. Boost taste by tossing them in:
- Garlic butter or lemon juice
- A sprinkle of Old Bay or Cajun seasoning
- A quick drizzle of soy sauce or hot sauce
Heating pre-cooked shrimp doesn’t have to be tricky—just fast, gentle, and moist! Whether you’re using the stovetop, microwave, or oven, the key is to avoid overcooking to keep that sweet, tender texture. Now that you’re armed with foolproof methods, why not put them to the test? 🍤
Try reheating a batch for your next taco night, salad, or pasta dish—and don’t forget to share your favorite way to enjoy them in the comments! Hungry for more seafood tips? Check out our guide on how to thaw shrimp safely.

Trained in classic French technique but raised on slow-cooked ribs and spicy rubs, she blends culinary skill with smoke and soul.
- Recipe for Boneless Pork Chops in Cast Iron Skillet: Sear and Baste to Juicy Perfection - October 3, 2026
- Recipe for Boneless Cross Rib Roast: Slow-Roasted Beef with Herb Crust - October 3, 2026
- Hamburgers in Sauce Recipe Crock Pot: Slow-Cooked Savory Delight - October 3, 2026