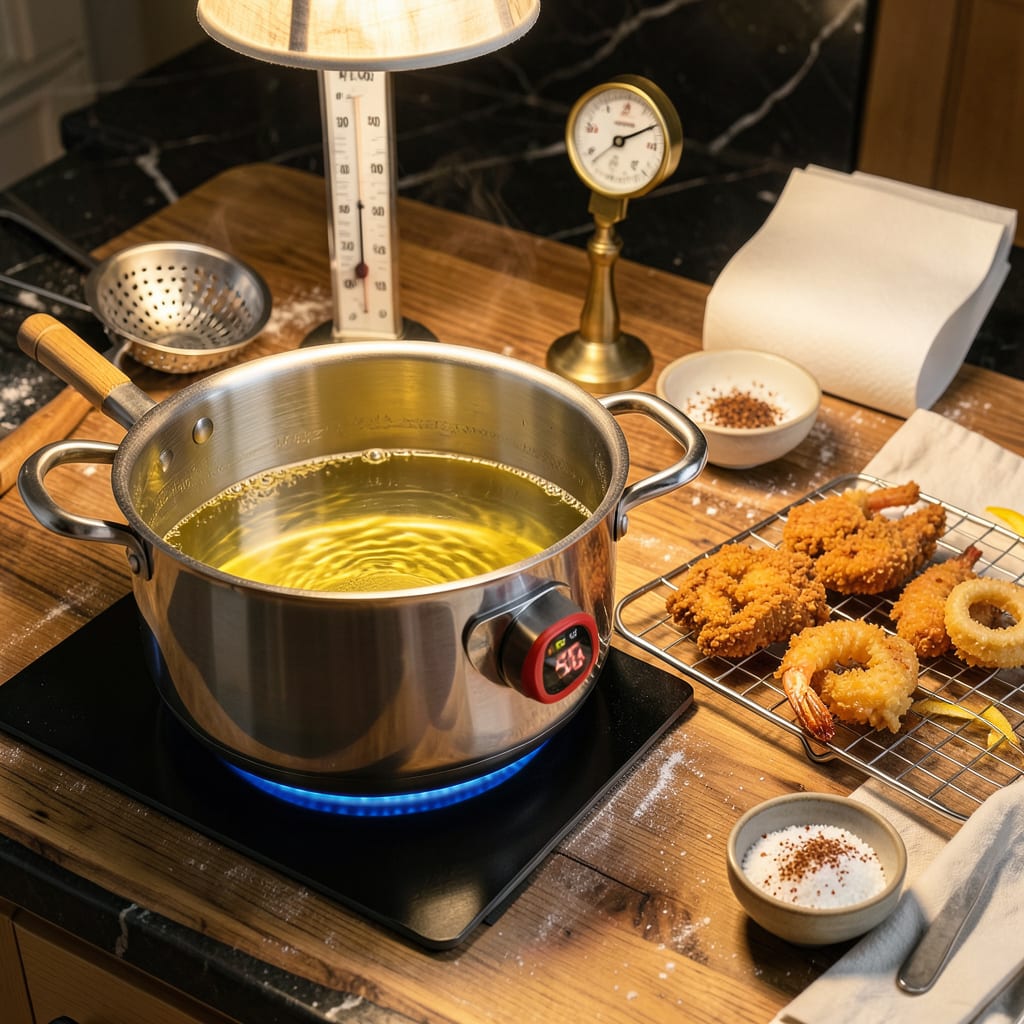
I’ll be real with you: maintaining oil at 350°F is the secret weapon for perfect frying every time. No more soggy fried chicken or greasy onion rings—just golden, crispy results that’ll make you look like a pro. I learned this the hard way after ruining three batches of hushpuppies before nailing the technique.
Here’s the thing—oil temperature drops fast when you add food, and most home cooks don’t adjust quickly enough. The solution? A good thermometer (yes, it’s worth it), knowing your stove’s quirks, and learning the visual cues that experienced cooks use. I’ll show you exactly how to keep that oil steady, whether you’re working with a deep fryer or just a pot on the stove.
This method works for everything from crispy fried chicken to perfect donuts. You’ll get that ideal golden-brown crust without burning the outside or leaving the inside undercooked. And don’t worry—I’ll cover safety too, because hot oil demands respect but shouldn’t scare you away from making amazing fried foods at home.
By the time you finish reading, you’ll understand why 350°F is the magic number and how to maintain it like a seasoned fry cook. No more guessing, no more ruined batches—just consistently perfect results. Let’s get that oil hot and start frying!
📚 In This Guide
- What You’ll Need
- Instructions
- Tips and Common Mistakes
What Youll Need
- ● Deep fryer or heavy-bottomed pot – At least 4-quart capacity (for even heat distribution).
- ● High-smoke-point oil – 2–4 cups (peanut, canola, or vegetable oil work best).
- ● Candy/deep-fry thermometer – Clip-on style for accurate, hands-free monitoring. 🌡️
- ● Slotted spoon or spider strainer – For safe food removal.
- ● Paper towels or cooling rack – To drain excess oil.
- ● Tongs – Heat-resistant, 12-inch+ length for safety.
- ● Oil filter or fine-mesh sieve – For reusing oil later.
- ● Fire extinguisher – Class B (just in case—safety first!).
- ● Timer – To track frying time without guesswork. ⏰
Step-by-Step Instructions for Maintaining 350°F Oil Temperature
Here’s the foolproof method I use every time—consistent heat means perfect results.
Choose the Right Equipment and Oil
Start by selecting a heavy-bottomed pot or Dutch oven that’s at least 4-5 inches deep. The weight and depth help maintain steady temperatures. I always use a pot that’s wider than my burner for even heat distribution.
Fill the pot with 2-3 inches of oil—enough to fully submerge your food but not so much that it’s hard to control. I prefer peanut oil for its high smoke point and neutral flavor, but vegetable or canola oil work well too. Avoid olive oil as it breaks down at high temperatures.
Heat the Oil Gradually and Use a Thermometer
Place your pot on the stove over medium heat and insert a deep-fry or candy thermometer. I clip mine to the side of the pot so the probe is submerged but not touching the bottom. This gives the most accurate reading.
Heat the oil slowly—this takes about 10-15 minutes depending on your stove. You’ll see tiny bubbles form around the thermometer probe when you’re getting close. Don’t rush this step; gradual heating prevents overshooting your target temperature and creates a more stable cooking environment.
Maintain the Temperature During Cooking
Once the oil reaches 350°F, adjust your burner to maintain that temperature. On most stoves, this means setting it between medium and medium-high. Watch for visual cues: the oil should shimmer but not smoke, and small bubbles should form around any food you add.
When you add food, the temperature will drop—this is normal. I recommend adding food in small batches (about 1/3 of the pot’s capacity) to minimize temperature fluctuations. After each addition, give the oil 30-60 seconds to recover to 350°F before adding more.
Monitor and Adjust Continuously
Keep a close eye on that thermometer—the temperature will fluctuate as you cook. If it drops below 340°F, increase the heat slightly. If it climbs above 360°F, reduce the heat immediately. I like to keep a small bowl of ice nearby; if the oil gets too hot, I’ll carefully drop in an ice cube to cool it quickly.
Listen to your oil too—it should make a steady, lively sizzling sound when food is cooking. If it’s silent, the oil’s too cool. If it’s crackling aggressively or smoking, it’s too hot. Between batches, use a slotted spoon to remove any food particles that could burn and affect the oil’s temperature.
Recover Between Batches
After removing a batch of food, give the oil 2-3 minutes to return to 350°F before adding more. This recovery time is crucial for maintaining consistent cooking results. I often use this time to drain the cooked food on a wire rack—it keeps everything crispy while the oil stabilizes.
If you notice the oil darkening or developing an off smell, it’s time to change it. Fresh oil maintains temperature more easily and gives better results. For long frying sessions, I’ll strain and replace the oil after 3-4 batches to ensure perfect performance every time.
Tips and Common Mistakes for Perfect Oil Temperature
Mastering that perfect 350°F oil temperature makes all the difference between soggy disasters and crispy perfection. Here’s what I’ve learned from years of frying everything from chicken to donuts.
Equipment Game-Changer: In Step 1, don’t underestimate the importance of that heavy-bottomed pot! I’ve ruined batches by using thin pots that create hot spots. The 4-5 inch depth isn’t arbitrary—it gives you a buffer zone so adding food doesn’t cause dramatic temperature drops. A wider pot also means more surface area for even heating across your burner.
Thermometer Technique: When clipping your thermometer in Step 2, make sure the probe sits at least 1 inch from the bottom—this gives the most accurate reading of the oil’s true temperature. I learned this after wondering why my oil always seemed to heat unevenly! Those 10-15 minutes of gradual heating are crucial; rushing causes overshooting that’s hard to correct.
Batch Size Secret: The 1/3 pot capacity rule in Step 3 isn’t just about safety—it’s about temperature control. I tested this by frying identical batches in different quantities, and the small batches consistently maintained 350°F better. Those 30-60 seconds of recovery time between additions let the oil stabilize, preventing that dreaded greasy finish.
Recovery Pro Tip: During the 2-3 minute recovery in Step 5, resist the urge to crank up the heat! A gradual return to 350°F prevents overshooting into that dangerous 360°F+ zone where oil starts breaking down. I keep a small notebook by my fry station to track how my particular stove responds—some burners need more adjustment than others.
Pro Tips for Keep Oil At 350
- Mastering that perfect 350°F oil temperature makes all the difference between soggy disasters and crispy perfection. …
- Equipment Game-Changer: In Step 1, don’t underestimate the importance of that heavy-bottomed pot! I’ve ruined batches…
- Thermometer Technique: When clipping your thermometer in Step 2, make sure the probe sits at least 1 inch from the bo…
Frequently Asked Questions
How long does it take for oil to reach 350°F?
Most oils heat to 350°F in 5-10 minutes on medium-high heat, depending on your stove and pot size. Use a candy or deep-fry thermometer for accuracy—guessing often leads to undercooked or greasy food. Pro tip: Preheat with the lid off to speed things up!
Can I use an alternative if I don’t have a thermometer?
Yes! Try the wooden spoon test: Dip a wooden spoon into the oil. If bubbles form steadily around it, the oil is ~350°F. Or toss in a 1-inch bread cube—it should brown in 60 seconds at the right temp. Still, a thermometer is the gold standard for precision!
Why does my oil temperature keep dropping when I add food?
Cold or wet food lowers oil temp fast! Pat food completely dry and fry in small batches. Let the oil recover to 350°F between batches (usually 2-3 minutes). If temp plummets repeatedly, your burner may not be hot enough—try increasing heat slightly.
Is 350°F the same for all oils?
Nope! Oils have different smoke points. Peanut, canola, or vegetable oil (smoke point: 400°F+) are ideal for 350°F frying. Avoid olive or sesame oil—they burn at lower temps. Always check your oil’s smoke point before heating!
What if my oil gets too hot (over 375°F)?
Remove the pot from heat immediately and let it cool (no water—it causes dangerous splatter!). If it smokes, discard the oil—it’s degraded and can impart bitter flavors. To prevent overheating, use a heavy pot (like cast iron) and adjust heat gradually.
Keeping your oil at a steady 350°F is the golden rule for crispy, delicious results—no more soggy fries or greasy snacks! 🎯 With the right thermometer, patience, and a few pro tricks (like adjusting heat gradually and avoiding overcrowding), you’ll master the art of frying in no time. Remember, practice makes perfect, so don’t stress if it takes a try or two.
Ready to put your skills to the test? Grab that recipe you’ve been eyeing and start frying with confidence—your taste buds will thank you! 🍟✨

Trained in classic French technique but raised on slow-cooked ribs and spicy rubs, she blends culinary skill with smoke and soul.
- Recipe for Boneless Pork Chops in Cast Iron Skillet: Sear and Baste to Juicy Perfection - October 3, 2026
- Recipe for Boneless Cross Rib Roast: Slow-Roasted Beef with Herb Crust - October 3, 2026
- Hamburgers in Sauce Recipe Crock Pot: Slow-Cooked Savory Delight - October 3, 2026