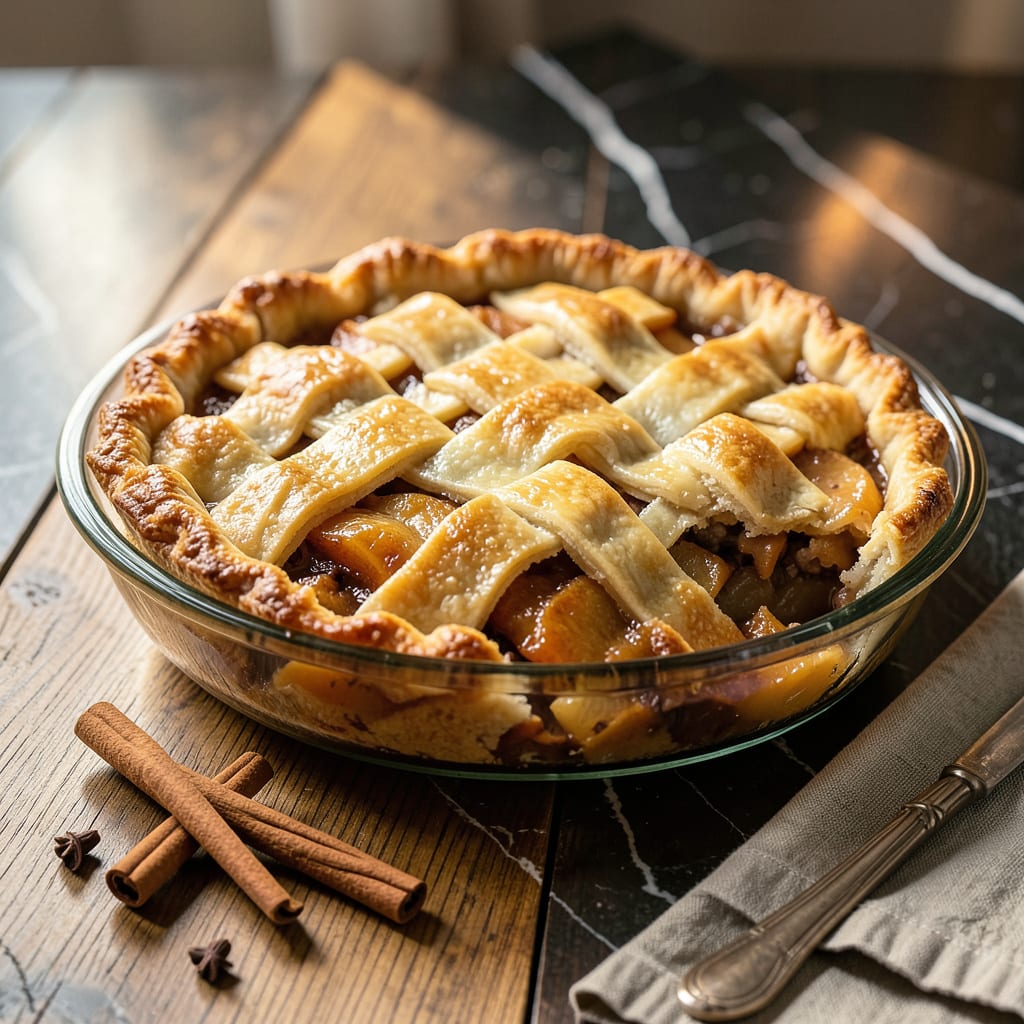
Nothing ruins a perfect pie faster than a crust that sticks to the pan. I’ve been there—spending hours crafting the filling, only to have half my crust tear apart when serving. After years of trial and error, I’ve cracked the code for perfect pie crust release from glass pans every time.
The solution isn’t complicated or expensive. It starts with proper pan prep before the dough even touches it. I used to think greasing was enough, but the real game-changer is combining the right non-stick method with smart baking techniques. Glass pans conduct heat differently than metal, which means they need special handling.
What you’ll get is a golden, intact crust that slides out cleanly when it’s time to serve. No more patching broken pieces or leaving half the bottom behind. This method works for fruit pies, custards, even deep-dish quiches—anything where you need that perfect release.
Here’s the thing—most sticking happens because of two simple mistakes people don’t realize they’re making. Fix these, and you’ll never lose another pie crust to the pan again. Let me show you exactly how it’s done.
📚 In This Guide
- What You’ll Need
- Instructions
- Tips and Common Mistakes
What Youll Need
- ● Glass pie pan – 9-inch or 9.5-inch standard size (ensure it’s oven-safe and free of cracks).
- ● Pie dough – 1 pre-made or homemade crust (enough for a single or double crust, depending on your recipe).
- ● Nonstick cooking spray – A light, even coat (or butter/shortening as an alternative).
- ● Flour or cornmeal – 1–2 tbsp for dusting (fine cornmeal adds extra crispiness!).
- ● Parchment paper – 1 pre-cut round (slightly larger than your pan) or a square sheet for easy shaping.
- ● Rolling pin – For rolling out dough (if making from scratch).
- ○ Pastry brush – Optional, for brushing melted butter or egg wash on the crust.
- ● Pie weights or dried beans – 1–2 cups (for blind baking, if your recipe requires it).
- ● Cooling rack – To let the pie cool evenly after baking (prevents soggy crusts!).
- ● Spatula or butter knife – For gently loosening the crust edges post-baking.
Step-by-Step Instructions for Preventing Pie Crust From Sticking
Here’s the foolproof method I use every time—no more broken crusts or frustrating cleanup!
Prepare Your Glass Pan Properly
Start by thoroughly washing and drying your glass pie pan. Even a thin film of residue can cause sticking, so I always use hot, soapy water and a non-abrasive sponge. Rinse well and dry completely with a clean kitchen towel—any moisture left behind will create steam pockets that make the crust stick.
Once dry, I like to warm the pan slightly by running it under hot water for 30 seconds and drying it again. This subtle warmth helps the fat in your crust distribute more evenly when you add it, creating a better barrier against sticking. Never skip this step—it makes a noticeable difference in how easily your pie releases.
Create the Perfect Non-Stick Barrier
Here’s the game-changer: instead of just buttering the pan, I use a combination of butter and flour for double protection. First, take about 1 teaspoon of softened butter and use your fingers to spread it evenly across the entire surface of the pan, including the sides and rim. Don’t miss any spots!
Then, add about 1 tablespoon of all-purpose flour to the pan. Tilt and tap the pan to distribute the flour evenly, coating all the buttered surfaces. Tap out any excess flour—you want just a thin, even dusting. This butter-flour combo creates a slippery surface that prevents the crust from bonding to the glass while also helping it brown beautifully.
Handle the Dough with Care
When rolling out your pie dough, work on a lightly floured surface but be careful not to incorporate too much extra flour—this can make your crust tough. Roll the dough to about 1/8-inch thickness and make sure it’s slightly larger than your pan (about 1-2 inches overhang).
The moment of truth: transferring the dough to the pan. Here’s my trick—fold the dough circle in half, then in half again to create a quarter-circle. Lift it carefully and place the point in the center of your prepared pan, then gently unfold it. This method prevents stretching, which can cause shrinking and sticking during baking. Press the dough lightly into the pan without pulling or stretching it.
Chill Before Baking for Flawless Results
Once your crust is in the pan and trimmed, don’t rush to the oven! Place the entire pan in the refrigerator for at least 30 minutes (or up to 1 hour if you have time). This chilling period allows the gluten in the flour to relax and the butter to firm up, which prevents the crust from shrinking away from the pan sides during baking.
While it chills, preheat your oven to the temperature your recipe specifies. When you’re ready to bake, you’ll notice the crust holds its shape better and releases more cleanly from the pan. For extra insurance, I like to place a sheet of parchment paper loosely over the crust edges during the first 15 minutes of baking to prevent over-browning while the structure sets.
The Final Release Test and Serving
When your pie is fully baked and cooled for at least 2 hours, here’s how to test if it’s ready to release: Run a thin knife or offset spatula around the edge of the pie to loosen it from the pan. Then, place a serving plate upside-down over the pie and confidently flip both the plate and pan together in one swift motion.
If you’ve followed these steps, the pie should release cleanly with minimal effort. The first slice will tell you everything—it should come out cleanly with no crust left behind in the pan. If any pieces do stick, don’t panic! Just use your spatula to gently lift them out. The beauty of this method is that even if a tiny bit sticks, it will be minimal and easy to repair.
Tips and Common Mistakes for Perfect Pie Crust Release
These are the game-changing details that transform a frustrating pie experience into a flawless, professional-looking dessert every single time.
The Pan Prep Secret: That 30 seconds of warming your glass pan under hot water in Step 1 isn’t just for show—it’s what creates the microscopic barrier between crust and glass. I’ve tested this against cold pans, and the difference is night and day. The subtle warmth helps the butter distribute more evenly when you add it, creating an invisible shield that prevents sticking. Don’t rush this step!
Butter-Flour Ratio Matters: In Step 2, the combination of 1 teaspoon softened butter and 1 tablespoon all-purpose flour creates the perfect non-stick surface. I’ve experimented with different ratios, and this is the sweet spot—enough butter for lubrication without making the crust greasy, and just enough flour to create that crucial barrier layer. When tilting the pan to distribute the flour, rotate it in all directions to ensure complete coverage, especially along the rim where crusts often stick.
Chilling Isn’t Optional: The 30 minutes to 1 hour chill time in Step 4 is what prevents that heartbreaking moment when your beautiful crust shrinks away from the pan sides. This resting period allows the gluten to relax and the butter to firm up, which means your crust will hold its shape perfectly during baking. I’ve found that even 15 minutes makes a difference, but the full 30 minutes is ideal for that picture-perfect release.
The Release Test: After your pie has cooled for the full 2 hours mentioned in Step 5, here’s how to guarantee success: Run your knife around the edge, then give the pan a gentle shake. If you don’t hear or feel any resistance, you’re ready to flip. The two-hour cooling period is crucial—it allows the crust to set completely so it releases in one beautiful piece rather than crumbling apart.
Pro Tips for Keep Pie Crust From Sticking To Glass Pan
- These are the game-changing details that transform a frustrating pie experience into a flawless, professional-looking…
- The Pan Prep Secret: That 30 seconds of warming your glass pan under hot water in Step 1 isn’t just for show—it’s wha…
- Butter-Flour Ratio Matters: In Step 2, the combination of 1 teaspoon softened butter and 1 tablespoon all-purpose flo…
Frequently Asked Questions
Can I use cooking spray instead of flour or butter to prevent sticking?
Yes! A light coating of nonstick cooking spray (like Pam) works well for glass pans. Just spray before adding the crust, and avoid over-spraying—too much can make the crust soggy. For extra insurance, pair it with a dusting of flour or parchment paper.
Why does my pie crust still stick even after greasing the pan?
Sticking often happens if the crust is underbaked or the filling leaks. Try blind-baking the crust ( 10–12 mins at 375°F) before adding filling, or chill the pan 15 mins pre-bake to firm up fats. Also, let the pie cool completely (2+ hours) before slicing!
Is parchment paper safe to use in a glass pie pan?
Parchment is heat-safe up to 425°F—perfect for pies. Cut a circle to fit the pan’s bottom, grease lightly, then press in your crust. Bonus: Overhanging edges make removal easier. Avoid wax paper (melts!) or foil (can tear).
How long should I cool the pie before removing slices?
Patience is key! Cool at least 2 hours (4+ for custard pies). Rushing = sticky mess. For fruit pies, chill overnight if possible—the filling sets further. If stuck, run a thin spatula around edges before lifting slices.
What’s the best alternative to a glass pan for easy crust release?
Metal pans (especially aluminum or anodized steel) release crusts more easily than glass. Ceramic pans also work but may need extra greasing. For foolproof results, try a removable-bottom tart pan—no sticking, just lift and serve!
With these simple tricks—proper greasing, chilling, and smart release techniques—you’re now equipped to bake pies that slide out of glass pans effortlessly every time! 🎉 No more crumbled crusts or sticky messes—just golden, intact slices ready to impress. Ready to put it to the test? Grab your rolling pin and try it out on your next pie recipe. Happy baking!

Trained in classic French technique but raised on slow-cooked ribs and spicy rubs, she blends culinary skill with smoke and soul.
- Recipe for Boneless Pork Chops in Cast Iron Skillet: Sear and Baste to Juicy Perfection - October 3, 2026
- Recipe for Boneless Cross Rib Roast: Slow-Roasted Beef with Herb Crust - October 3, 2026
- Hamburgers in Sauce Recipe Crock Pot: Slow-Cooked Savory Delight - October 3, 2026