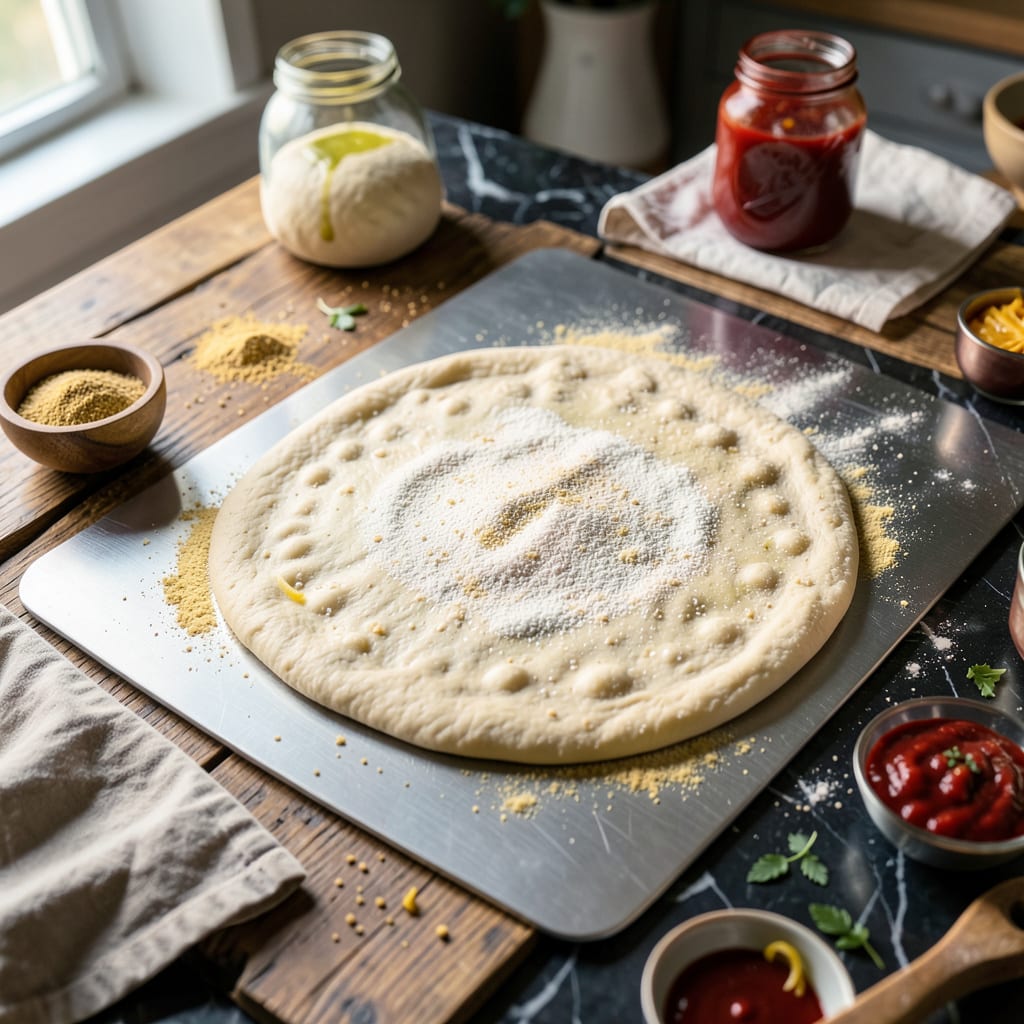
Nothing ruins pizza night faster than dough glued to your peel, leaving half your masterpiece stuck while the other half slides into the oven. I’ve been there—watching my carefully stretched dough tear apart mid-transfer, taking my pizza dreams with it. After years of trial and error (and more than a few failed pies), I cracked the code for perfect, stick-free transfers every single time.
The secret isn’t just about flour—it’s about the right combination of surface prep, dough hydration, and timing. I learned this the hard way during a backyard pizza party where my first three attempts ended in disaster. Now I can confidently launch pizzas into my 700°F oven without a second thought, whether I’m working with wet Neapolitan dough or sturdy New York-style.
What changed everything? Understanding that metal peels need different treatment than wood. The key is creating a micro-layer of frictionless particles between dough and metal—something flour alone can’t always achieve. My method works for home ovens, pizza stones, and even outdoor pizza ovens, giving you that professional pizzeria slide every time.
No more torn dough or frantic scraping. Just smooth transfers, intact pizzas, and the satisfaction of nailing that restaurant-quality launch. Here’s exactly how to make it happen—step by step, with all the details that actually matter.
📚 In This Guide
- What You’ll Need
- Instructions
- Tips and Common Mistakes
What Youll Need
- ● Metal pizza peel (12–16 inches wide, preferably perforated for better airflow 🍕).
- ● Semolina flour or fine cornmeal (½–1 cup, for dusting—coarser than all-purpose flour).
- ● All-purpose flour or “00” flour (small bowl, for extra dusting if needed).
- ● Pizza dough (1 lb ball, room temperature for easier stretching).
- ○ Bench scraper or dough cutter (1, optional but handy for shaping).
- ● Olive oil or cooking spray (light coating for the peel if dough is extra sticky).
- ○ Parchment paper (1 sheet, optional backup for tricky transfers).
- ● Pizza stone or steel (preheated in oven, for baking—essential for crispy crust!).
- ● Oven mitts (1 pair, safety first when handling hot peels! 🔥).
Instructions for Keeping Pizza Dough From Sticking to Metal Peel
This simple technique ensures your pizza slides off effortlessly every time—no more frustrating kitchen mishaps.
Prepare Your Work Surface and Tools
Start by setting up your workstation with everything within reach. I always use a clean, dry metal peel that’s been lightly dusted with semolina flour or fine cornmeal—this creates a non-stick barrier between the dough and metal. Avoid regular flour as it burns easily and doesn’t provide the same slippery texture.
Make sure your peel is completely dry before dusting. Any moisture will cause the flour to clump and stick to the dough. I like to wipe it down with a dry towel first, then apply an even layer of semolina by tilting the peel and letting the grains distribute naturally across the surface.
Shape the Dough Directly on the Peel
Place your pizza dough on the prepared peel and begin stretching it into shape. Work quickly but gently, using your fingertips to press from the center outward. If the dough starts to stick at any point, lift the edge carefully and sprinkle more semolina underneath—don’t force it or you’ll tear the dough.
The key here is maintaining constant movement. I keep the peel slightly tilted and give it little shakes as I work to ensure the dough isn’t adhering. You’ll know it’s ready when you can gently jiggle the peel and the dough moves freely. This usually takes about 30 seconds of continuous shaping and checking.
Apply the Final Non-Stick Layer
Once your dough is shaped, give the peel another light dusting of semolina, focusing on the edges where the dough meets the metal. Then comes the crucial step: gently lift the dough by its edges and give the peel a quick shake. The dough should slide around easily—if it doesn’t, add more semolina and try again.
Here’s the thing—most people underestimate how much semolina they need. You want it to look like a light snowfall across your peel. I always do a final “shake test” before adding toppings: if the dough moves freely when I tilt the peel at a 45-degree angle, I know it’s ready for the oven.
Top and Transfer with Confidence
Add your sauce and toppings quickly but carefully. Start with the sauce in the center and work outward in a spiral motion, leaving a ½-inch border for the crust. Distribute toppings evenly—too many in one spot can create weight imbalances that cause sticking during transfer.
When you’re ready to transfer, give the peel a few quick back-and-forth shakes to ensure everything is still moving freely. Then, in one confident motion, slide the pizza onto your preheated stone. The secret is speed—hesitation causes the dough to stick. I like to use a slight jerking motion at the end to ensure complete release.
Troubleshoot and Adjust for Next Time
If you do experience sticking, don’t panic. Use a spatula to gently loosen the stuck portions while the pizza cooks. For your next pizza, increase the semolina slightly and work faster during shaping. Remember that humidity affects dough stickiness—on damp days, you might need extra semolina or cornmeal.
I’ve found that practicing with plain dough (no toppings) helps perfect the technique. Pay attention to how the dough behaves at each stage. With this method, you’ll achieve that satisfying “whoosh” sound as your pizza slides perfectly onto the stone every single time.
Tips and Common Mistakes for Perfect Pizza Transfers
Mastering the peel technique transforms pizza night from frustrating to flawless. Here’s what I’ve learned through countless trials and errors.
The Semolina Secret: Don’t be shy with the semolina flour or fine cornmeal in Step 1. I used to sprinkle lightly and wonder why my dough stuck, until I realized you need enough to create a visible layer—think “light snowfall” as mentioned in Step 3. The grains should be clearly visible through the dough when you lift it. This isn’t the place for restraint; excess semolina simply brushes off after baking, while insufficient amounts guarantee sticking.
Speed Matters in Step 2: The 30 seconds mentioned for shaping isn’t arbitrary. Dough begins adhering to the peel almost immediately, which is why constant movement is crucial. I’ve found that working with slightly cooler dough (straight from the fridge) gives you more working time before it starts sticking. Keep those little shakes going as you shape—this isn’t just about testing release, it’s about preventing adhesion in the first place.
Angle Technique for Step 3: That 45-degree angle test in Step 3 is your best insurance policy. I actually practice this motion before adding toppings—tilt the peel to exactly 45 degrees (use a protractor if you’re unsure) and watch how the dough behaves. It should slide downward immediately with just the peel’s angle, no shaking required. If it hesitates even slightly, add more semolina to the sticky spots before proceeding.
Transfer Confidence from Step 4: The jerking motion described in Step 4 isn’t just for show—it’s physics. A quick, decisive movement breaks the surface tension between dough and peel. I visualize it like snapping a towel: one smooth acceleration followed by a sudden stop. This is where most home cooks fail by being too gentle. Remember, your pizza stone is hot and ready; hesitation causes the dough to cook onto the peel before it even reaches the stone.
Pro Tips for Keep Pizza Dough From Sticking To Metal Peel
- Mastering the peel technique transforms pizza night from frustrating to flawless. Here’s what I’ve learned through co…
- The Semolina Secret: Don’t be shy with the semolina flour or fine cornmeal in Step 1. I used to sprinkle lightly and …
- Speed Matters in Step 2: The 30 seconds mentioned for shaping isn’t arbitrary. Dough begins adhering to the peel almo…
Frequently Asked Questions
How long should I let the dough sit on the peel before baking?
Don’t let it sit too long! After shaping, transfer the dough to the peel immediately and bake within 5–10 minutes. The longer it sits, the more moisture seeps out, making it stickier. Work quickly but gently to avoid tears.
Can I use flour instead of semolina or cornmeal?
Yes, but it’s riskier! Flour burns faster and can create a gummy layer. If using flour, opt for rice flour (less likely to clump) or dust very lightly. Semolina or cornmeal add texture and act as tiny ball bearings for easier sliding.
Why does my dough still stick even after using semolina?
Three common culprits: 1) Too much sauce (soaks the dusting), 2) Wet toppings (like fresh mozzarella—pat it dry!), or 3) Insufficient dusting. Re-dust the peel right before sliding the pizza into the oven for extra insurance.
Is a wooden peel better than metal for preventing sticking?
Wooden peels can help (they absorb excess moisture), but they’re not magic! You’ll still need to dust them well. Metal peels are thinner and easier to maneuver—just master the dusting technique. Pro tip: Use metal for launching, wood for retrieving!
What’s the fastest way to fix dough that’s stuck mid-transfer?
Don’t panic! Quickly slide a thin spatula or bench scraper under the stuck spot, sprinkle more semolina, and gently wiggle the pizza loose. If it tears, patch it with a pinch of dough—rustic pizzas hide flaws well!
With the right prep—semolina, flour, or parchment paper—your pizza dough will slide off that metal peel like a pro! 🎯 No more sticky messes or torn crusts, just perfect, restaurant-worthy transfers every time. Practice makes perfect, so grab your peel, fire up the oven, and start experimenting with confidence.
Ready to take it further? Try mastering a wood-fired pizza recipe or testing different flours for even crispier results!

Trained in classic French technique but raised on slow-cooked ribs and spicy rubs, she blends culinary skill with smoke and soul.
- Recipe for Boneless Pork Chops in Cast Iron Skillet: Sear and Baste to Juicy Perfection - October 3, 2026
- Recipe for Boneless Cross Rib Roast: Slow-Roasted Beef with Herb Crust - October 3, 2026
- Hamburgers in Sauce Recipe Crock Pot: Slow-Cooked Savory Delight - October 3, 2026