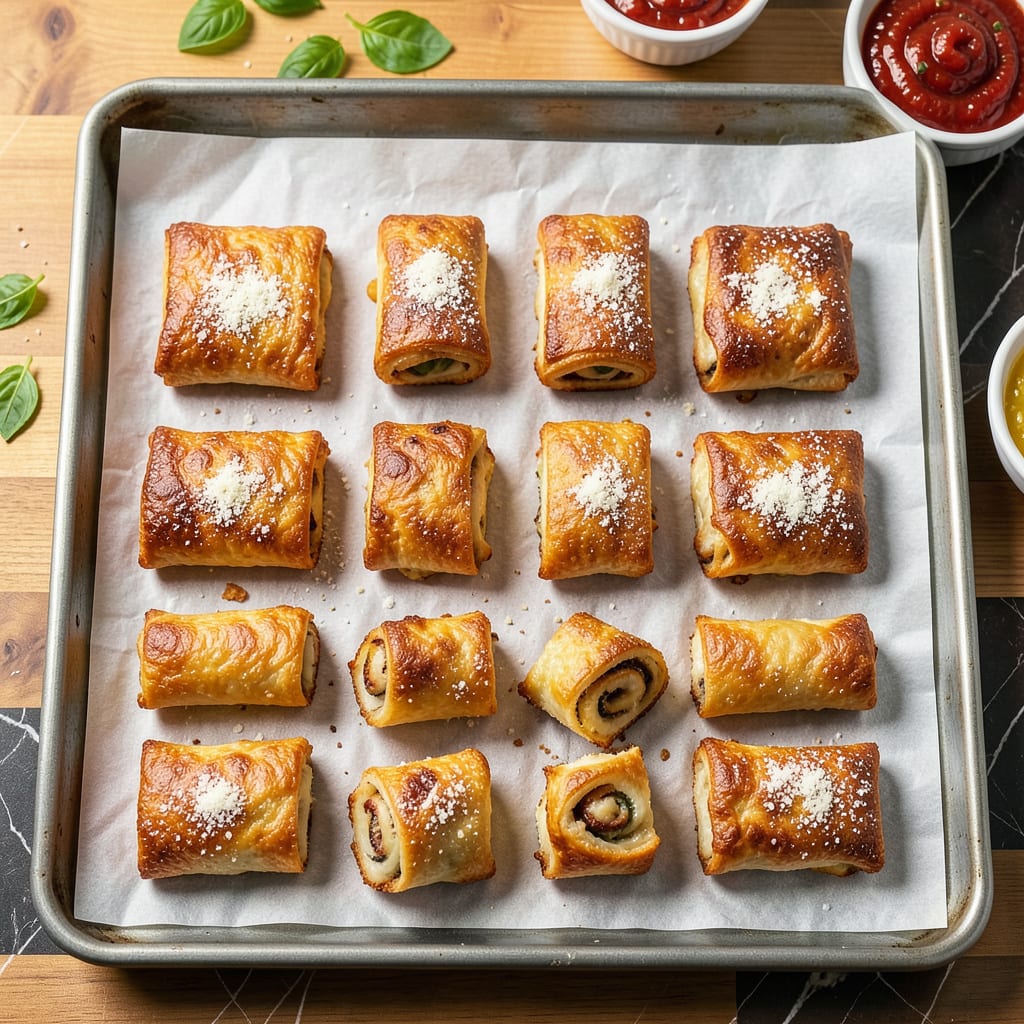
I’ve lost count of how many pizza rolls I’ve sacrificed to the oven gods—exploded cheese bombs sticking to the tray instead of crispy, golden bites. After years of trial and error (and more than a few smoke alarms), I finally cracked the code to perfect pizza rolls every time. The solution isn’t complicated, but it does require understanding why they burst in the first place.
Here’s the thing—most people overlook two critical factors: temperature and moisture. Pizza rolls explode when steam builds up inside faster than the crust can crisp. I learned this the hard way during a Super Bowl party when my entire batch turned into cheesy lava puddles. The fix? A simple adjustment to your cooking method that lets the dough cook through before the filling overheats.
Whether you’re using an oven, air fryer, or microwave, the principles stay the same. Lower heat for the first half of cooking lets the crust set, then a quick blast of higher heat at the end ensures that golden crispiness we all crave. No more cheese volcanoes on your baking sheet—just evenly cooked, intact pizza rolls that actually hold their filling.
Bonus: These techniques work for any brand or dietary version—regular, vegan, or gluten-free. The science stays the same, and your snack game just got a serious upgrade. Let’s get those pizza rolls right.
📚 In This Guide
- What You’ll Need
- Instructions
- Tips and Common Mistakes
What Youll Need
- ● Frozen pizza rolls – 1 bag (any brand, but check cooking instructions for variations).
- ● Baking sheet – 1 standard (12×17 inches) or larger for even spacing.
- ● Parchment paper or aluminum foil – 1 sheet (to prevent sticking).
- ○ Cooking spray (optional) – Light coating for extra crispiness.
- ○ Oven thermometer (optional) – Ensures accurate temperature (🌡️).
- ● Tongs or spatula – For safe flipping/removal.
- ● Timer – Phone or kitchen timer (⏰).
- ○ Cooling rack (optional) – Keeps rolls crispy post-baking.
- ● Microwave-safe plate (if microwaving) – For small batches.
Instructions
Here’s the foolproof method I’ve perfected to get crispy, intact pizza rolls every single time.
Arrange Pizza Rolls with Proper Spacing
Start by lining your baking sheet with parchment paper or aluminum foil. This isn’t just for easy cleanup—it prevents the rolls from sticking and tearing when you try to remove them. Spread the pizza rolls in a single layer, leaving at least ½ inch of space between each one.
I know it’s tempting to crowd them for maximum quantity, but this spacing is crucial. When pizza rolls heat up, the filling expands and needs room to do so without bursting through the dough. Think of it like giving each roll its own little breathing room in the oven.
Preheat Your Oven to the Right Temperature
Set your oven to 425°F and let it fully preheat for at least 15 minutes. This higher temperature might seem counterintuitive when you’re trying to prevent explosions, but here’s why it works: a hot oven cooks the exterior quickly, creating a sturdy crust that can contain the expanding filling.
A lower temperature would allow the filling to heat and expand before the dough has a chance to firm up. You’ll know your oven is ready when you can feel heat radiating strongly when you open the door. Don’t rush this step—an properly preheated oven is key to even cooking.
Bake Using the Two-Step Temperature Method
Place your pizza rolls in the preheated 425°F oven and bake for 5 minutes. This initial high heat creates that protective crust I mentioned. After 5 minutes, reduce the temperature to 375°F and continue baking for 8-10 minutes or until they reach your desired crispiness.
Watch for visual cues: the rolls should turn golden brown on the bottom and edges. The two-step method gives you the best of both worlds—quick crust formation to contain the filling, followed by gentler heat to cook them through without burning. I check them at the 8-minute mark to prevent over-browning.
Let Them Rest Before Serving
This might be the hardest step, but it’s absolutely essential. When you remove the pizza rolls from the oven, let them sit on the baking sheet for 3-5 minutes before transferring or eating. During this time, the filling settles and the crust firms up just a bit more.
If you cut into them immediately, all that hot filling has nowhere to go but out—often taking the top of the roll with it. I use this time to prepare dipping sauces or set the table. The rolls will still be piping hot after resting, but they’ll hold together beautifully when you bite into them.
Serve with the Right Technique
When it’s finally time to eat, serve the pizza rolls with small bowls of sauce for dipping rather than pouring sauce over them. The additional moisture from sauce can soften the crust and make the rolls more prone to falling apart.
If you prefer to eat them without utensils, let them cool for an additional 2 minutes after resting. They’ll be slightly less molten inside but still delicious, and much easier to handle. For the absolute best texture, I recommend eating them within 10 minutes of coming out of the oven—after that, they start to lose their perfect crispness.
Tips and Common Mistakes
These simple adjustments make all the difference between pizza rolls that explode and ones that stay perfectly intact.
Spacing Strategy: The ½ inch between rolls in Step 1 isn’t arbitrary—it accounts for the filling’s expansion during baking. When I first tried crowding rolls to fit more on a sheet, I ended up with a sticky mess of burst dough. That half-inch gap gives each roll room to puff without touching its neighbors, which prevents the domino effect of one bursting and taking out its neighbors.
Temperature Precision: The 15-minute preheat at 425°F in Step 2 creates what I call the “crust shield.” I learned this after ruining batches with a partially preheated oven—the filling would bubble through weak spots in the dough. A fully heated oven at exactly 425°F forms that protective barrier in the first 5 minutes of baking, which is why you can’t skip or rush this step.
Visual Doneness Cues: During the 8-10 minutes at 375°F in Step 3, watch for golden brown edges rather than the timer. I check at the 8-minute mark by lifting one roll with a spatula—the bottom should be evenly browned, not spotty. The edges will darken slightly during the 3-5 minute resting period, so pull them when they’re just shy of your ideal color.
Resting Technique: Those 3-5 minutes in Step 4 aren’t just cooling time—they’re structural. The filling is still expanding when you first remove the rolls, and cutting too soon releases all that pressure at once. I set a timer for exactly 4 minutes (the sweet spot I’ve found) and use that time to prep plates or sauces. The rolls will still be piping hot but will hold their shape when bitten.
Pro Tips for Keep Pizza Rolls From Exploding
- These simple adjustments make all the difference between pizza rolls that explode and ones that stay perfectly intact.
- Spacing Strategy: The ½ inch between rolls in Step 1 isn’t arbitrary—it accounts for the filling’s expansion during b…
- Temperature Precision: The 15-minute preheat at 425°F in Step 2 creates what I call the “crust shield.” I learned thi…
Frequently Asked Questions
Why do pizza rolls explode in the oven in the first place?
Pizza rolls explode when steam builds up inside the filling faster than the crust can vent. Overheating or uneven cooking causes the cheese and sauce to expand rapidly, bursting through weak spots. Lower temps (375°F or less) and proper spacing on the tray help steam escape gradually instead of all at once.
Can I microwave pizza rolls without them exploding?
Yes, but it’s tricky! Microwaves heat unevenly, so use a low power setting (50-70%) and cook in 30-second bursts, stirring between intervals. Cover them with a damp paper towel to trap moisture and prevent pressure buildup. Expect softer (not crispy) results—oven or air fryer is still best for texture.
How long should I cook pizza rolls to avoid explosions but ensure they’re crispy?
Bake at 375°F for 12-15 minutes (or per package instructions), flipping halfway. For extra crispiness, broil for 1-2 minutes after baking—but watch closely! Air fryers (350°F, 6-8 mins) also reduce explosion risk while delivering crunch. Always let them rest 2 minutes post-cooking to firm up.
What’s the best way to clean exploded pizza roll mess from my oven?
Let the oven cool, then sprinkle baking soda on the spill and spray with vinegar. Let it bubble for 10 minutes, then scrub with a non-abrasive sponge. For stubborn cheese, use a plastic scraper or a paste of baking soda and water. Pro tip: Line your tray with foil or parchment next time!
Are there any pizza roll brands that explode less than others?
Brands with thicker crusts (like Totino’s Bold or Pillsbury) or “crispy” varieties tend to hold up better. Mini or “bite-size” rolls also explode less due to smaller fillings. Check reviews for “low-splatter” notes, and avoid overfilled or “extra cheese” versions if explosions are a recurring issue.
No more messy kitchen disasters—now you’ve got the secrets to perfectly crispy, explosion-free pizza rolls every time! 🎉 By adjusting your oven temp, spacing them right, and avoiding overcrowding, you’ll enjoy gooey, golden bites without the cleanup headache. Next up? Experiment with dipping sauces or air-fryer methods to level up your snack game even more. Happy rolling (the non-explosive kind)! 🍕✨

Trained in classic French technique but raised on slow-cooked ribs and spicy rubs, she blends culinary skill with smoke and soul.
- Recipe for Boneless Pork Chops in Cast Iron Skillet: Sear and Baste to Juicy Perfection - October 3, 2026
- Recipe for Boneless Cross Rib Roast: Slow-Roasted Beef with Herb Crust - October 3, 2026
- Hamburgers in Sauce Recipe Crock Pot: Slow-Cooked Savory Delight - October 3, 2026