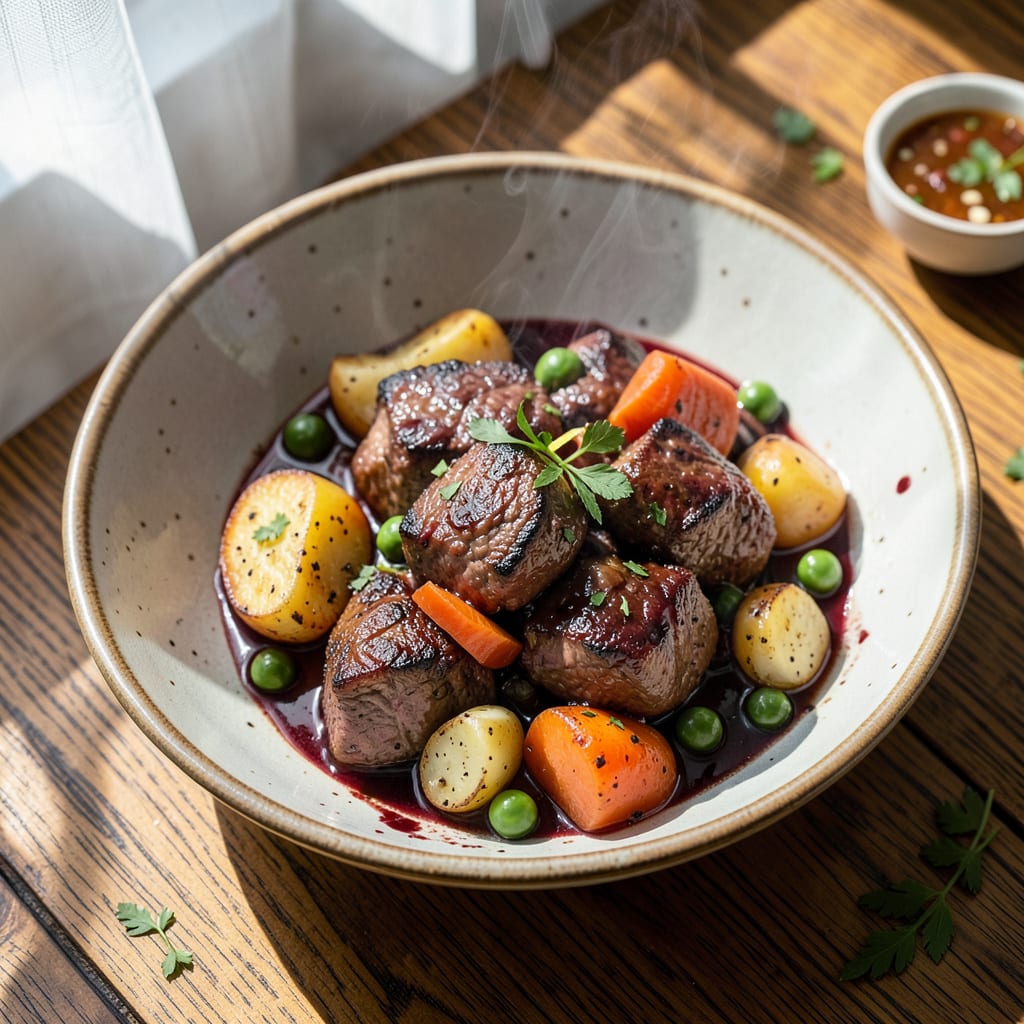
Let me be real with you—canned beef stew doesn’t have to taste like a compromise. I’ve turned countless lackluster cans into rich, hearty meals that actually taste homemade. The secret? A few simple upgrades that wake up the flavors without requiring hours in the kitchen.
Start with what you’ve got in that can, then layer in fresh aromatics like onions and garlic. A splash of red wine or beef broth adds depth, while a spoonful of tomato paste and Worcestershire sauce boosts umami. These small additions transform flat, tinny flavors into something complex and satisfying.
Don’t stop there—simmering is where the magic happens. Just 15-20 minutes lets all those flavors meld together while the liquid reduces slightly, creating a thicker, more luxurious stew. The difference between straight-from-the-can and this upgraded version is like night and day.
Finish with fresh herbs and a pat of butter stirred in at the end for richness. Serve with crusty bread to soak up every last bite. This isn’t just damage control—it’s a full-on flavor transformation that’ll make you forget you started with a can.
📚 In This Guide
- What You’ll Need
- Instructions
- Tips and Common Mistakes
What Youll Need
- ● 1 can (14–16 oz) beef stew – Your base (any brand works, but low-sodium gives you more control! 🌡️)
- ● 1–2 tbsp olive oil or butter – For sautéing aromatics (butter adds richness!)
- ● 1 small onion, diced – Sweet or yellow for best flavor
- ● 2–3 garlic cloves, minced – Fresh is best, but 1 tsp garlic powder works in a pinch
- ● 1 cup beef broth or stock – Homemade or store-bought (low-sodium preferred)
- ● 1 tbsp tomato paste – Deepens flavor and color
- ● 1 tsp Worcestershire sauce – The secret umami boost! 💥
- ● 1 bay leaf – Adds subtle earthy depth
- ● Salt & black pepper – To taste (start with ½ tsp each)
- ● ½ cup red wine – Dry red like Cabernet (cook off the alcohol!)
- ● 1 tsp smoked paprika – For a smoky, Spanish-style twist
- ● ½ cup mushrooms, sliced – Earthy richness (cremini or shiitake work great)
- ● 1 carrot or potato, diced – Extra texture if your stew lacks veggies
- ● Fresh herbs (thyme, rosemary, or parsley) – 1–2 sprigs or 1 tsp dried
- ● 1 tbsp soy sauce – For a savory, salty kick (trust us!)
- ● ½ cup frozen peas – Bright pop of color and sweetness (add at the end)
- ● Medium saucepan or deep skillet (2–3 qt capacity)
- ● Wooden spoon or spatula – For stirring and scraping up browned bits
- ● Chef’s knife & cutting board – For prepping veggies
- ● Measuring spoons/cups – Precision matters for balance!
- ○ Immersion blender (optional) – For a creamier texture (blend half only!)
Step-by-Step Instructions for Upgrading Canned Beef Stew
Transforming basic canned stew into something special takes just a few smart moves and minimal effort.
Brown the Meat for Depth of Flavor
Start by emptying the canned beef stew into a colander to drain off the liquid. I like to pat the beef pieces dry with paper towels—this helps them brown better. Heat a large skillet over medium-high heat with 1 tablespoon of oil until it shimmers.
Add the drained beef pieces in a single layer, being careful not to overcrowd the pan. Let them cook undisturbed for 2-3 minutes until you see a nice deep brown crust forming on the bottom. This browning process creates the Maillard reaction, which develops rich, meaty flavors that the original canned version lacks.
Flip the pieces and brown the other side for another 2 minutes. You’ll notice the kitchen starting to smell amazing—that’s your sign the flavors are building. Remove the beef from the pan and set it aside while you work on the next layer of flavor.
Build a Flavor Base with Aromatics
In the same skillet (don’t clean it—those browned bits are pure flavor), reduce the heat to medium. Add 1 diced onion and cook for 3-4 minutes, stirring occasionally, until it becomes translucent and starts to soften. You’ll know it’s ready when the sharp onion smell mellows out.
Push the onions to one side and add 2 minced garlic cloves to the cleared spot. Cook for just 30 seconds until fragrant—don’t let it brown or it will turn bitter. Stir everything together, then add 1 tablespoon tomato paste and cook for another 1 minute, stirring constantly.
This simple combination of onions, garlic, and tomato paste creates a rich flavor foundation that will make your stew taste homemade. The tomato paste adds umami depth, while the onions and garlic provide aromatic complexity that balances the beefy richness.
Deglaze and Simmer for Richness
Pour in ½ cup of red wine or beef broth and use a wooden spoon to scrape up all those delicious browned bits from the bottom of the pan. This process, called deglazing, incorporates all that concentrated flavor into your stew base. Let it simmer for 2-3 minutes until the liquid reduces by about half.
Return the browned beef to the pan along with the original canned stew liquid (or replace it with 1 cup of beef broth for better flavor). Add 1 teaspoon Worcestershire sauce and ½ teaspoon smoked paprika for extra depth. Stir everything together and let it simmer for 10-15 minutes on low heat.
You’ll see the liquid start to thicken slightly and the flavors meld together. Taste and adjust the seasoning—you’ll likely need to add salt and pepper, as canned stews are often underseasoned. The stew should have a rich, complex flavor that coats the back of your spoon.
Add Fresh Elements for Brightness
Just before serving, stir in 1 cup of frozen peas and 1 diced carrot (if your stew didn’t come with enough vegetables). Cook for 3-4 minutes until the vegetables are tender but still bright. I like to add them at the end to preserve their texture and color.
Finish with 1 tablespoon chopped fresh parsley and 1 teaspoon fresh thyme leaves. These fresh herbs add a pop of color and brighten up the rich flavors. You can also add a splash of lemon juice or red wine vinegar to balance the richness with a touch of acidity.
Let the stew sit off heat for 5 minutes before serving. This brief rest allows the flavors to harmonize. You’ll notice how the fresh elements contrast beautifully with the deep, savory base you’ve built, creating a perfectly balanced bowl of stew.
Serve with the Right Accompaniments
Ladle the upgraded stew into warmed bowls. I love serving it with crusty bread or buttery mashed potatoes to soak up the rich sauce. The bread adds textural contrast, while the potatoes make it even more comforting.
For an extra touch, sprinkle each serving with grated Parmesan cheese or crumbled bacon bits. These toppings add another layer of flavor and make the dish feel special. The cheese adds saltiness and umami, while the bacon contributes smokiness that pairs perfectly with the beef.
You’ll be amazed at how these simple upgrades transform canned stew into a dish that tastes like it simmered all day. The key is building layers of flavor through browning, aromatics, and fresh finishing touches—each step contributes to the final, restaurant-quality result.
Tips and Common Mistakes
These simple but powerful techniques will take your upgraded stew from good to restaurant-quality with minimal extra effort.
The Browning Difference: In Step 1, don’t rush those 2-3 minutes of browning—this is where the magic happens. The deep brown crust you’re creating through the Maillard reaction adds more flavor than any spice could. I’ve found that patting the beef completely dry with paper towels (really press down!) makes all the difference in getting that perfect sear rather than steaming the meat. Use medium-high heat as specified—too low and you’ll steam instead of brown, too high and you’ll burn before the crust forms.
Layering Flavors: Step 2’s aromatic base is your flavor foundation. When cooking the 1 diced onion for 3-4 minutes, look for translucency around the edges rather than full softness—that’s your visual cue. The 30 seconds for garlic might seem short, but trust me, it’s perfect timing to release flavor without bitterness. Here’s what nobody tells you—stirring the 1 tablespoon tomato paste for that full 1 minute until it darkens slightly caramelizes the sugars and deepens the umami flavor exponentially.
Simmering Strategy: During Step 3’s 10-15 minutes simmer on low heat, maintain just a gentle bubble—you should see small bubbles breaking the surface occasionally, not a rolling boil. This slow simmer allows flavors to meld without reducing the liquid too quickly. I like to use this time to prepare my fresh elements for Step 4. If your stew seems too thin after simmering, let it go the full 15 minutes—the liquid will thicken slightly as it cools during that 5-minute rest before serving.
Fresh Finishes: The 3-4 minutes for vegetables in Step 4 might seem too short, but it’s intentional—you want them tender-crisp to contrast with the soft beef. For the herbs, tear the 1 tablespoon chopped fresh parsley by hand rather than chopping for better texture. That final 5 minutes off heat isn’t just resting time; it’s when the fresh herbs infuse their bright flavors into the warm stew without wilting completely.
Pro Tips for Make Canned Beef Stew Taste Better
- These simple but powerful techniques will take your upgraded stew from good to restaurant-quality with minimal extra …
- The Browning Difference: In Step 1, don’t rush those 2-3 minutes of browning—this is where the magic happens. The dee…
- Layering Flavors: Step 2’s aromatic base is your flavor foundation. When cooking the 1 diced onion for 3-4 minutes, l…
Frequently Asked Questions
Can I upgrade canned beef stew without cooking it?
Try no-cook boosts like a splash of hot sauce, fresh herbs (parsley, cilantro), or a drizzle of olive oil. A sprinkle of grated Parmesan or crumbled feta adds richness. For extra depth, stir in a spoonful of pesto or a dash of Worcestershire sauce.
How long does it take to improve canned beef stew?
Most upgrades take 5–15 minutes. Simmering with broth, wine, or spices (like smoked paprika) takes 10–15 mins. Quick fixes (acid, herbs, or cheese) take under 2 mins. For slow-cooker methods (adding potatoes or carrots), plan for 1–2 hours on low.
What’s the best substitute for wine in beef stew?
Use beef broth + 1 tsp balsamic vinegar for depth, or grape juice + 1 tsp soy sauce for sweetness. For alcohol-free options, try mushroom stock or non-alcoholic red wine. Each adds complexity without overpowering the stew. →
Why does my upgraded stew taste bland or mushy?
Bland? Likely needs salt, acid (lemon juice/vinegar), or umami (soy sauce, fish sauce). Mushy? Over-simmering or adding soft veggies (like zucchini) too early. Fix texture with crunchy toppings (fried onions, croutons) or stir in fresh veggies at the end.
Can I freeze upgraded canned beef stew?
Yes! Freeze in airtight containers for up to 3 months. Avoid adding potatoes (they turn grainy) or dairy (it separates). Reheat on the stove with a splash of water or broth. Pro tip: Label with the date and any added ingredients!
With just a few simple tweaks—like fresh herbs, umami boosters, or a splash of acid—you can turn that humble can of beef stew into a restaurant-worthy meal in minutes. 🍲 Don’t settle for bland when bold, rich flavors are only a pantry raid away!
Now that you’ve got the secrets, why not pick one upgrade and try it tonight? Your taste buds (and dinner guests) will thank you. Happy cooking! 👨🍳

Trained in classic French technique but raised on slow-cooked ribs and spicy rubs, she blends culinary skill with smoke and soul.
- Recipe for Boneless Pork Chops in Cast Iron Skillet: Sear and Baste to Juicy Perfection - October 3, 2026
- Recipe for Boneless Cross Rib Roast: Slow-Roasted Beef with Herb Crust - October 3, 2026
- Hamburgers in Sauce Recipe Crock Pot: Slow-Cooked Savory Delight - October 3, 2026