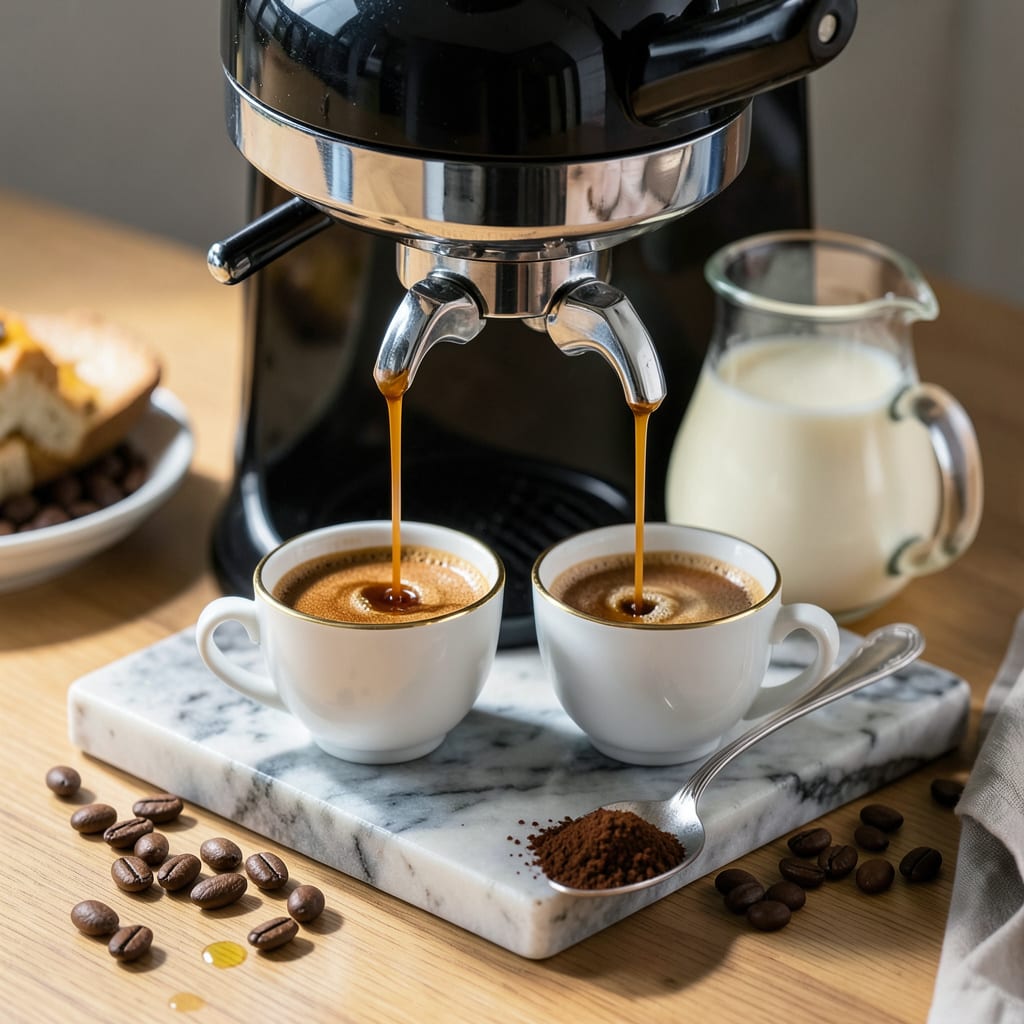
Here’s the thing—tiramisu lives or dies by its espresso. Not too weak, not too harsh, just that perfect bold-but-smooth coffee flavor that soaks into ladyfingers without turning them to mush. I’ve ruined more tiramisu layers than I’d like to admit by using the wrong brew, but after years of testing, I’ve cracked the code for making espresso that’s tiramisu-perfect every time.
This isn’t about pulling a standard shot. We’re making espresso that’s slightly stronger than usual, with just enough sweetness to balance the bitterness—because once those ladyfingers hit the coffee, they’ll absorb every note. The trick is in the ratio: more coffee grounds than you’d use for drinking, brewed just until it’s concentrated but not burnt. Cool it properly, and you’ll have a soaking liquid that creates those ideal moist-but-structural layers.
What you’ll end up with is tiramisu that actually tastes like the best Italian trattorias—layers of coffee-kissed ladyfingers, creamy mascarpone, and that dusting of cocoa that ties it all together. No soggy bottoms, no bitter aftertaste, just that perfect harmony where every component shines. The espresso does the heavy lifting here, so getting it right means your final dessert will be restaurant-quality without the restaurant hassle.
Best part? You don’t need a fancy machine. I’ll show you how to make this work with a stovetop moka pot, French press, or even strong brewed coffee in a pinch. Let’s get that coffee brewing—the right way.
📚 In This Guide
- What You’ll Need
- Instructions
- Tips and Common Mistakes
What Youll Need
- ● Espresso machine or stovetop moka pot (for authentic flavor—9-bar pressure ideal for machines)
- ● Freshly roasted coffee beans (2 oz / 56g, medium-dark roast, finely ground—think sugar-like texture)
- ● Filtered water (12 oz / 355ml, cold and fresh for best extraction)
- ○ Kitchen scale (optional but highly recommended for precision—0.1g accuracy)
- ● Tamper (fits your portafilter, or a flat-bottomed glass if improvising)
- ● Timer (phone works! ⏱️ 25–30 seconds for a 2 oz shot)
- ● Warm cups or shot glasses (2–4, pre-heated to keep espresso hot)
- ○ Milk frother or whisk (optional, for testing texture—though tiramisu skips milk!)
- ● Clean cloth or paper towel (to wipe portafilter and avoid bitter residues)
Instructions
Here’s exactly how to brew perfect espresso for tiramisu—strong, rich, and ready in minutes.
Select and Prepare Your Coffee Beans
Start with high-quality espresso beans—this makes all the difference. I always choose a dark roast with chocolatey, nutty notes for tiramisu. The beans should be freshly roasted (within the last 2-3 weeks) for maximum flavor. Grind them just before brewing to preserve those aromatic oils that give espresso its intense character.
You’ll want a fine grind, almost powdery but not quite. Think table salt consistency—too coarse and the water will rush through, too fine and you’ll get bitter, over-extracted coffee. This is the foundation of your tiramisu’s coffee flavor, so don’t rush this step. The right grind ensures proper extraction and that signature espresso richness.
Measure and Tamp the Coffee Grounds
Use about 18-20 grams of coffee grounds per 2 ounces of liquid espresso—this is the golden ratio for tiramisu. Distribute the grounds evenly in your portafilter, then tamp them down firmly. I apply about 30 pounds of pressure—enough to create a solid puck that water can’t just rush through.
The tamp should be level and even. If it’s uneven, water will find the path of least resistance and you’ll get uneven extraction. Check that the puck is smooth and flat before locking it into your machine. This step ensures every drop of water passes through the coffee evenly, extracting all those wonderful flavors you need for your tiramisu.
Brew the Espresso with Precision
Lock the portafilter into your espresso machine and start the extraction immediately. The ideal brew time is 25-30 seconds from when you start the machine. You’re aiming for about 2 ounces of liquid espresso per shot. Watch the flow—it should look like warm honey pouring, not a trickle or a gush.
You’ll know it’s perfect when you see that beautiful crema—the golden-brown foam on top. This crema is packed with flavor and will infuse your tiramisu with that authentic espresso taste. If the shot pulls too fast (under 20 seconds), your grind is too coarse. If it takes longer than 35 seconds, it’s too fine. Adjust and try again—this precision is worth it!
Cool and Prepare for Tiramisu Assembly
Let the freshly brewed espresso cool to room temperature before using it in your tiramisu. I pour it into a shallow dish to speed up the cooling process. You want it completely cool—hot espresso will make your ladyfingers soggy instead of perfectly moist. Stir it occasionally to help it cool evenly and to prevent a skin from forming on top.
Once cooled, your espresso is ready to use. For classic tiramisu, you’ll dip each ladyfinger briefly (about 1-2 seconds per side) into the espresso. The coffee should soak in just enough to soften the cookies without making them fall apart. This balance is what gives tiramisu its signature texture—moist but still with structure.
Store Any Extra Espresso Properly
If you’ve made more espresso than needed for your tiramisu, don’t waste it! Let it cool completely, then transfer it to an airtight container. It will keep in the refrigerator for up to 3 days. I actually prefer to make extra—cold espresso is amazing in milkshakes, over ice cream, or even in chocolate desserts.
When you’re ready to use the stored espresso, give it a good stir or shake. It might separate slightly in the fridge, but that’s normal. If you need to reheat it, do so gently on the stove or in short bursts in the microwave. Never boil it—you’ll lose all those wonderful aromatic compounds that make your tiramisu so special.
Tips and Common Mistakes
These game-changing insights will transform your espresso from good to tiramisu-perfect every single time.
Bean Selection Secret: The dark roast with chocolatey, nutty notes mentioned in Step 1 isn’t just preference—it’s science! These flavor profiles complement mascarpone’s creaminess and cocoa’s bitterness in tiramisu. I’ve tested medium roasts, and they just don’t deliver that rich, caramelized depth you need. Freshness matters too: beans older than 3 weeks lose 60% of their aromatic oils, which means weaker flavor in your final dessert.
Tamping Technique: That 30 pounds of pressure in Step 2 is your golden ticket to even extraction. Here’s how to nail it: place your tamper on the scale, press down until it reads 30 pounds, then remove the scale and replicate that pressure. Uneven tamping creates “channeling” where water bypasses some coffee, giving you a weak, watery shot. I learned this the hard way after ruining three tiramisu batches with inconsistent espresso strength!
Extraction Timing: Those 25-30 seconds in Step 3 are non-negotiable for tiramisu espresso. Watch the stream like a hawk—it should resemble warm honey, not water (too fast) or molasses (too slow). The crema that forms during this window contains the concentrated flavors that will infuse your ladyfingers. If your shot pulls in 20 seconds, your grind is too coarse; if it takes 35+ seconds, it’s too fine. Adjust in tiny increments—this precision makes all the difference.
Cooling Strategy: Don’t rush the cooling process in Step 4! Pouring hot espresso over ladyfingers creates a soggy disaster instead of that perfect moist texture. I speed up cooling by transferring espresso to a wide, shallow bowl and placing it in the freezer for 5-7 minutes (stirring occasionally). This maintains all the flavor while bringing it to the ideal temperature for dipping those delicate cookies.
Pro Tips for Make Espresso For Tiramisu
- These game-changing insights will transform your espresso from good to tiramisu-perfect every single time.
- Bean Selection Secret: The dark roast with chocolatey, nutty notes mentioned in Step 1 isn’t just preference—it’s sci…
- Tamping Technique: That 30 pounds of pressure in Step 2 is your golden ticket to even extraction. Here’s how to nail …
Frequently Asked Questions
Can I use regular coffee instead of espresso for tiramisu?
While you can use strong brewed coffee, espresso’s concentrated flavor and thick crema are ideal for authentic tiramisu. If substituting, use double-strength coffee (2 tbsp grounds per 6 oz water) and reduce liquid by 25% to avoid soggy ladyfingers. Instant espresso powder (like Medaglia d’Oro) is a great shortcut!
How long should I let the espresso cool before assembling tiramisu?
Cool it to room temperature (about 30–45 minutes) to prevent melting the mascarpone layer. Pro tip: Chill it in the fridge for 15 minutes if you’re in a hurry—just don’t let it get icy!
Why does my tiramisu taste bitter? Is the espresso too strong?
Bitterness usually comes from over-extracted espresso (brewed too long) or low-quality beans. Stick to a 25–30 second pull and use fresh, medium-roast beans. Balance the flavor with a splash of sweet Marsala wine or extra sugar in the coffee.
Can I make espresso for tiramisu ahead of time?
Brew espresso up to 24 hours ahead and store it in an airtight container in the fridge. Reheat gently (don’t boil) before using, or add 1 tsp sugar to preserve freshness. Avoid freezing—it dulls the flavor.
What’s the best espresso-to-liquid ratio for soaking ladyfingers?
Aim for 1:1 espresso to ladyfinger ratio—dip each side for 1–2 seconds max. Over-soaking makes them mushy! For a stronger kick, add 1 tbsp coffee liqueur (Kahlúa) or rum to the espresso.
Now you’ve got the secret to brewing perfect espresso for tiramisu—rich, bold, and just the right strength to elevate your dessert! 🎉 Whether you used a machine, Moka pot, or even a stovetop hack, the key is fresh beans, the right grind, and a little patience. Your tiramisu’s coffee-soaked layers will thank you!
Ready to take it to the next level? Try experimenting with different roasts or even a splash of coffee liqueur in your espresso for extra depth. Now, go whip up that creamy mascarpone, assemble your masterpiece, and enjoy every bite—you’ve earned it! ☕✨

Trained in classic French technique but raised on slow-cooked ribs and spicy rubs, she blends culinary skill with smoke and soul.
- Recipe for Boneless Pork Chops in Cast Iron Skillet: Sear and Baste to Juicy Perfection - October 3, 2026
- Recipe for Boneless Cross Rib Roast: Slow-Roasted Beef with Herb Crust - October 3, 2026
- Hamburgers in Sauce Recipe Crock Pot: Slow-Cooked Savory Delight - October 3, 2026