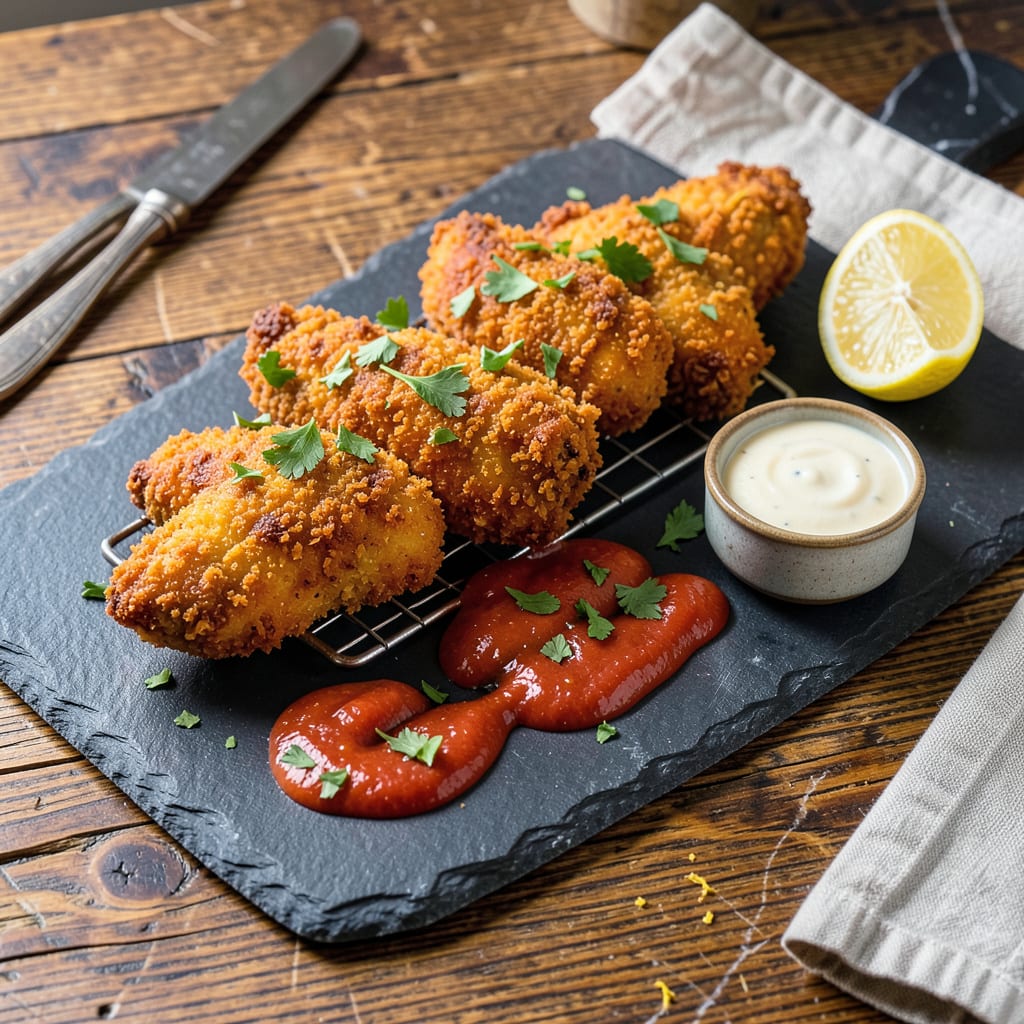
Let me tell you, frozen chicken tenders don’t have to be sad and soggy. I’ve spent years perfecting the method to get them golden crispy with a tender center—no deep fryer required. The secret starts with proper oven preheating and a simple trick that changes everything.
Most people just toss frozen tenders on a tray and hope for the best. Big mistake. I found that lightly coating them with oil before baking creates that perfect crunchy exterior while keeping the inside juicy. And here’s the kicker: a wire rack over your baking sheet lets hot air circulate, preventing that dreaded steamy bottom.
By the time they come out of the oven, you’ll have chicken tenders with that satisfying snap when you bite in, followed by juicy, flavorful meat inside. They’re so good even my pitmaster friends ask for seconds. The best part? This method works whether you’re using an oven, air fryer, or even a skillet.
Serve them with your favorite dipping sauce or alongside crispy fries for the ultimate snack. Here’s exactly how to make it happen—no more rubbery, sad tenders, I promise.
📚 In This Guide
- What You’ll Need
- Instructions
- Tips and Common Mistakes
What Youll Need
- ● Frozen chicken tenders – 1 bag (12–16 oz, any brand)
- ● Cooking oil – 1–2 tbsp (avocado, vegetable, or olive oil for high-heat baking)
- ● Baking sheet – 1 (rimmed, heavy-duty for even crisping)
- ○ Wire rack – 1 (optional but ideal for extra crunch by allowing airflow)
- ● Parchment paper – 1 sheet (or aluminum foil for easy cleanup)
- ○ Cooking spray – optional (for a lighter oil coating)
- ○ Seasonings – optional (garlic powder, paprika, or cayenne for a flavor boost)
- ● Tongs or spatula – 1 (for safe flipping)
- ○ Oven thermometer – optional (to verify accurate temp)
- ○ Meat thermometer – optional (ensures tenders reach 165°F internally)
Instructions for Perfectly Crispy Frozen Chicken Tenders
You’re about to transform those frozen tenders into golden, crunchy perfection—here’s exactly how to do it right.
Preheat and Prepare for Maximum Crispiness
Crank your oven to 425°F—this high heat is the secret to getting that restaurant-quality crunch. While it preheats, line a baking sheet with parchment paper or use a wire rack set inside a rimmed baking sheet. The rack is my personal favorite because it allows hot air to circulate underneath, ensuring crispiness on all sides.
Don’t skip this step! Baking directly on a pan steams the bottom of the tenders, leaving you with soggy spots. You want that heat to hit every surface evenly. If you’re using parchment, make sure it’s cut to fit snugly—no overhang that could burn.
Arrange the Tenders for Even Cooking
Spread the frozen chicken tenders in a single layer on your prepared baking sheet, leaving about 1 inch of space between each piece. This spacing is crucial—it prevents steam from getting trapped between the tenders, which would make them soft instead of crispy.
Here’s the thing—don’t thaw them first! Cooking from frozen actually helps create that perfect contrast between the crispy exterior and juicy interior. The cold center cooks gently while the outside gets beautifully browned. If your tenders are particularly thick, you might want to flip them halfway through cooking.
Bake to Golden Perfection
Bake on the middle oven rack for 15-18 minutes, then check for doneness. You’re looking for a deep golden brown color and an internal temperature of 165°F when tested with a meat thermometer. The edges should be crispy and slightly elevated from the original shape.
Real talk: every oven runs differently, so start checking at the 15-minute mark. If they’re not quite crispy enough, give them 2-3 more minutes and check again. You’ll know they’re perfect when they’re uniformly golden and make a satisfying crunch sound when you tap them with tongs.
Rest Briefly and Serve Immediately
Transfer the crispy tenders to a wire rack or paper towel-lined plate to cool for 2-3 minutes. This brief rest lets the coating set completely and prevents that first bite from being too hot. The tenders will stay crispy for about 10 minutes after coming out of the oven, so serve them while they’re hot!
I love serving these with a simple honey mustard or spicy mayo for dipping. The contrast between the crispy exterior and tender interior is what makes these so addictive. If you’ve got leftovers (unlikely!), reheat them in a 400°F oven for 5-7 minutes to restore the crunch—microwaving will make them soggy.
Tips & Tricks for Perfectly Crispy Frozen Chicken Tenders
These game-changing tricks will take your frozen tenders from basic to restaurant-quality crispy perfection every single time.
Heat Control: That 425°F temperature in Step 1 isn’t arbitrary—it’s the sweet spot for creating that perfect crunch while cooking the inside through. I’ve found that preheating for a full 15 minutes ensures your oven reaches true temperature. If your oven runs hot, check tenders at the 13-minute mark instead of 15 to prevent burning.
The Technique That Changed Everything: In Step 2, that 1-inch spacing between tenders is non-negotiable! I learned this the hard way after ending up with steamed, soggy batches. The space allows hot air to circulate freely, which is what creates that satisfying crunch. If your tenders are different sizes, group similar sizes together for even cooking.
Critical Timing: During the 15-18 minute bake in Step 3, resist the urge to open the oven door! Every time you peek, you lose valuable heat that’s working to crisp up those tenders. Instead, turn on your oven light and watch through the window. The tenders are done when they reach that deep golden brown color mentioned in the instructions—it should look like perfect fried chicken.
Resting Wisdom: Those 2-3 minutes of resting in Step 4 might seem insignificant, but they’re crucial! This brief pause lets the coating set completely, preventing it from sliding off when you dip. I like to rest them on a wire rack to maintain crispiness on all sides—paper towels can sometimes trap steam and soften the bottom.
Pro Tips for Make Frozen Chicken Tenders Crispy
- These game-changing tricks will take your frozen tenders from basic to restaurant-quality crispy perfection every sin…
- Heat Control: That 425°F temperature in Step 1 isn’t arbitrary—it’s the sweet spot for creating that perfect crunch w…
- The Technique That Changed Everything: In Step 2, that 1-inch spacing between tenders is non-negotiable! I learned th…
Frequently Asked Questions
Can I make frozen chicken tenders crispy without deep frying?
Skip the greasy mess by using your oven or air fryer. Toss tenders in 1 tbsp oil (or cooking spray) and bake at 425°F (220°C) for 15-20 mins, flipping halfway. For extra crunch, broil 1-2 mins at the end—just watch closely!
Why are my frozen chicken tenders soggy after baking?
Sogginess usually happens from steam buildup or overcrowding. Fix it: Pat tenders dry before baking, space them out on the tray, and avoid covering with foil. A wire rack over a baking sheet also helps airflow!
How long do I cook frozen chicken tenders in an air fryer?
Air fry at 400°F (200°C) for 10-12 mins, shaking the basket halfway. No thawing needed! For thicker tenders, add 1-2 extra mins. Always check the internal temp hits 165°F (74°C).
What’s the best oil for crispy frozen chicken tenders?
High-smoke-point oils work best! Try avocado, vegetable, or canola oil. For flavor, mix in a pinch of garlic powder or paprika. Avoid olive oil—it burns at high temps and can taste bitter.
Can I use cornstarch or flour to make them crispier?
Yes! Lightly coat thawed tenders in 1 tbsp cornstarch or flour before baking—it creates a crunchy crust. For gluten-free, use rice flour or crushed pork rinds. Pro tip: Spritz with oil after coating for max crisp!
Now you’ve got the secrets to turn frozen chicken tenders into crispy, golden perfection—no deep fryer required! 🎉 Whether you’re baking, air-frying, or adding a quick broil, the right technique makes all the difference. Say goodbye to soggy tenders and hello to that irresistible crunch every time.
Ready to put your new skills to the test? Grab a bag of tenders, preheat that oven, and get crisping! For extra flavor, try dipping them in your favorite sauce or pairing with a fresh side. Happy cooking! 🍗✨

Trained in classic French technique but raised on slow-cooked ribs and spicy rubs, she blends culinary skill with smoke and soul.
- Recipe for Boneless Pork Chops in Cast Iron Skillet: Sear and Baste to Juicy Perfection - October 3, 2026
- Recipe for Boneless Cross Rib Roast: Slow-Roasted Beef with Herb Crust - October 3, 2026
- Hamburgers in Sauce Recipe Crock Pot: Slow-Cooked Savory Delight - October 3, 2026