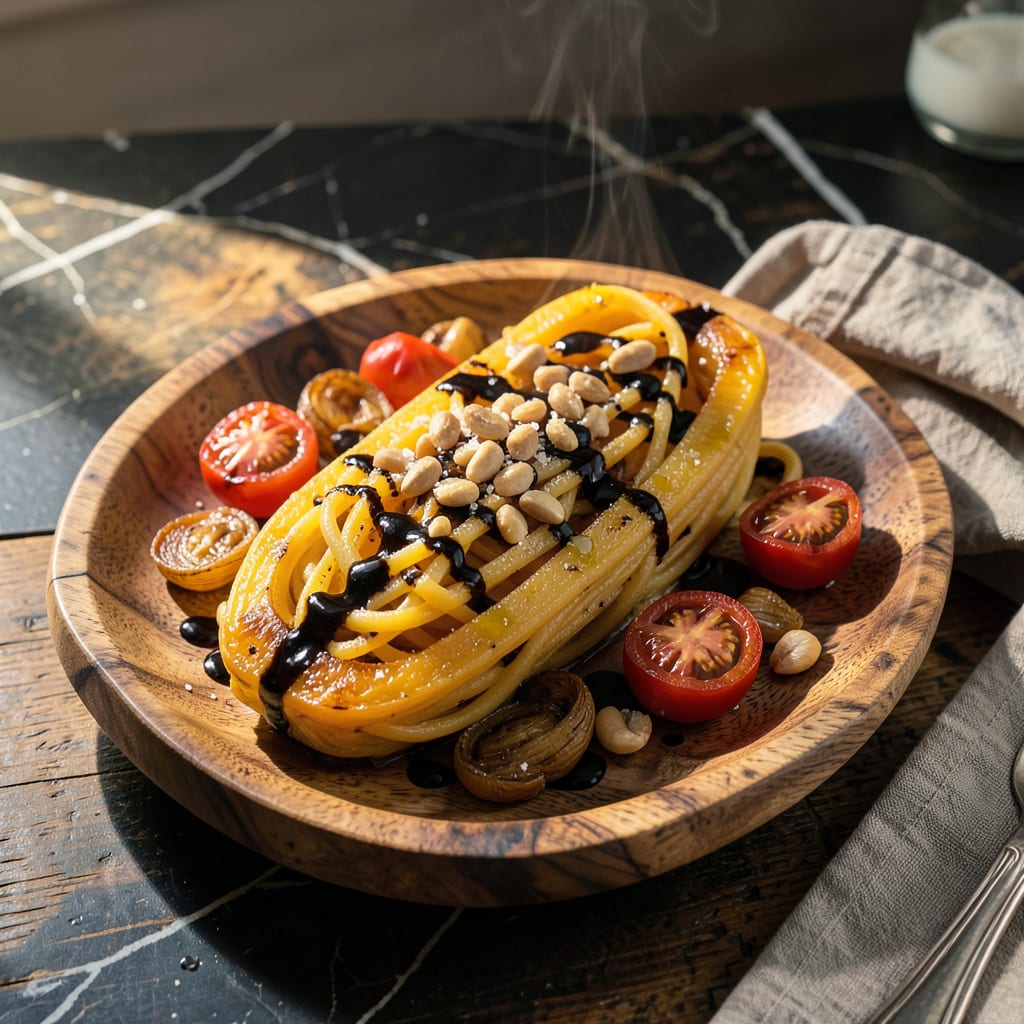
Spaghetti squash has a dirty little secret—it’s basically a water balloon in vegetable form. That stringy, pasta-like texture we love? It’s hiding in a fortress of moisture that turns your perfect strands into a soggy mess if you’re not careful. I’ve ruined more squash dishes than I’d like to admit before cracking the code.
The problem isn’t you—it’s science. Spaghetti squash contains about 90% water by weight, and its cell structure releases all that liquid when cooked improperly. But here’s the good news: with three simple technique adjustments, you can transform watery disappointment into perfectly firm strands every time. No fancy equipment required.
I’m talking about squash that holds its shape when tossed with sauce, maintains texture under toppings, and actually resembles the pasta it’s named after. The methods I use now—developed after too many mushy failures—work whether you’re roasting, microwaving, or even air-frying your squash. They’re the difference between a sad side dish and a meal that makes you forget about regular pasta.
Best part? These techniques take minimal extra effort but deliver maximum payoff. You’ll end up with squash that’s ready for anything—tossed with marinara, loaded with vegan pesto, or simply dressed with olive oil and herbs. Let’s fix that watery squash problem for good.
📚 In This Guide
- What You’ll Need
- Instructions
- Tips and Common Mistakes
What Youll Need
- ● 1 medium spaghetti squash (about 4–5 lbs for 4 servings)
- ● Sharp chef’s knife (8–10 inches for safe, clean cuts)
- ● Large spoon or ice cream scoop (to remove seeds easily)
- ● Baking sheet (half-sheet pan, 18×13 inches, with a rim to catch drips)
- ○ Parchment paper or aluminum foil (for easy cleanup—optional but helpful!)
- ● Olive oil or avocado oil (1–2 tbsp for roasting)
- ● Salt (½ tsp for seasoning, plus extra to taste)
- ● Fork (for scraping out those perfect strands post-roasting)
- ● Paper towels or clean kitchen towel (to pat dry excess moisture)
- ○ Colander (optional, for draining if pre-salting)
- ● Measuring spoons (for precise oil/salt ratios)
- ○ Oven thermometer (optional but great for accuracy—aim for 400°F)
Step-by-Step Instructions for Perfectly Firm Spaghetti Squash
Here’s the foolproof method I use every time to get those perfect, al dente strands without any watery mess.
Choose and Prepare the Right Squash
Start by selecting a firm, heavy spaghetti squash that feels solid for its size. I always look for one with smooth, unblemished skin and a deep yellow color—these are signs of ripeness and lower water content. Give it a gentle tap; a ripe squash will sound hollow.
Wash the squash thoroughly under cool water to remove any dirt or debris. I like to use a vegetable brush for this, especially around the stem area where dirt can hide. Pat it completely dry with a clean kitchen towel. This initial drying step is crucial—any surface moisture will turn to steam in the oven and contribute to that watery texture we’re trying to avoid.
Cut and Seed with Precision
Place the squash on a stable cutting board. Using a sharp chef’s knife, carefully cut the squash in half lengthwise. This can take some effort, so don’t rush it. I find it helps to make a small starter cut, then gently rock the knife back and forth while applying even pressure.
Once halved, use a sturdy spoon to scrape out all the seeds and stringy pulp from the center. Be thorough here—any remaining seeds can add unwanted moisture during cooking. After seeding, I always pat the cut sides dry again with paper towels. This extra step removes surface moisture that would otherwise steam the squash from the inside out.
Roast Cut-Side Down for Maximum Drainage
Preheat your oven to 400°F—this higher temperature helps evaporate moisture more effectively than lower temps. Place the squash halves cut-side down on a rimmed baking sheet. I line my sheet with parchment paper for easy cleanup, but don’t use foil—it traps steam and makes the squash soggy.
Roast for 40-50 minutes until the skin gives slightly when pressed and the flesh is tender when pierced with a fork. The cut-side down position is critical here—it allows all the released moisture to drain onto the baking sheet instead of pooling in the squash cavity. You’ll actually see the liquid collecting on the parchment as it cooks out.
Drain and Fluff Immediately After Roasting
When the squash is tender, remove it from the oven and let it cool for just 2-3 minutes—enough to handle safely but not so long that it starts to steam in its own heat. Using oven mitts, carefully flip the halves over to expose the cooked flesh.
Here’s the game-changer: use a clean kitchen towel to gently press down on the squash strands, absorbing any remaining surface moisture. Then, use a fork to scrape out the strands into a colander set over a bowl. Let them drain for 5 minutes, gently tossing occasionally. This final drainage step removes that last bit of excess liquid that would otherwise make your dish watery.
Finish with a Quick Sauté for Perfect Texture
For the absolute best texture, I recommend giving the drained strands a quick sauté. Heat 1 tablespoon of olive oil in a large skillet over medium-high heat. Add the squash strands and cook for 3-4 minutes, stirring occasionally, until any remaining moisture has evaporated and the strands are just beginning to develop some golden edges.
This final step does two things: it drives off that last bit of moisture, and it gives the squash a slightly firmer texture that mimics al dente pasta. The strands should be tender but still hold their shape, with no liquid pooling in the pan. At this point, your spaghetti squash is ready to use in any recipe, and I promise it will hold up beautifully without turning to mush.
Tips and Common Mistakes
After years of battling soggy spaghetti squash, I’ve learned these key details make all the difference between watery disappointment and perfect, firm strands.
Drying is Everything: The secret starts before the oven even turns on. In Step 1, when you’re washing the squash, take extra time to pat it completely dry with a clean towel. I mean bone-dry—no visible moisture at all. Then after seeding in Step 2, pat those cut surfaces dry again. This double-drying prevents steam from forming inside the squash during roasting, which is what creates that watery texture we’re trying to avoid.
Roasting Position Matters: When you place the squash cut-side down in Step 3, make sure it’s sitting perfectly flat on the baking sheet. I’ve found that if the halves are even slightly tilted, moisture can pool in one corner instead of draining evenly. At 400°F, that 40-50 minute roast is your chance to let gravity do the work—all that liquid needs to escape downward, not collect in the squash cavity.
Don’t Skip the Sauté: I know it’s tempting to skip Step 5 when you’re hungry, but those 3-4 minutes in the skillet with olive oil over medium-high heat transform the texture completely. The heat drives off any lingering moisture while giving the strands that perfect al dente bite. Watch for the moment when the squash stops releasing liquid and just starts to develop golden edges—that’s when you know it’s ready.
Timing the Cool-Down: The 2-3 minute rest in Step 4 is crucial but often rushed. Let it cool just enough to handle safely, but not so long that condensation forms inside the squash halves. I set a timer for exactly 2 minutes—any longer and you risk the squash steaming itself from residual heat, undoing all your drainage work.
Pro Tips for Make Spaghetti Squash Less Watery
- After years of battling soggy spaghetti squash, I’ve learned these key details make all the difference between watery…
- Drying is Everything: The secret starts before the oven even turns on. In Step 1, when you’re washing the squash, tak…
- Roasting Position Matters: When you place the squash cut-side down in Step 3, make sure it’s sitting perfectly flat o…
Frequently Asked Questions
Can I cook spaghetti squash ahead of time to reduce wateriness?
Yes! Pre-cook it 1–2 days ahead and store strands in an airtight container (unseasoned). Pat dry with a paper towel before reheating to remove excess moisture. Avoid overcooking initially—aim for al dente strands to prevent mushiness when reheated in a skillet or oven.
Why is my spaghetti squash still watery after roasting?
Overcrowding or under-salting are common culprits. Roast cut-side down on a wire rack (not a tray) for airflow, and salt generously before baking to draw out moisture. If it’s still soggy, squeeze strands in a clean kitchen towel post-cooking to wring out liquid.
What’s the fastest way to remove water from spaghetti squash?
For speed, microwave it! Pierce the squash, microwave whole for 10–12 minutes, then halve and scrape. Pat strands dry with paper towels or spread on a baking sheet under the broiler for 2–3 minutes to evaporate excess moisture quickly.
Can I use a slow cooker without making it watery?
Tricky but possible! Add 1/2 cup water max to the slow cooker (or none if your model retains moisture well). Cook on high for 3–4 hours, then drain strands in a colander and press with a spoon to remove liquid before serving.
Are there low-moisture alternatives to roasting or microwaving?
Try the Instant Pot! Add 1 cup water, cook whole squash on high pressure for 7 minutes, then quick-release. Or air-fry halved squash at 375°F for 20–25 minutes—both methods yield firmer strands with less liquid than traditional baking.
Say goodbye to soggy spaghetti squash for good! 🎉 The secret lies in proper prep—whether you roast it cut-side down, salt it ahead of time, or give it a quick squeeze post-cooking. With these simple tweaks, you’ll get perfectly firm, restaurant-worthy strands every time.
Ready to put your new skills to the test? Grab a squash and try one of these methods tonight—your taste buds (and meal prep game) will thank you! For extra inspiration, check out our favorite spaghetti squash recipes next. Happy cooking! 🍽️

Trained in classic French technique but raised on slow-cooked ribs and spicy rubs, she blends culinary skill with smoke and soul.
- Recipe for Boneless Pork Chops in Cast Iron Skillet: Sear and Baste to Juicy Perfection - October 3, 2026
- Recipe for Boneless Cross Rib Roast: Slow-Roasted Beef with Herb Crust - October 3, 2026
- Hamburgers in Sauce Recipe Crock Pot: Slow-Cooked Savory Delight - October 3, 2026