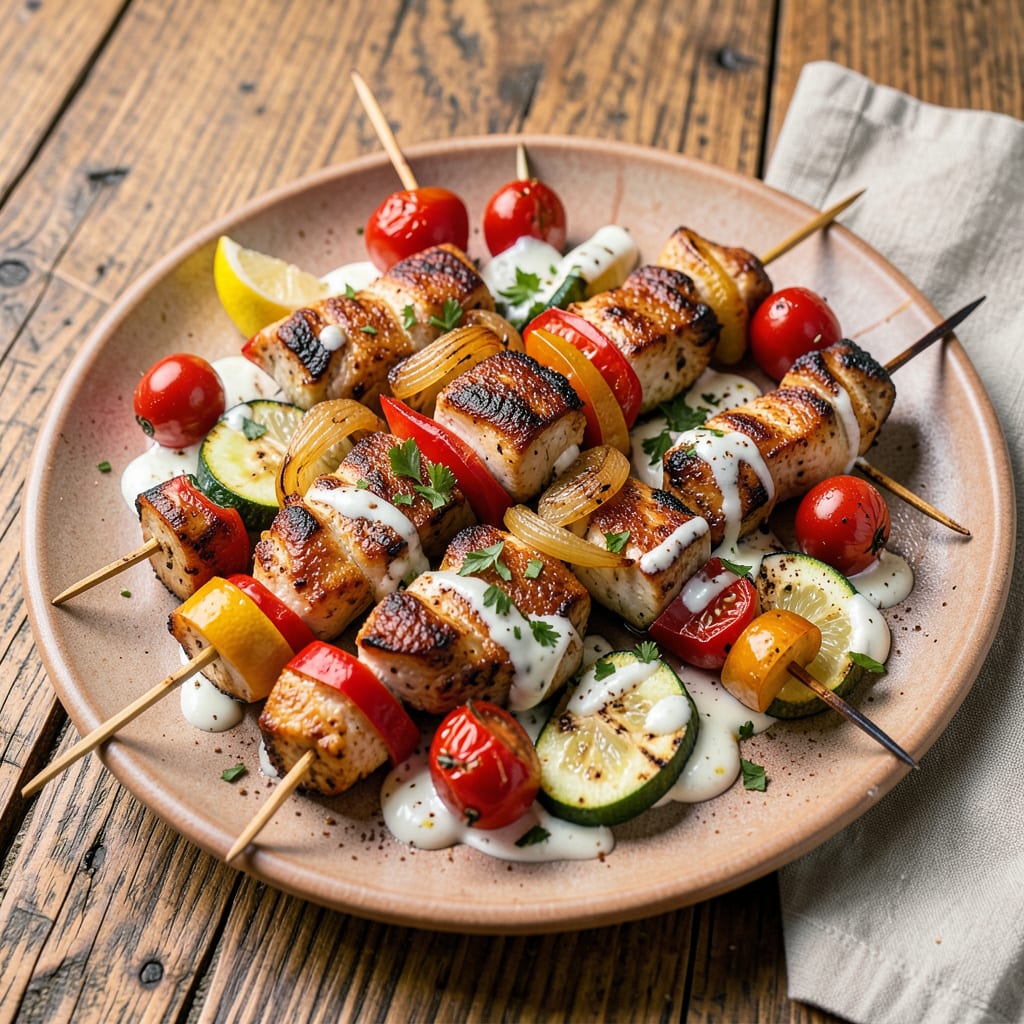
Who says you need a grill to make killer kebabs? I’ve been perfecting my indoor kebab game for years, and let me tell you—your oven can deliver that same charred, smoky flavor you’re craving. The secret is all in the technique and getting that high heat just right. No backyard? No problem.
What I love about this method is how foolproof it is. We’re talking perfectly cooked protein, slightly blistered veggies, and that unmistakable kebab flavor—all without stepping outside. I use a simple marinade that works with everything from chicken to halloumi, and a broiler trick that mimics grill marks beautifully. You’ll be shocked at how close this comes to the real deal.
The best part? You control everything—no flare-ups, no weather worries, and no babysitting the grill. Just pop those skewers in the oven, set your timer, and let the heat work its magic. I’ve made these on busy weeknights and lazy weekends, and they always disappear fast.
Whether you’re feeding a crowd or just treating yourself, these oven-baked kebabs bring all the flavor with none of the fuss. Grab your skewers and let’s get started—your kitchen is about to become the best grill substitute you’ve ever tried.
📚 In This Guide
- What You’ll Need
- Instructions
- Tips and Common Mistakes
What Youll Need
- ● Meat or protein: 1.5 lbs (700g) of cubed chicken, beef, lamb, shrimp, or tofu (1-inch cubes work best)
- ● Vegetables: 2 cups of bell peppers, onions, zucchini, or mushrooms (cut into 1-inch chunks)
- ● Skewers: 8–10 metal or wooden skewers (soak wooden ones in water for 30 mins to prevent burning)
- ● Marinade: ½ cup olive oil, lemon juice, garlic, and spices (or 1 cup store-bought marinade)
- ● Baking sheet: 1 large, rimmed sheet pan (or a broiler pan for extra crispiness)
- ● Aluminum foil or parchment paper (for easy cleanup)
- ● Tongs (for flipping skewers safely)
- ○ Meat thermometer (optional but highly recommended for perfect doneness)
- ○ Basting brush (optional, for extra marinade glaze)
- ○ Oven-safe wire rack (optional, for even cooking and browning)
Step-by-Step Instructions for Oven-Baked Kebabs
You’ll be surprised how easy it is to get that smoky, charred flavor right in your oven.
Prepare Your Ingredients and Skewers
Start by cutting your protein and vegetables into uniform, bite-sized pieces—about 1-inch cubes works perfectly. I like to use a mix of textures: bell peppers for crunch, onions for sweetness, and zucchini for tenderness. If you’re using meat, trim any excess fat to prevent flare-ups in the oven.
Soak your wooden skewers in warm water for at least 30 minutes while you prep. This prevents them from burning in the oven. If you’re using metal skewers, skip this step but make sure they’re clean and dry. Arrange your ingredients in separate bowls for easy assembly—this keeps the process organized and stress-free.
Assemble the Skewers for Even Cooking
Thread your ingredients onto the skewers, alternating between different items for balanced flavor in every bite. I always start and end with sturdy vegetables like bell peppers or onions—they help hold everything in place. Leave about ½ inch of space between each piece so the heat can circulate properly.
Don’t overcrowd the skewers; you want everything to cook evenly. If you’re making multiple types of kebabs (like all-veggie and meat), keep them separate since they’ll likely have different cooking times. Place the assembled skewers on a baking sheet lined with parchment paper for easy transfer to the oven.
Broil for That Perfect Charred Finish
Position your oven rack about 4-6 inches from the broiler element and preheat the broiler to high. This close proximity mimics the direct heat of a grill. Place your skewers on a wire rack set over a baking sheet—this allows air to circulate underneath, giving you that all-around char.
Broil for 8-10 minutes, then carefully flip the skewers and broil for another 6-8 minutes. Watch closely during this time—the high heat means things can go from perfectly charred to burnt quickly. You’re looking for light charring on the edges and that signature smoky aroma filling your kitchen.
Finish with a Rest and Optional Glaze
Remove the kebabs from the oven when everything is cooked through and has those beautiful char marks. Let them rest for 5 minutes on the baking sheet—this allows the juices to redistribute, especially important for meat kebabs. The internal temperature should read 165°F for chicken or 145°F for beef.
For extra flavor, brush the hot kebabs with a simple glaze made from honey and lemon juice, or your favorite barbecue sauce. The residual heat will caramelize the glaze slightly, adding another layer of flavor. Serve immediately while everything is still warm and those charred edges are at their crispest.
Tips & Tricks for Perfect Oven-Baked Kebabs
Getting that grill-like char in your oven is all about technique and attention to detail. Here’s what I’ve learned from perfecting this method.
Skewer Preparation: Don’t rush the 30-minute soaking time for wooden skewers—this step is crucial. I’ve found that using warm water helps the wood absorb moisture faster than cold water. For extra insurance against burning, pat the skewers dry before threading ingredients, as excess water can create steam and prevent proper charring.
Broiling Technique: The 4-6 inch distance from the broiler element in Step 3 makes all the difference. Position your rack closer (4 inches) for more intense charring, or further away (6 inches) if you’re using delicate ingredients that might burn quickly. Remember to rotate your baking sheet halfway through each 8-10 minute broiling session for even cooking—ovens often have hot spots.
Ingredient Arrangement: When assembling your skewers in Step 2, place ingredients that cook at similar rates together. For example, dense vegetables like potatoes need to be cut smaller than quick-cooking items like zucchini. I always position meat pieces toward the center of the skewer where they’ll get the most even heat exposure from all sides.
Temperature Monitoring: While the 165°F and 145°F targets in Step 4 are perfect for food safety, don’t rely solely on temperature. Look for visual cues too—meat should have slight charring and vegetables should be tender with caramelized edges. The 5-minute resting time is non-negotiable; it’s when the juices redistribute for maximum flavor in every bite.
Pro Tips for Make Kebabs Without A Grill
- Getting that grill-like char in your oven is all about technique and attention to detail. Here’s what I’ve learned fr…
- Skewer Preparation: Don’t rush the 30-minute soaking time for wooden skewers—this step is crucial. I’ve found that us…
- Broiling Technique: The 4-6 inch distance from the broiler element in Step 3 makes all the difference. Position your …
Frequently Asked Questions
Can I use wooden skewers instead of metal ones? How do I prevent burning?
Soak wooden skewers in water for at least 30 minutes before threading to prevent charring. For extra safety, leave ½-inch gaps between food items to reduce direct heat exposure. Metal skewers conduct heat better but aren’t required—just adjust oven temps by 25°F if using wood.
How long does it take to cook kebabs in the oven vs. a grill?
Oven-baked kebabs typically take 15–25 minutes at 400°F (200°C), flipping halfway. Grilling is faster (8–12 minutes), but ovens offer even cooking without flare-ups. Use a meat thermometer: 165°F for chicken, 145°F for beef/lamb. Pro tip: Broil for 2–3 minutes at the end for that “grilled” char!
What’s the best alternative if I don’t have skewers at all?
No skewers? No problem! Try these hacks:
- Sheet pan kebabs: Arrange ingredients in groups on parchment paper.
- Foil packets: Toss everything with oil/spices, seal, and bake.
- Cast-iron skillet: Sear chunks in batches for a smoky crust.
Just reduce cook time by 5–7 minutes for smaller pieces.
Why are my kebabs dry? How can I fix this?
Overcooking or lean meats are usual culprits. Marinate meat for at least 2 hours (yogurt or olive oil bases work best), and don’t overcrowd skewers. For oven cooking, add a drizzle of broth or lemon juice halfway through. Try chicken thighs instead of breasts—they stay juicier!
Can I meal prep kebabs ahead of time?
Yes! Assemble skewers (uncooked) up to 24 hours ahead and refrigerate in a sealed container. For marinated kebabs, store meat and veggies separately to avoid sogginess. Freeze raw kebabs for up to 3 months—thaw overnight before baking. Reheat in the oven at 350°F for 10 minutes.
Who knew you could get that smoky, charred kebab magic without a grill? 😉 With just an oven, a few clever tricks, and your favorite ingredients, you’re now ready to whip up restaurant-worthy skewers anytime—rain or shine. Whether you’re meal prepping for the week or hosting a cozy dinner, these methods prove that great flavor doesn’t need fancy equipment.
Ready to level up? Try experimenting with different marinades or swapping proteins for veggies next time. And if you loved this hack, share your sizzling creations with us—tag #NoGrillNoProblem! Now, go preheat that oven and get cooking. 🍽️✨

Trained in classic French technique but raised on slow-cooked ribs and spicy rubs, she blends culinary skill with smoke and soul.
- Recipe for Boneless Pork Chops in Cast Iron Skillet: Sear and Baste to Juicy Perfection - October 3, 2026
- Recipe for Boneless Cross Rib Roast: Slow-Roasted Beef with Herb Crust - October 3, 2026
- Hamburgers in Sauce Recipe Crock Pot: Slow-Cooked Savory Delight - October 3, 2026