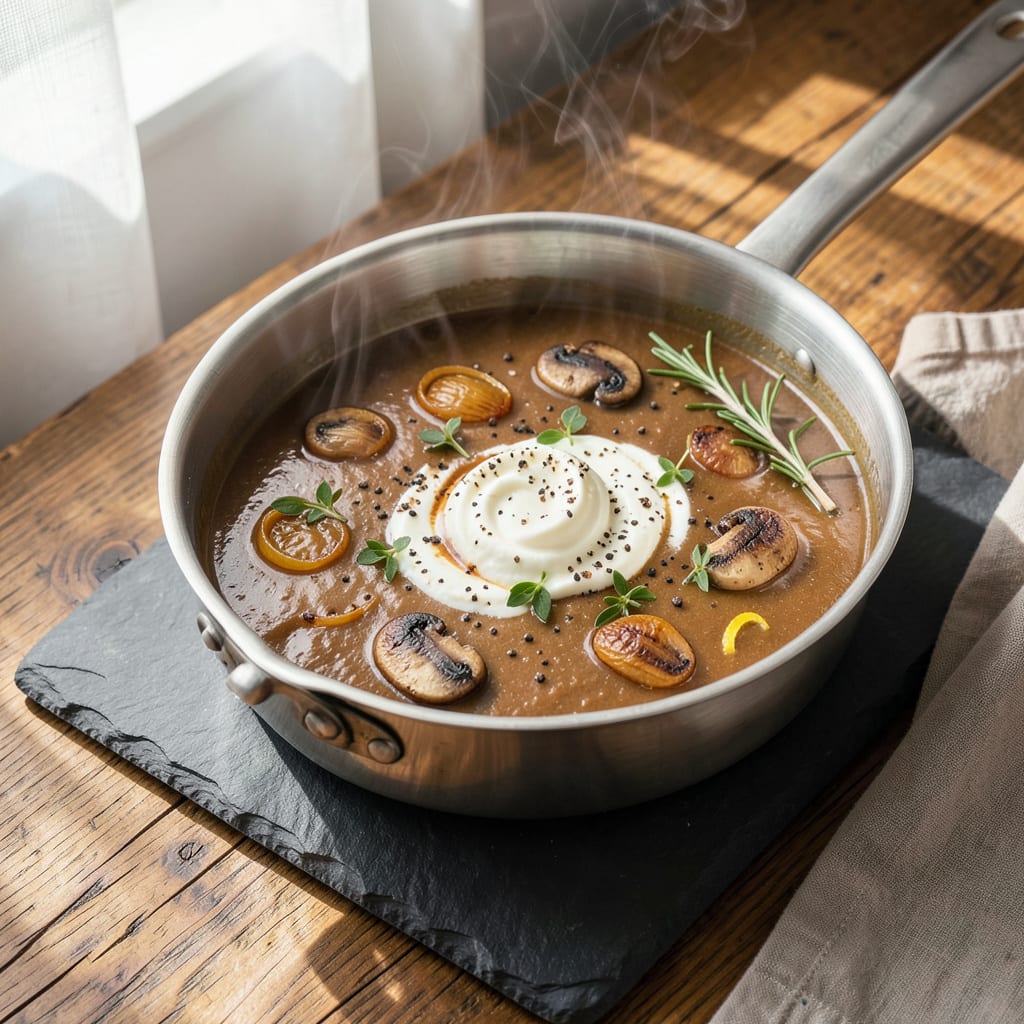
Let me tell you something—packet gravy doesn’t have to taste like regret. I’ve been upgrading store-bought shortcuts for years, and with just a few simple tweaks, you can turn that sad powder into rich, velvety gravy that actually tastes homemade. The secret? Treating it like a blank canvas instead of a finished product.
First, we’re building flavor from the ground up. A quick sauté of onions and garlic in butter adds depth that no packet can match. Then we’ll boost the umami with a splash of Worcestershire or soy sauce—trust me, it changes everything. The gravy goes from flat to complex in about 3 minutes of extra work.
The texture is where most people fail. Packet gravy is either too thin or gloppy, but we’ll fix that with a simple butter roux. It adds body and richness while smoothing out any graininess. By the time you’re done, you’ll have silky gravy that clings to mashed potatoes and meat like it was made from scratch.
Perfect for Sunday roasts, Thanksgiving leftovers, or even just dressing up weeknight meatloaf. This method works with any brand, any flavor—beef, chicken, or turkey. Here’s exactly how to do it right.
📚 In This Guide
- What You’ll Need
- Instructions
- Tips and Common Mistakes
What Youll Need
- ● 1 packet of gravy mix (any brand, beef, chicken, turkey, or pork)
- ● 1 cup of cold water (or milk/broth for extra richness)
- ● 1 tbsp of unsalted butter (or bacon fat for smoky depth)
- ● 1 small saucepan (1-2 quart capacity, non-stick preferred)
- ● Whisk (or fork for smooth blending)
- ● Measuring cups and spoons
- ● ½ tsp garlic powder or 1 minced clove of fresh garlic
- ● ½ tsp onion powder or 1 tbsp finely diced onion
- ● 1 splash of Worcestershire sauce (for umami boost)
- ● ¼ tsp black pepper (freshly cracked is best!)
- ● 1 tbsp pan drippings (from roasted meat—liquid gold! 🍖)
- ● Pinch of smoked paprika (for a subtle BBQ vibe)
Step-by-Step Instructions for Upgrading Packet Gravy
Transform your instant gravy into something truly special with these simple but powerful techniques.
Brown Your Base Ingredients
Start by heating a saucepan over medium heat and adding a pat of butter or a drizzle of oil. The key here is to create depth of flavor before you even open the gravy packet. I like to add finely chopped onions or shallots first, cooking them for 3-4 minutes until they turn translucent and just begin to caramelize at the edges.
Next, stir in minced garlic and cook for 30 seconds until fragrant – you’ll smell when it’s ready. If you’re using meat drippings (which I highly recommend), add them now and let them sizzle for a minute. This browning process develops complex flavors that will make your gravy taste like it simmered all day.
Bloom the Gravy Packet
Here’s where we transform the packet mix. Instead of just adding water, first sprinkle the gravy powder into the hot pan with your browned ingredients. Cook it for 1-2 minutes, stirring constantly, until the powder darkens slightly and becomes fragrant. This “blooming” step activates the spices and eliminates that raw flour taste.
Watch carefully – you want the mixture to turn a shade darker but not burn. The kitchen should smell rich and savory at this point. If you’re adding herbs like thyme or rosemary, toss them in now so their flavors can infuse into the fat before you add liquid.
Build Flavor with Better Liquids
Instead of using plain water, reach for something with more character. I prefer a combination of half beef or chicken stock and half whole milk for richness. Pour in the liquids gradually while whisking constantly to prevent lumps from forming.
Bring the mixture to a gentle simmer over medium-low heat. As it thickens, taste and adjust the seasoning – you’ll likely need less salt than you think because the packet already contains plenty. This is also the perfect time to add a splash of Worcestershire sauce or a pinch of smoked paprika for extra depth.
Finish with Rich Additions
Once your gravy has reached your desired consistency, it’s time for the finishing touches that make it extraordinary. Remove the pan from heat and stir in a pat of cold butter – this creates a silky, velvety texture. For umami richness, I love adding a teaspoon of soy sauce or a splash of red wine.
If you want a restaurant-quality shine, whisk in a tablespoon of heavy cream at the very end. For herb lovers, stir in fresh chopped parsley or chives just before serving. The heat from the gravy will gently cook the herbs, releasing their bright flavors without making them bitter.
Rest and Adjust Before Serving
Let your gravy rest off heat for 2-3 minutes before serving. This allows the flavors to meld together and the consistency to settle. Give it one final taste and adjust the seasoning if needed – sometimes a pinch more pepper or a squeeze of lemon juice can make all the difference.
If the gravy thickens too much as it sits, simply whisk in a little warm stock or water to reach your preferred consistency. Serve immediately while hot and fragrant. The difference between this and plain packet gravy will astonish you – rich, complex flavor with minimal extra effort.
Tips and Common Mistakes
These simple but powerful techniques will transform your packet gravy from basic to extraordinary. Here’s what I’ve learned from years of perfecting this method.
Heat Control: In Step 1, that medium heat is crucial for developing flavor without burning. When cooking onions for 3-4 minutes, you want gentle caramelization, not charring. The same goes for the 30 seconds with garlic—it should become fragrant, not bitter. If your pan gets too hot, reduce to medium-low temporarily to prevent scorching.
Blooming Technique: During Step 2, those 1-2 minutes of cooking the gravy powder are game-changing. Stir constantly and watch for the color to deepen slightly—this activates the spices and removes that raw flour taste. I like to think of it as “waking up” the flavors in the packet. If you rush this step, you’ll miss out on that rich, savory depth.
Liquid Strategy: When adding your half beef or chicken stock and half whole milk in Step 3, pour gradually while whisking. This prevents lumps and ensures a smooth texture. The medium-low heat is perfect for gentle simmering—too high and you risk scorching the bottom, too low and the gravy won’t thicken properly.
Resting Period: That 2-3 minutes of resting time in Step 5 isn’t just for show. It allows the flavors to meld and the consistency to settle. I’ve found that skipping this makes the gravy taste more one-dimensional. Use this time to adjust your seasoning—sometimes just a pinch more pepper or a squeeze of lemon juice can elevate everything.
Pro Tips for Make Packet Gravy Better
- These simple but powerful techniques will transform your packet gravy from basic to extraordinary. Here’s what I’ve l…
- Heat Control: In Step 1, that medium heat is crucial for developing flavor without burning. When cooking onions for 3…
- Blooming Technique: During Step 2, those 1-2 minutes of cooking the gravy powder are game-changing. Stir constantly a…
Frequently Asked Questions
Can I use milk instead of water for packet gravy?
Yes! Swapping water for whole milk or half-and-half adds creaminess and richness. For best results, use equal parts milk and water (or all milk for extra decadence). Just whisk vigorously to avoid lumps—low-fat milk may thin the gravy, so adjust with a cornstarch slurry if needed.
How do I fix lumpy packet gravy?
Lumps happen—no stress! Whisk vigorously while heating, or strain through a fine-mesh sieve. For stubborn lumps, blend with an immersion blender or add 1 tsp of cold water at a time while stirring. Pro tip: Mix the packet with cold liquid first to prevent clumping.
What’s the best way to thicken runny gravy?
A too-thin gravy is an easy fix! Make a slurry with 1 tbsp cornstarch or flour + 2 tbsp cold water, then whisk into simmering gravy. Let it cook 1–2 minutes to thicken. Avoid over-stirring after adding—patience is key! For instant results, mash a potato flake or two into the mix.
Can I make packet gravy ahead of time?
Prepare gravy as directed, then store in an airtight container in the fridge for up to 3 days. Reheat gently on the stove, adding a splash of water or broth if it thickens too much. Avoid freezing—it can separate or become grainy.
What are healthy alternatives to packet gravy?
For a cleaner option, try:
- Homemade roux-based gravy (butter + flour + broth).
- Mushroom or onion powder for umami without MSG.
- Low-sodium broth + cornstarch slurry (skip the packet!).
With just a few simple upgrades—richer liquids, fresh aromatics, and smart seasoning—you can turn basic packet gravy into a restaurant-worthy masterpiece! 🎯 Whether you’re drizzling it over mashed potatoes or smothering a roast, these tweaks make all the difference. Now that you’ve got the secrets, grab a packet and start experimenting—your taste buds (and dinner guests) will thank you!

Trained in classic French technique but raised on slow-cooked ribs and spicy rubs, she blends culinary skill with smoke and soul.
- Recipe for Boneless Pork Chops in Cast Iron Skillet: Sear and Baste to Juicy Perfection - October 3, 2026
- Recipe for Boneless Cross Rib Roast: Slow-Roasted Beef with Herb Crust - October 3, 2026
- Hamburgers in Sauce Recipe Crock Pot: Slow-Cooked Savory Delight - October 3, 2026