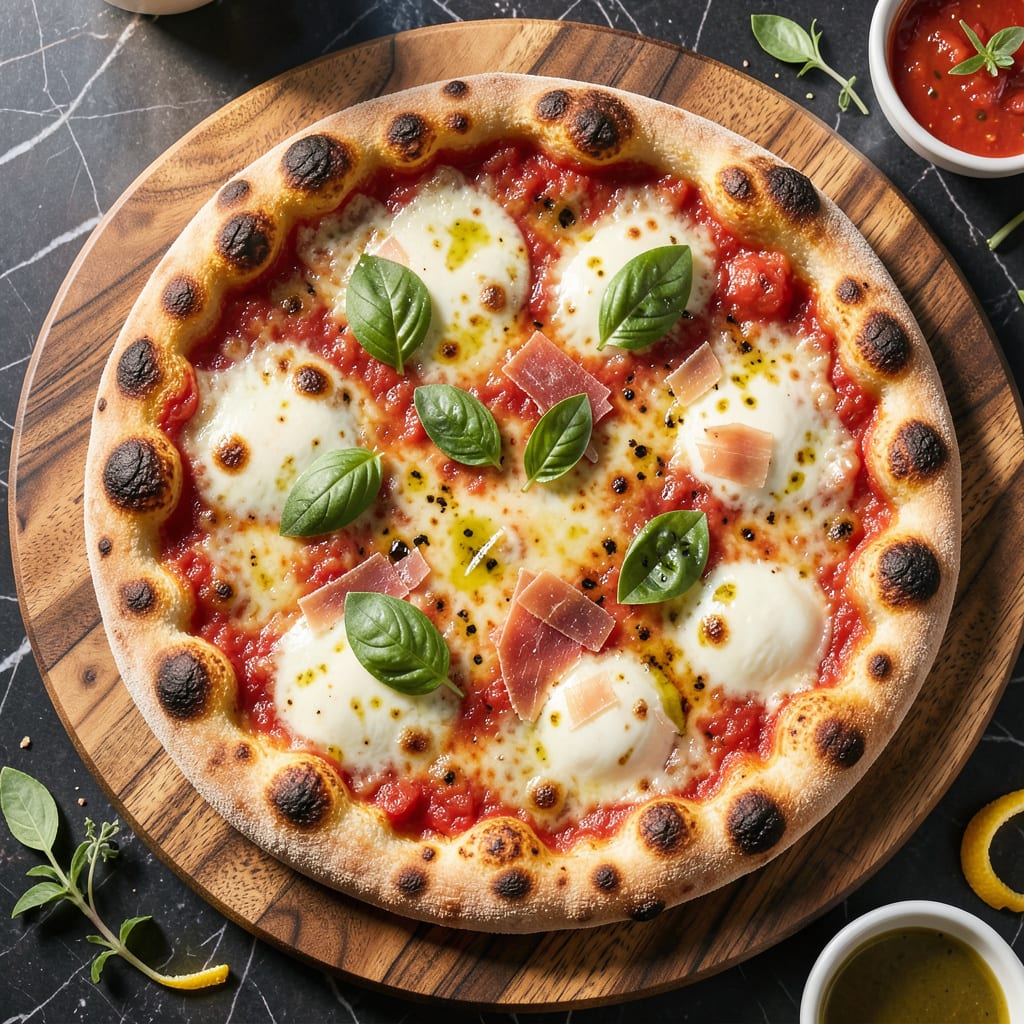
Let me tell you something—great pizza starts with the crust, and most home cooks are missing a few simple tricks that make all the difference. I’ve spent years perfecting my method, and it’s not about fancy equipment or complicated techniques. The real secret? Giving your dough time to develop flavor and using a few unexpected ingredients to boost that base.
Here’s the thing—most pizza dough recipes focus on speed, but flavor comes from patience. I let my dough ferment for at least 24 hours in the fridge, which develops complex flavors and creates that perfect chewy-crispy texture. A touch of honey in the dough caramelizes during baking, adding depth and helping achieve that golden brown color we all crave. And don’t skip the olive oil—it makes the crust tender while helping it crisp up beautifully.
The cooking method matters just as much as the dough itself. I swear by my cast-iron skillet for achieving that pizzeria-quality crust at home. Get it screaming hot before adding your dough, then finish under the broiler for just 2-3 minutes. This creates a crust that’s crispy on the bottom, airy and chewy inside, with those beautiful leopard-spotted bubbles we all love. It’s the kind of crust that makes people pause mid-bite and ask “Wait, you made this?”
But we’re not done yet. The final touch happens after baking—brush that hot crust with garlic-infused olive oil and sprinkle with flaky sea salt. This adds another layer of flavor and texture that takes your pizza from good to “I could eat this every night.” Whether you’re making a classic margherita or loading it up with toppings, these techniques will transform your pizza game forever.
📚 In This Guide
- What You’ll Need
- Instructions
- Tips and Common Mistakes
What Youll Need
- ● For the dough: 2 ½ cups (300g) bread flour or 00 flour (for chewier texture 💡)
- ● 1 tsp (5g) instant yeast (or 2 ¼ tsp active dry yeast if proofing)
- ● 1 tsp (6g) fine sea salt (adjust to taste)
- ● 1 tbsp (15ml) extra-virgin olive oil (cold-pressed for flavor ✨)
- ● 1 cup (240ml) warm water (105–110°F / 40–43°C)
- ○ Optional: 1 tbsp (12g) honey or sugar (for browning)
- ○ Optional: 1 tsp (3g) garlic powder or dried herbs (oregano, basil)
- ● Tools & equipment: Stand mixer with dough hook or large mixing bowl + wooden spoon
- ● Kitchen scale (for precise measurements 🎯)
- ● Plastic wrap or damp towel (for proofing)
- ● Pizza stone/steel or inverted baking sheet (for crispiness 🔥)
- ● Pizza peel or parchment paper (for easy transfer)
- ○ Rolling pin (optional—hand-stretching works too!)
- ● Pastry brush (for oil/garlic butter glaze)
- ● Prerequisites: 2–24 hours for cold proofing (flavor booster! ⏰)
- ● 30–60 minutes to bring dough to room temp before shaping
- ● Oven preheated to 500°F (260°C) or higher (the hotter, the better!)
Instructions for Better-Tasting Pizza Crust
Transform your homemade pizza crust with these simple techniques that guarantee crispy, flavorful results every time.
Start with Quality Ingredients
Begin by selecting the right foundation for your crust. I always recommend using 00 flour for its fine texture and high protein content, which creates that perfect chewy yet crispy texture. If you can’t find 00 flour, bread flour makes an excellent substitute.
For the liquid, use cold water straight from the fridge—this slows down yeast activity initially, allowing for better gluten development. The water should feel noticeably chilly to the touch. Don’t forget to add fine sea salt to enhance all the flavors in your dough.
Master the Dough Mixing Technique
Combine your ingredients in a large bowl, mixing just until the dough comes together. Here’s the thing—I never use a mixer for pizza dough. Hand-mixing gives you better control over gluten development. The dough should feel slightly sticky but not wet.
Knead the dough for 8-10 minutes on a lightly floured surface until it becomes smooth and elastic. You’ll know it’s ready when you can stretch a small piece thin enough to see light through it without tearing. This windowpane test ensures proper gluten development for that perfect chewy texture.
Implement the Cold Fermentation Method
After kneading, place the dough in a lightly oiled bowl and cover it tightly with plastic wrap. Refrigerate for at least 24 hours, but I’ve found that 48-72 hours yields the best flavor development. The slow, cold fermentation allows complex flavors to develop that simply can’t happen with quick-rise methods.
When you’re ready to use the dough, let it come to room temperature for about 2 hours before shaping. You’ll notice the dough has roughly doubled in size and developed a slightly tangy aroma—that’s exactly what you want for maximum flavor.
Shape and Pre-Bake for Optimal Texture
Shape your dough on a piece of parchment paper, stretching it gently with your fingertips rather than rolling it. This preserves the air bubbles that create those wonderful pockets in the crust. Leave the edges slightly thicker if you prefer a puffy crust, or stretch them thin for a crispier finish.
Here’s my secret: pre-bake the crust for 3-4 minutes in a 500°F oven before adding toppings. This creates a sturdy base that won’t get soggy when you add sauce and cheese. Look for the edges to just begin turning light golden brown—that’s your cue it’s ready for toppings.
Finish with High Heat and Proper Topping Technique
After adding your toppings, return the pizza to the oven and bake at 500°F for 8-12 minutes. The high heat is crucial for achieving that perfect crispy yet chewy texture. Rotate the pizza halfway through baking to ensure even browning.
Watch for the crust to turn a deep golden brown and the cheese to develop some bubbly, slightly charred spots. These visual cues tell you the pizza is done. Let it rest for 2-3 minutes before slicing—this allows the cheese to set slightly and prevents toppings from sliding off.
Tips and Common Mistakes
The difference between good pizza crust and exceptional pizza crust comes down to a few key details. Here’s what I’ve learned from years of perfecting my technique.
Cold Fermentation Secret: The 24-hour minimum refrigeration in Step 3 isn’t just about convenience—it’s where the magic happens. I’ve found that extending to 48-72 hours develops even deeper, more complex flavors. The slow fermentation at cold temperatures allows the yeast to work gradually, creating that slightly tangy, artisanal taste you can’t get with quick-rise methods. Trust me, the wait is worth it.
The Windowpane Test: When kneading your dough for 8-10 minutes in Step 2, don’t just watch the clock. Perform the windowpane test by stretching a small piece of dough—it should be thin enough to see light through without tearing. This ensures proper gluten development for that perfect chewy texture. If it tears, keep kneading for another minute or two.
Pre-Bake Precision: Those 3-4 minutes of pre-baking in Step 4 at 500°F are crucial. Watch for the edges to just begin turning light golden brown—that’s your visual cue. This creates a sturdy base that prevents soggy bottoms when you add toppings. I like to set a timer for 3 minutes, then check every 30 seconds after that.
High Heat Mastery: The 8-12 minutes at 500°F in Step 5 isn’t just about cooking—it’s about creating that perfect crispy-yet-chewy texture. Rotate your pizza halfway through baking to ensure even browning. Look for deep golden brown crust and slightly charred cheese spots as your doneness indicators rather than relying solely on time.
Pro Tips for Make Pizza Crust Taste Better
- The difference between good pizza crust and exceptional pizza crust comes down to a few key details. Here’s what I’ve…
- Cold Fermentation Secret: The 24-hour minimum refrigeration in Step 3 isn’t just about convenience—it’s where the mag…
- The Windowpane Test: When kneading your dough for 8-10 minutes in Step 2, don’t just watch the clock. Perform the win…
Frequently Asked Questions
How long should I let pizza dough rise for the best flavor?
For optimal taste, let your dough rise slowly in the fridge for 24–48 hours (cold fermentation ). This develops deeper flavors! If short on time, a 1–2 hour room-temperature rise works, but flavor won’t be as rich. Pro tip: Use a dough ball per pizza for even rising.
Can I use honey or sugar instead of salt to enhance crust flavor?
Yes! Swap 1 tsp sugar or honey per cup of flour to feed yeast and add subtle sweetness. But don’t skip salt entirely—it balances flavors. Try 1/2 tsp salt + 1 tsp honey for a perfect combo. Avoid over-sweetening; it can caramelize too fast!
Why does my pizza crust taste bland even after adding herbs?
Bland crust often means under-seasoning or rushed fermentation. Boost flavor by: 1) Mixing herbs into the dough (not just on top), 2) Using garlic powder or grated Parmesan in the dough, or 3) Brushing crust with olive oil + salt before baking. Fresh herbs (like basil) burn—add them post-bake!
What’s the best oil for crispier, tastier pizza crust?
Extra-virgin olive oil (EVOO) wins for flavor and crispiness! Brush it on the crust before baking or mix 1–2 tbsp into the dough. For extra crunch, try avocado oil (high smoke point) or infused oils (garlic/chili). Avoid butter—it burns easily.
How do I fix a soggy pizza crust after baking?
Prevent sogginess before baking by: 1) Preheating your pizza stone/steel for 30+ mins, 2) Using less sauce (or pre-cooking it), and 3) Baking at high heat (475°F+). Already soggy? Re-crisp in a dry skillet for 2–3 mins or broil for 1 min—watch closely!
With these simple tweaks—from dough hydration to flavor-packed toppings—your pizza crust can go from forgettable to restaurant-worthy in no time! 🍕 Remember, great crust is all about balance: crispy edges, airy texture, and bold flavor. Now that you’ve got the secrets, it’s time to roll up your sleeves and experiment. Try one new technique on your next pizza night—your taste buds (and dinner guests) will thank you!

Trained in classic French technique but raised on slow-cooked ribs and spicy rubs, she blends culinary skill with smoke and soul.
- Recipe for Boneless Pork Chops in Cast Iron Skillet: Sear and Baste to Juicy Perfection - October 3, 2026
- Recipe for Boneless Cross Rib Roast: Slow-Roasted Beef with Herb Crust - October 3, 2026
- Hamburgers in Sauce Recipe Crock Pot: Slow-Cooked Savory Delight - October 3, 2026