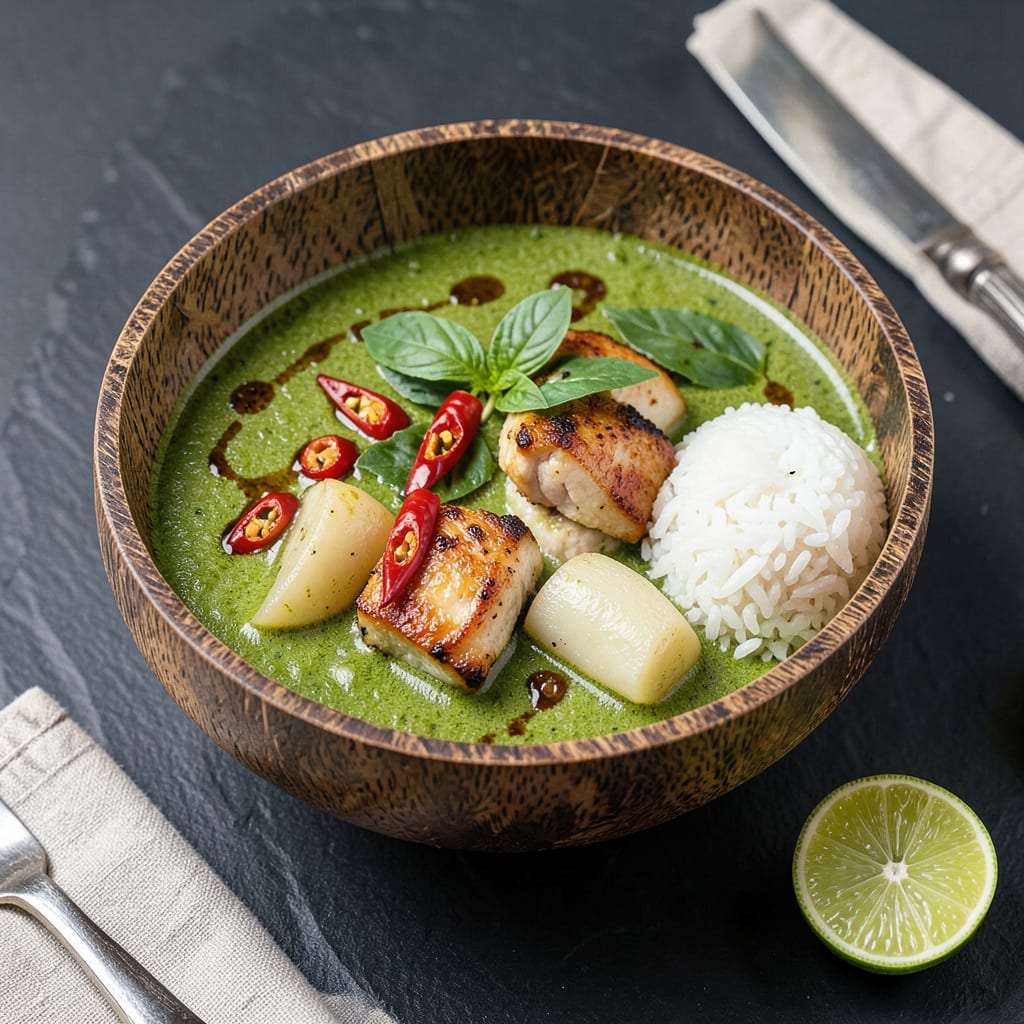
I’ll be real with you—nailing that perfect Thai heat level is what separates good Thai food from the kind that makes you sit up and take notice. After years of experimenting (and a few tears from overzealous chili additions), I’ve cracked the code for balancing spice without losing those vibrant flavors that make Thai cuisine so addictive.
This isn’t about just dumping chili flakes into your dish. We’re talking strategic heat layering—when to add fresh Thai chilies for bright, immediate fire versus when to use chili paste for deep, smoky warmth. I’ve found that timing is everything: add chilies too early and they mellow out; too late and they’ll overwhelm everything else.
The real magic happens when you understand how to balance that heat with Thai cuisine’s holy trinity: coconut milk’s creaminess, lime’s sharp acidity, and palm sugar’s caramel sweetness. I’ve seen too many home cooks either under-season their Thai dishes or make them inedibly spicy—this method gives you complete control over the heat level.
Whether you’re making a fiery jungle curry or a gently spiced coconut soup, these techniques will help you achieve that perfect balance where the heat enhances the flavors rather than masking them. No more guessing games—just confident, delicious Thai cooking every time.
📚 In This Guide
- What You’ll Need
- Instructions
- Tips and Common Mistakes
What Youll Need
- ● Fresh Thai chilies – 5–10 prik kee noo (bird’s eye chilies) for intense heat 🌶️ or 3–5 prik chee fah (sky-pointing chilies) for milder spice. Adjust based on tolerance!
- ● Dried chilies – ½ cup (soaked in warm water for 10 mins if making pastes). Opt for prik haeng (Thai dried chilies) for authentic flavor.
- ● Garlic & shallots – 6 cloves garlic + 3 shallots (peeled; essential for balance).
- ● Fish sauce – 2–3 tbsp nam pla (high-quality, like Red Boat or Tiparos).
- ● Lime juice – 1–2 limes (freshly squeezed; bottled won’t cut it!).
- ● Palm sugar or brown sugar – 1–2 tbsp (to tame the burn).
- ○ Mortar and pestle – Granite preferred (for crushing chilies/pastes). Optional: Mini food processor (less authentic but faster).
- ● Chef’s knife & cutting board – Sharp blade for fine chopping (safety first!).
- ○ Gloves (optional but smart!) – Latex or nitrile to avoid chili burns on hands. 🧤
- ● Small saucepan – For toasting dried chilies (2–3 mins on medium heat).
- ● Tasting spoons – To test heat levels before over-spicing your dish!
- ● Ventilation – Open windows or turn on the exhaust fan (chili fumes sting!).
Instructions
Here’s exactly how to build authentic Thai heat—layer by layer, for that perfect balance of fire and flavor.
Start with Fresh Thai Chilies
Fresh chilies are the foundation of real Thai heat. I always use bird’s eye chilies (prik kee noo) for authentic flavor—they deliver intense, bright heat that dried chilies can’t match. For a standard curry serving four, you’ll want 4-6 chilies for medium heat, or 8-10 if you’re serious about spice.
Slice them thinly on the diagonal—this exposes more surface area and releases their fiery oils. Here’s the thing: the seeds and white pith contain most of the capsaicin, so leave them in for maximum heat. If you’re sensitive, remove some seeds but keep the pith. Always wash your hands immediately after handling!
Bloom the Chilies in Hot Oil
Heat 2 tablespoons of neutral oil in a wok or skillet over medium-high heat until it shimmers. Add your sliced chilies and stir constantly for 30-45 seconds until they turn bright red and become fragrant. This blooming process unlocks their essential oils and mellows the raw bite.
Watch carefully—you want the chilies to sizzle but not burn. Burnt chilies taste bitter and ruin your dish. As soon as you smell that sharp, spicy aroma (you’ll know it when you smell it!), remove the pan from heat. This infused oil will carry heat throughout your entire dish.
Build Heat in Layers
Real Thai heat isn’t just about chilies—it’s about layering different spicy elements. After your chilies, add 1 tablespoon of Thai shrimp paste (if using) and cook for another 30 seconds until it becomes aromatic. Then incorporate 1 stalk of lemongrass (bruised) and 3 kaffir lime leaves (torn) to build complexity.
Now add your main ingredients (like curry paste or stir-fry components) and cook them in this spicy foundation. The heat will penetrate everything as it cooks. For curries, simmer for at least 10 minutes to let the flavors meld. For stir-fries, cook at high heat for 3-5 minutes to maintain crispness while absorbing the spice.
Balance with Acid and Sweetness
Here’s the secret to perfect Thai heat: it should burn but also make you want another bite. After your dish cooks, stir in 1-2 tablespoons of palm sugar and 2 tablespoons of lime juice. The sugar rounds out the sharp edges of the heat while the acidity cuts through the richness.
Taste as you go—you’re aiming for a harmonious balance where the heat hits first, then the sweetness soothes, and finally the acidity refreshes your palate. This is what makes Thai food addictive! If it’s too spicy, add a splash of coconut milk (for curries) or more lime juice (for stir-fries).
Finish with Fresh Herbs and Texture
Just before serving, stir in ¼ cup of Thai basil and 2 tablespoons of chopped cilantro. The fresh herbs add brightness and contrast to the heat. For texture, I love adding crushed roasted peanuts or fried shallots on top—they provide a satisfying crunch that distracts from the burn.
Serve immediately with steamed jasmine rice—it’s the perfect neutral base to showcase your spicy creation. The rice also helps control the heat level for each bite. Remember, in Thailand we say “gin laew reu yang?” (“eat now or wait?”) because the flavors develop even more after sitting for 5-10 minutes!
Tips and Common Mistakes
Here’s what separates good Thai heat from the kind that makes your taste buds dance with perfect balance.
Chili Preparation: The diagonal slicing in Step 1 isn’t just for looks—it creates maximum surface area to release those fiery oils. I’ve found that cutting bird’s eye chilies at a 45-degree angle (about 1/8-inch thick) gives you the perfect balance of heat distribution and visual appeal. The seeds and white pith are non-negotiable for authentic heat, but if you must reduce spice, remove only half the seeds while keeping all the pith—this maintains the essential chili flavor without overwhelming heat.
Blooming Technique: Those 30-45 seconds in Step 2 are everything! The moment you add chilies to that shimmering oil at medium-high heat, start your timer and don’t walk away. You’re looking for that exact moment when the chilies turn bright red and the oil becomes fragrant—this is when the capsaicin fully infuses into the oil. If you smell any bitterness, you’ve gone too far. Remove from heat immediately and let the residual heat finish the blooming process off-heat to prevent burning.
Layering Heat: The 30 seconds for shrimp paste in Step 3 might seem short, but it’s the perfect window to develop its funky depth without burning. Here’s the chef’s trick: after adding the paste, immediately stir it into the oil to create a thin film across the pan’s surface. This ensures even cooking and prevents hot spots that could scorch the paste. When you add the lemongrass and kaffir lime leaves, bruise the lemongrass by bending it sharply and tear the lime leaves to release their aromatic oils—this makes all the difference in flavor infusion.
Flavor Development: That 5-10 minute resting period in Step 5 isn’t optional—it’s when the magic happens! As the dish sits, the heat mellows slightly while the flavors marry together. I always taste immediately after cooking, then again after 5 minutes. You’ll notice how the heat becomes more integrated with the other flavors, creating that signature Thai balance where the spice enhances rather than overpowers. This resting time also allows the rice to absorb some of the sauce, creating perfect bites.
Pro Tips for Make Thai Food Spicy
- Here’s what separates good Thai heat from the kind that makes your taste buds dance with perfect balance.
- Chili Preparation: The diagonal slicing in Step 1 isn’t just for looks—it creates maximum surface area to release tho…
- Blooming Technique: Those 30-45 seconds in Step 2 are everything! The moment you add chilies to that shimmering oil a…
Frequently Asked Questions
Got burning questions about spicing up your Thai dishes? Here’s what most home cooks ask—with quick, practical answers to keep your kitchen adventures smooth and flavorful!
How do I adjust spice levels after cooking if my dish is too mild?
Add fresh heat! Stir in nam prik pao (Thai chili jam) for sweetness + kick, or mix in finely chopped bird’s eye chilies (seeds included). For soups like tom yum, drop in a chili paste (like sambal oelek) and simmer 2–3 minutes. Taste as you go!
Can I use dried chilies instead of fresh? What’s the conversion?
Yes! Dried chilies (like chilies de árbol) are 2–3x more potent. Swap 1 fresh Thai chili for ½ tsp dried chili flakes or 1 small dried chili (soaked + rehydrated). Toast dried chilies in a dry pan for 30 seconds to boost flavor before grinding.
Why does my spicy Thai food taste bitter or harsh?
Overheated chilies or seeds burn easily, turning bitter. Fix it: Balance with palm sugar (or brown sugar) and a splash of fish sauce or lime juice. Pro tip: Add chilies late in cooking (last 5 minutes) to preserve bright heat without bitterness.
What’s the best substitute for Thai chilies if I can’t find them?
Use serrano peppers (1:1 ratio) for similar heat, or jalapeños (2:1 ratio—milder). For smoky depth, add ½ tsp cayenne + ¼ tsp smoked paprika per chili. Avoid habaneros unless you love extreme heat—they’re 5x hotter!
How long should I cook chilies to maximize flavor without losing heat?
For curries/stir-fries: Sauté whole chilies in oil for 30–60 seconds until fragrant (remove before eating if you prefer milder heat). For soups: Simmer crushed chilies 5–10 minutes to infuse flavor. Never boil—high heat destroys capsaicin’s complexity!
Mastering the art of spicy Thai food is all about balance—layering heat with bold flavors like lime, herbs, and umami. Whether you’re using fiery prik kee noo or a homemade chili paste, start small, taste often, and trust your palate! 🌶️
Now that you’ve got the tools, why not put them to the test? Pick a classic dish like tom yum soup or pad kra pao and experiment with your newfound spice skills. Happy cooking—and don’t forget the rice! 🍚✨

Trained in classic French technique but raised on slow-cooked ribs and spicy rubs, she blends culinary skill with smoke and soul.
- Recipe for Boneless Pork Chops in Cast Iron Skillet: Sear and Baste to Juicy Perfection - October 3, 2026
- Recipe for Boneless Cross Rib Roast: Slow-Roasted Beef with Herb Crust - October 3, 2026
- Hamburgers in Sauce Recipe Crock Pot: Slow-Cooked Savory Delight - October 3, 2026