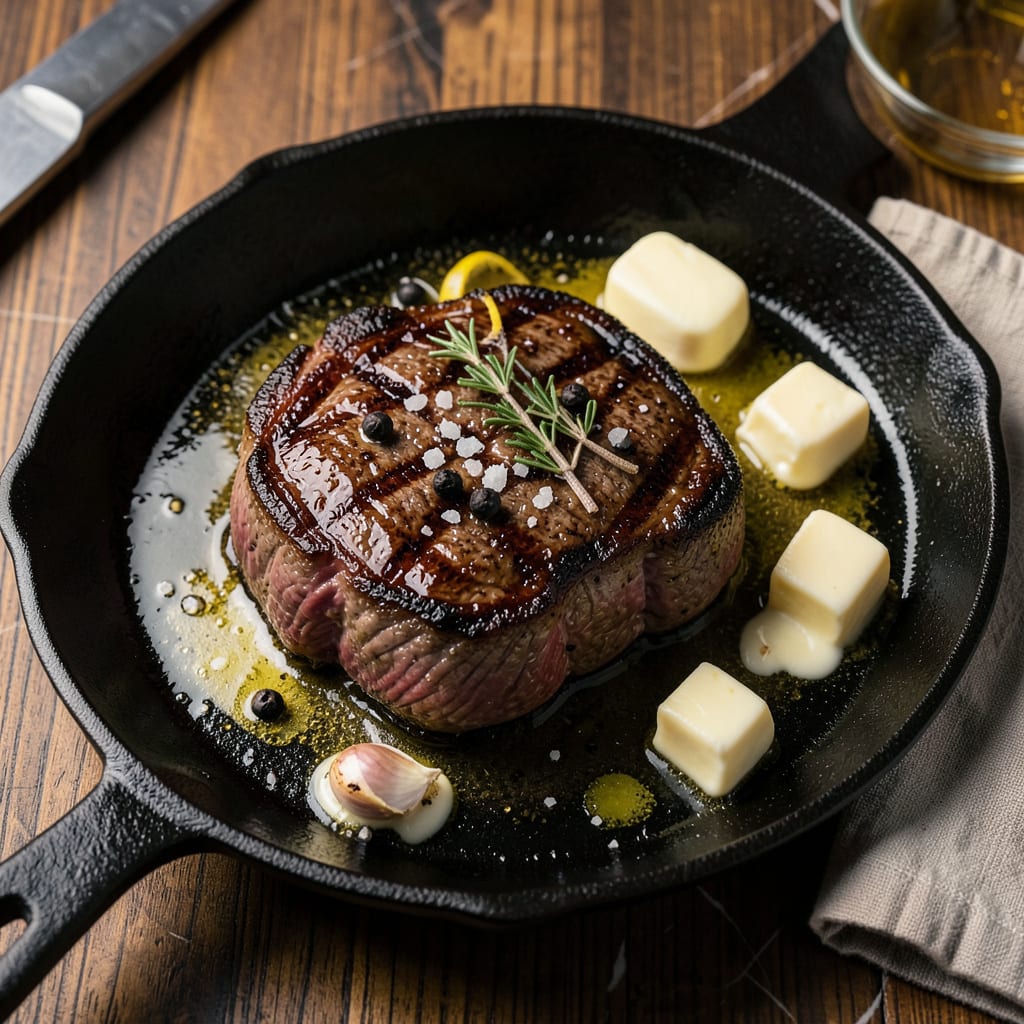
Perfectly seared steak with rich, nutty brown butter is a restaurant-quality achievement any home cook can master. The secret lies in controlling heat and understanding butter’s delicate balance—too hot and it burns, too cool and it pools. I’ve spent years perfecting this technique, from backyard cookouts to professional kitchens, and the difference is night and day.
Butter burns at 300°F, far below the ideal steak-searing temperature of 400-450°F. The solution isn’t avoiding butter—it’s using it strategically. Start with high-smoke-point oil to build your crust, then introduce butter during the final basting phase when temperatures are more controlled. This creates that coveted golden-brown crust while infusing the steak with butter’s rich flavor.
My foolproof method combines French technique with pitmaster precision. First, sear the steak in oil until a deep crust forms. Then reduce heat, add butter, and baste continuously with aromatic herbs and garlic. The result is a steak with a crispy, caramelized exterior and buttery depth that penetrates every bite.
This technique works for any cut, from ribeyes to filets, and transforms a simple steak into a centerpiece worthy of special occasions. The best part? It requires no special equipment—just a heavy pan, good butter, and attention to temperature. Let’s break down the process step by step.
📚 In This Guide
- What You’ll Need
- Instructions
- Tips and Common Mistakes
What Youll Need
- ● Steak: 1–2 cuts (1–1.5 inches thick), like ribeye, NY strip, or filet mignon (room temperature).
- ● Butter: 2–4 tbsp unsalted (cold, cubed for even melting).
- ● Oil: 1–2 tbsp high-smoke-point oil (avocado, grapeseed, or refined coconut oil).
- ● Pan: Heavy-bottomed skillet (cast iron or stainless steel, 10–12 inches).
- ● Tongs: Long-handled, heat-resistant (no forks—they pierce the meat!).
- ● Thermometer: Instant-read meat thermometer (for perfect doneness).
- ● Basting spoon: Heatproof (or a large metal spoon).
- ● Paper towels: To pat steak very dry (key for searing!).
- ● Kosher salt & black pepper: Coarse salt for seasoning (1 tsp per side).
- ○ Optional aromatics: 2 garlic cloves (crushed), 1–2 sprigs fresh thyme/rosemary.
- ● Heat source: Stovetop with good ventilation (butter can smoke!).
- ● Resting plate: Warm plate or cutting board (to rest steak post-cook).
Instructions
Mastering the technique of butter basting transforms steak from good to extraordinary—here’s the precise method.
Select the Right Butter and Prepare Properly
Begin with high-quality unsalted butter, as salted butter contains moisture that accelerates burning. Cut 4 tablespoons of cold butter into 1-tablespoon portions and return to the refrigerator. The cold temperature is crucial—it allows you to control the melting process gradually rather than all at once.
Clarified butter or ghee can be used as an alternative, as they contain no milk solids (the primary cause of burning). If using regular butter, the cold, portioned approach mimics this effect by limiting the exposure of milk solids to direct heat at any given time.
Achieve the Perfect Sear Before Adding Butter
Heat your skillet (preferably cast iron or stainless steel) over medium-high heat until it reaches 400°F—a drop of water should sizzle and evaporate immediately. Add a high-smoke-point oil like avocado or grapeseed, just enough to coat the pan lightly. The oil creates a protective barrier between the butter and the pan later.
Sear the steak for 2-3 minutes per side until a deep, golden-brown crust forms. This crust isn’t just for flavor—it acts as an insulating layer that helps regulate the butter’s temperature during basting. The steak should release easily from the pan when properly seared; if it sticks, it’s not ready to flip.
Control Heat and Baste with Precision
Reduce the heat to medium-low and immediately add the first portion of cold butter. As it melts, tilt the pan slightly and use a large spoon to continuously baste the steak with the foaming butter. The key is maintaining a temperature where the butter foams actively but never turns brown—that’s the threshold before burning.
Add subsequent butter portions only as the previous one fully incorporates into the pan sauce. I maintain a rhythm of 30 seconds of basting between each addition. The butter should remain a pale golden color throughout. If you notice the foam subsiding or the butter pooling rather than emulsifying, the heat is too low; if it darkens or smells nutty, it’s too high.
Monitor Visual and Auditory Cues
Listen for a steady, gentle sizzle—the sound should resemble light rain, not aggressive frying. Visually, the butter should form a consistent foam layer that coats about one-third of the steak’s height in the pan. The foam’s color is your most reliable indicator: pure white means perfect temperature; any hint of tan means you’re approaching the burn zone.
I use the “spoon test” as a final check: dip a clean spoon into the butter and lift it. The butter should coat the back of the spoon smoothly, with no brown specks. If you see any sediment or discoloration, immediately remove the pan from heat and transfer the steak to a resting plate—the butter has begun to break down.
Rest and Utilize the Brown Butter Solids
Transfer the steak to a cutting board and tent loosely with foil. Pour the remaining butter from the pan over the steak—those browned milk solids that settled at the bottom (if any) contain intense flavor. Let the steak rest for 5-10 minutes; this allows the butter to absorb into the crust while the juices redistribute.
For presentation, I strain the remaining pan butter through a fine-mesh sieve and drizzle the clear, golden liquid over the sliced steak. The solids can be discarded or saved for enhancing sauces—they’re packed with concentrated beef and butter flavor, though they’ll have a slightly bitter edge from the high heat exposure.
Tips and Common Mistakes
The difference between perfectly basted steak and burnt butter comes down to precision and observation. Here’s what separates success from failure.
Heat Control: The transition from medium-high to medium-low heat in Step 3 is critical. I maintain my pan at exactly 400°F during searing, then reduce to medium-low for basting—the butter’s ideal foaming temperature. Use an infrared thermometer to verify your pan’s actual temperature, as stovetop dials are notoriously inaccurate. The 30-second basting rhythm between butter additions creates a controlled emulsification process that prevents overheating.
Butter Preparation: In Step 1, cutting the 4 tablespoons of butter into individual portions isn’t just about portion control—it’s about temperature regulation. Each cold pat maintains the pan’s temperature equilibrium as it melts. For even better results, place your portioned butter on a chilled plate before adding to the pan. This extra step ensures the butter stays cold longer during the basting process.
Visual Cues: The foam color during Step 4 reveals everything about your butter’s state. Pure white foam indicates perfect temperature, while any tan hue means you’ve crossed into the burn zone. I use the “one-third height” measurement as my visual benchmark—the foam should consistently reach this level on the steak’s sides. If it drops below this, your heat is too low and the butter isn’t emulsifying properly.
Equipment Selection: A heavy cast iron skillet is non-negotiable for this technique. Its heat retention properties create the even temperature distribution needed for both the initial 2-3 minute sear and subsequent basting. The skillet’s weight also helps maintain temperature when cold butter is added, preventing the sudden drops that lead to uneven cooking and potential burning.
Pro Tips for Not Burn Butter When Cooking Steak
- The difference between perfectly basted steak and burnt butter comes down to precision and observation. Here’s what s…
- Heat Control: The transition from medium-high to medium-low heat in Step 3 is critical. I maintain my pan at exactly …
- Butter Preparation: In Step 1, cutting the 4 tablespoons of butter into individual portions isn’t just about portion …
Frequently Asked Questions
Why does butter burn so easily when cooking steak?
Butter burns quickly because it contains milk solids that brown at 250°F (121°C) and burn at 300°F (149°C). Clarified butter (ghee) removes these solids, raising the smoke point to 450°F (232°C). If using regular butter, keep heat at medium and baste constantly to prevent scorching.
Can I use oil instead of butter to avoid burning?
Yes! Oils like avocado (520°F smoke point) or refined coconut oil (450°F) handle high heat better. For butter flavor, try a 50/50 butter-oil blend—it browns beautifully without burning. Just add butter at the end for that rich finish.
How long should I baste the steak with butter?
Baste for the last 1–2 minutes of cooking (medium-rare) or 2–3 minutes (well-done). Use a spoon to drizzle melted butter continuously over the steak. Remove from heat if butter starts foaming aggressively—it’s about to burn!
What’s the best pan for butter-basting steak?
A heavy stainless steel or cast-iron skillet distributes heat evenly, reducing hot spots that burn butter. Avoid nonstick—it can’t handle high heat needed for a good sear. Preheat the pan 3–5 minutes before adding oil/butter.
My butter turned brown (or black)—is the steak ruined?
Brown butter adds nutty flavor (great for sauces!), but black flecks mean it’s burnt. Scrape off charred bits and taste—if bitter, trim the steak’s crust. Next time, lower heat and use clarified butter or ghee. Pro tip: Add a splash of lemon juice to mask slight burnt tastes!
Mastering the art of butter-basting steak without burning it is all about temperature control, timing, and a little patience. By using clarified butter, monitoring heat, and basting like a pro, you’ll lock in rich, nutty flavors—without the bitter burn. 🎯
Now that you’ve got the technique down, why not put it to the test? Fire up that pan, grab your favorite cut, and cook with confidence. Your perfectly seared, buttery steak is just minutes away! 🥩✨

Trained in classic French technique but raised on slow-cooked ribs and spicy rubs, she blends culinary skill with smoke and soul.
- Recipe for Boneless Pork Chops in Cast Iron Skillet: Sear and Baste to Juicy Perfection - October 3, 2026
- Recipe for Boneless Cross Rib Roast: Slow-Roasted Beef with Herb Crust - October 3, 2026
- Hamburgers in Sauce Recipe Crock Pot: Slow-Cooked Savory Delight - October 3, 2026