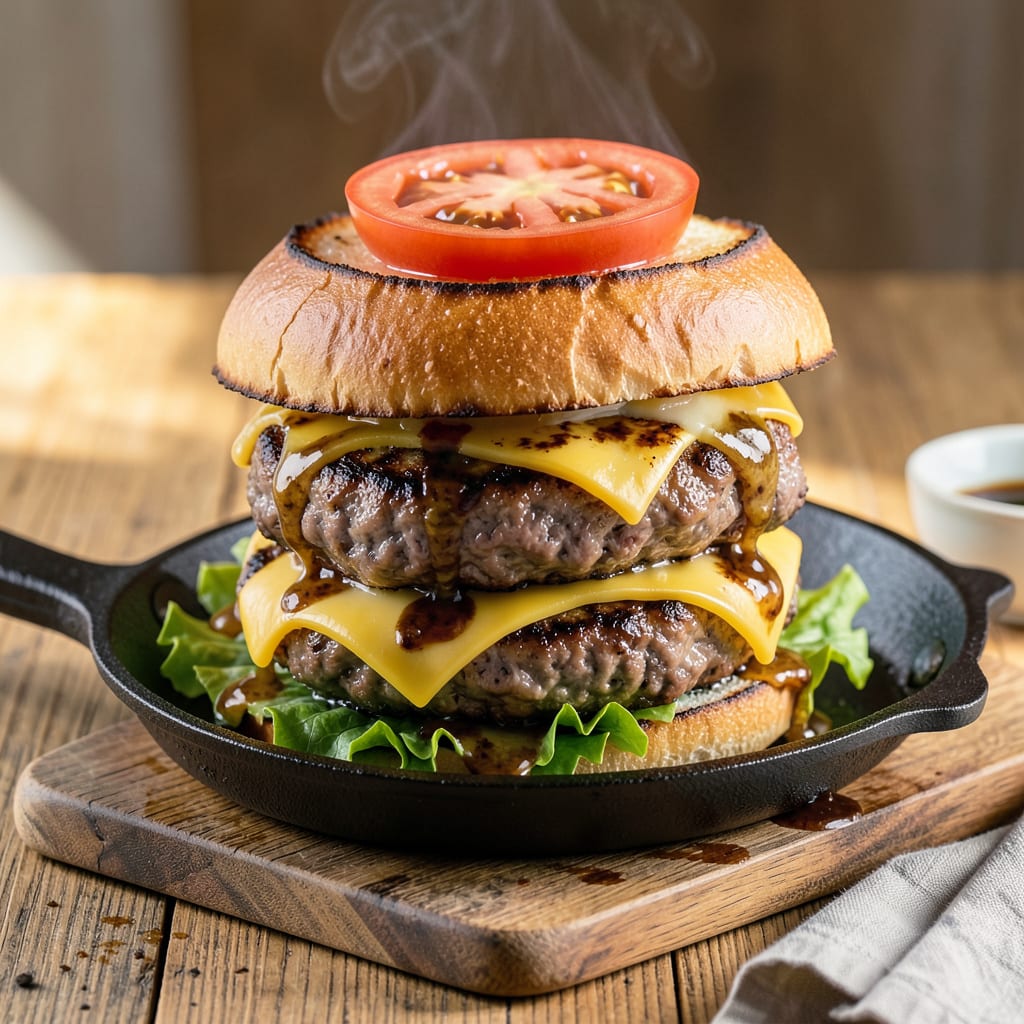
Let me tell you something—nothing beats a perfectly pan-fried burger with a crispy crust and juicy center. But here’s the thing: most home cooks end up with charred outsides and raw insides. I’ve burned through my fair share of patties (literally) before mastering this foolproof technique that delivers juicy results every single time.
The secret isn’t fancy ingredients—it’s all about heat control and timing. I learned this the hard way after ruining what felt like a pound of good beef. Now I know exactly when to adjust the flame, how long to let the patties rest before flipping, and why your skillet choice makes all the difference. This method works whether you’re using store-bought patties or homemade blends.
What you’ll get is a burger with a golden-brown crust that gives way to perfectly cooked beef inside. No more guessing when to flip or worrying about smoke alarms. The technique even leaves you with a flavorful fond in the pan—perfect for toasting buns or making a quick pan sauce.
Here’s where it gets interesting—this same method works for different burger sizes and doneness preferences. Whether you like yours medium-rare or well-done, I’ll show you how to nail it without the burn. Let’s get that skillet hot.
📚 In This Guide
- What You’ll Need
- Instructions
- Tips and Common Mistakes
What Youll Need
- ● Ground beef (80/20 fat ratio for juiciness) – 1 lb per 4 burgers
- ● Salt & black pepper – 1 tsp each (or to taste)
- ● Neutral oil (like vegetable or canola) – 1-2 tbsp for the pan
- ● Heavy skillet (cast iron or stainless steel) – 10-12 inches wide
- ● Spatula (thin, metal for easy flipping)
- ○ Meat thermometer (optional but highly recommended for precision)
- ○ Burger buns – lightly toasted (optional but delicious!)
- ○ Cheese slices (optional, if making cheeseburgers)
- ● Toppings (lettuce, tomato, onions, pickles, etc.) – to taste
Instructions
Here’s the foolproof method I use to get perfectly cooked burgers with no burnt outsides.
Choose the Right Pan and Heat Level
Start with a heavy-bottomed skillet—cast iron works best because it holds heat evenly and prevents hot spots that cause burning. Place your pan over medium heat and let it preheat for 3-4 minutes before adding anything. You’ll know it’s ready when you can hold your hand about 2 inches above the pan and feel steady warmth (but not discomfort).
This moderate heat is crucial. Too high and you’ll burn the outside before the inside cooks; too low and you’ll steam the burger instead of searing it. I’ve found that medium heat gives you that perfect balance—a golden crust without any charred bits. If your stove runs hot, you might need to adjust slightly lower.
Form Patties with the Right Technique
Divide your ground beef into equal portions (about 4 ounces each for standard burgers) and gently form them into patties. Here’s the key: don’t overwork the meat. Press just enough to hold the patty together, but don’t compact it tightly. I like to make a slight dimple in the center of each patty with my thumb—this prevents the burgers from puffing up into meatballs as they cook.
Season both sides generously with salt and pepper right before cooking. I wait until this moment because salt draws out moisture, and we want to keep these burgers as juicy as possible. The patties should be about ¾-inch thick—thick enough to stay juicy but thin enough to cook through without burning.
Cook with Patience and Precision
Add your patties to the preheated pan, leaving at least 1 inch between them so they don’t steam. Don’t press down on the burgers with your spatula—this squeezes out all the precious juices we’re working to preserve. Let them cook undisturbed for 3-4 minutes until you see the edges turning from pink to brown and juices start to pool on the surface.
This is when most people make the burning mistake. Resist the urge to peek or move the burgers. They’ll release naturally from the pan when they’re ready to flip. When you see that first bead of blood appear on the top surface, that’s your signal. Flip once and only once—this ensures even cooking without drying out the meat.
Monitor Temperature for Perfect Doneness
After flipping, cook for another 3-4 minutes for medium-rare to medium doneness. Here’s how I check without cutting into the burger: press the center gently with your finger. A rare burger feels soft and squishy, medium feels springy but gives slightly, and well-done feels firm. For precise results, use an instant-read thermometer inserted sideways into the patty.
Remove the burgers when they reach 130-135°F for medium-rare, 140-145°F for medium, or 160°F for well-done. They’ll continue cooking for a few degrees after you take them off the heat. If you’re adding cheese, place it on the patties during the last minute of cooking and cover the pan briefly to melt it.
Rest Before Serving
Transfer the cooked burgers to a clean plate and let them rest for 2-3 minutes before serving. This short waiting period allows the juices to redistribute throughout the meat instead of running out onto your plate when you take the first bite. I know it’s tempting to dig in right away, but this step makes the difference between a good burger and a great one.
While they rest, you can toast your buns in the same pan if you like—they’ll soak up all those delicious beefy flavors. Serve your burgers immediately while they’re still warm. Each bite should be juicy throughout, with a flavorful crust on the outside but no hint of burning. The meat should be tender and moist, not dry or tough.
Tips and Common Mistakes
Let me share the hard-won lessons that transformed my burgers from good to restaurant-quality every single time.
Heat Control: That 3-4 minutes of preheating your pan in Step 1 isn’t just a suggestion—it’s the foundation of perfect burgers. I learned this after years of inconsistent results. Cast iron needs this time to develop an even heat distribution that prevents hot spots. Test it with your hand as described: if you can’t hold it there for 3 seconds, you’re ready. This moderate heat creates that ideal golden crust without any burnt edges we’re all trying to avoid.
Patty Formation Secret: The ¾-inch thickness mentioned in Step 2 is your sweet spot. I used to make thicker patties thinking they’d stay juicier, but they ended up burning on the outside before cooking through. That slight dimple in the center is your insurance policy against the “meatball effect” as the patties cook. Press gently when forming—think of shaping a snowball, not packing one.
The Flip Timing: Those 3-4 minutes per side in Steps 3 and 4 are critical. Here’s what changed everything for me: wait for that first bead of blood to appear on the top surface before flipping. This visual cue is more reliable than any timer. When you see it, you’ll know the proteins have started to set properly on the bottom, preventing sticking and ensuring that perfect crust.
Resting Matters: I know those 2-3 minutes of resting in Step 5 feel like torture when you’re hungry, but they make all the difference. The juices need this time to redistribute throughout the meat. Cut into a burger too soon and you’ll watch all that precious moisture escape onto your plate. I set a timer to resist the temptation—it’s worth the wait for that first juicy bite.
Pro Tips for Pan Fry Burgers Without Burning
- Let me share the hard-won lessons that transformed my burgers from good to restaurant-quality every single time.
- Heat Control: That 3-4 minutes of preheating your pan in Step 1 isn’t just a suggestion—it’s the foundation of perfec…
- Patty Formation Secret: The ¾-inch thickness mentioned in Step 2 is your sweet spot. I used to make thicker patties t…
Frequently Asked Questions
How long should I pan-fry a burger on each side?
For medium-rare burgers, cook 3-4 minutes per side over medium heat. For medium, aim for 4-5 minutes per side. Always check internal temp—160°F for ground beef (use a meat thermometer!). Thicker patties? Add 1-2 extra minutes.
Can I pan-fry frozen burgers without thawing?
Yes! Cook 5-7 minutes per side on medium-low heat, covered, to prevent burning. Flip only once—patience is key! Thawed burgers cook more evenly, so defrost overnight in the fridge for best results.
Why do my burgers stick to the pan?
Three common culprits: cold pan, not enough oil, or lean meat. Heat the pan 2-3 minutes before adding burgers, use 1 tbsp high-smoke-point oil (like avocado or canola), and avoid pressing patties. Cast iron or stainless steel works best!
What’s the best oil for pan-frying burgers?
Opt for oils with a high smoke point (400°F+): avocado, canola, or refined coconut oil. Butter burns easily—save it for basting! For extra flavor, try a light olive oil or add a pat of butter at the end.
How do I keep burgers juicy without burning them?
Four pro tips:
- Use 80/20 ground beef (fat = flavor + moisture).
- Don’t overhandle the meat—form patties gently.
- Let burgers rest 5 minutes after cooking.
- Cover the pan briefly if they brown too fast.
Mastering the art of pan-frying burgers without burning them is all about patience, heat control, and timing. 🌟 With the right pan, fat, and technique—like resisting the urge to press down or flipping just once—you’ll lock in juicy, flavorful results every time. No more dry, charred patties!
Now that you’ve got the know-how, fire up that stove and put these tips to the test! For extra confidence, try experimenting with different fat percentages or seasonings next. Happy cooking—your perfect burger awaits! 🍔

Trained in classic French technique but raised on slow-cooked ribs and spicy rubs, she blends culinary skill with smoke and soul.
- Recipe for Boneless Pork Chops in Cast Iron Skillet: Sear and Baste to Juicy Perfection - October 3, 2026
- Recipe for Boneless Cross Rib Roast: Slow-Roasted Beef with Herb Crust - October 3, 2026
- Hamburgers in Sauce Recipe Crock Pot: Slow-Cooked Savory Delight - October 3, 2026