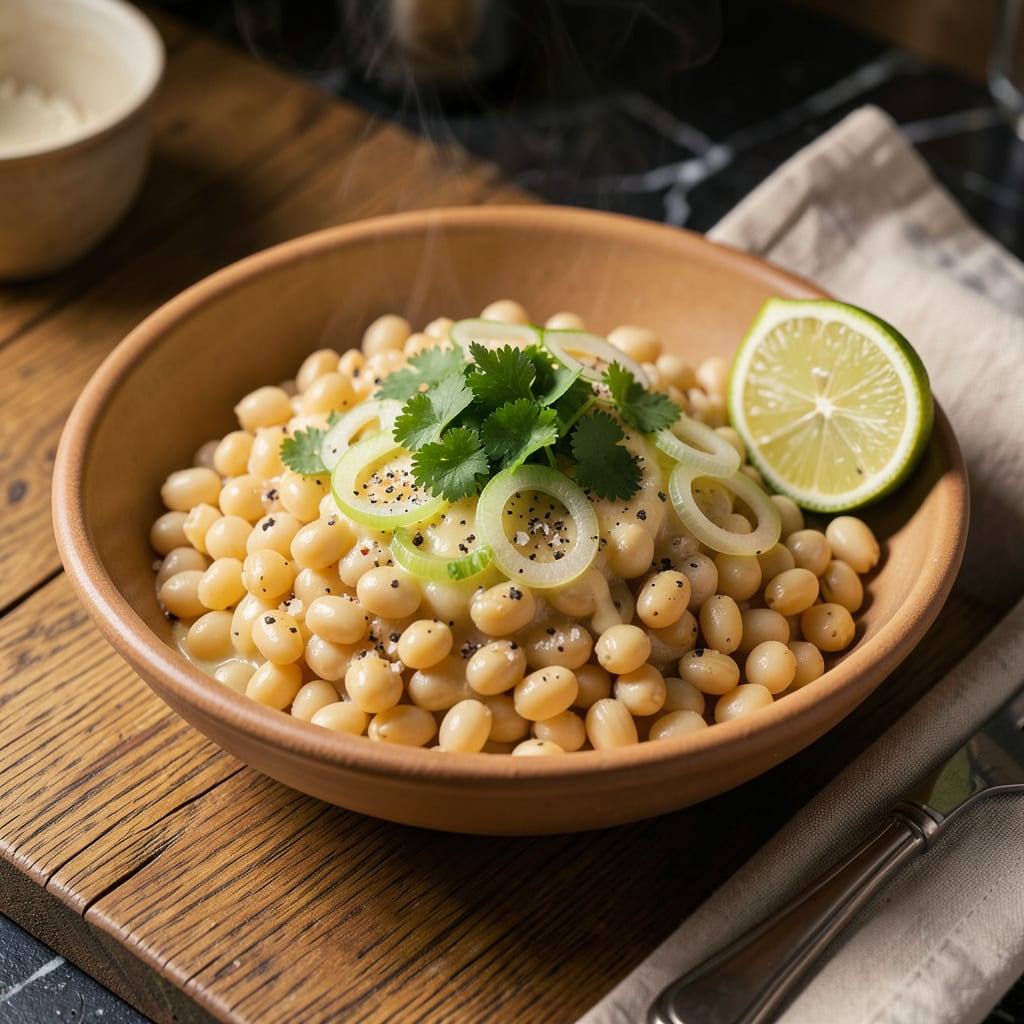
Let me tell you about the easiest side dish you’re not making enough—canned hominy. I grew up eating this stuff at family cookouts, and it’s the ultimate no-fuss ingredient that transforms into something special with just 10 minutes of attention. The key is treating it like pasta, not just heating it straight from the can.
What makes hominy great is its versatility. You can boil it until plump and tender, then toss with butter and salt for a simple side. Or sauté it with onions and peppers for extra flavor. I love adding a pinch of smoked paprika when I’m feeling fancy—it brings out hominy’s natural corn sweetness without overpowering it.
This isn’t just a side dish though. Hominy works in soups, stews, or even as a base for grain bowls. The texture is what sells it—each kernel stays firm but gets this pleasant chewiness that soaks up flavors beautifully. Leftovers keep well for days, making it perfect for meal prep.
Whether you’re new to hominy or just need a reminder of how good it can be, this method delivers. No special skills required, just a can opener and 10 minutes. Let’s get that pot on the stove.
📚 In This Guide
- What You’ll Need
- Instructions
- Tips and Common Mistakes
What Youll Need
- ● 1 can (15–29 oz) hominy – White or yellow, drained and rinsed (check for low-sodium if preferred).
- ● 1–2 tbsp butter or oil – For richness (olive oil or vegan butter work too!).
- ● ½ tsp salt – Adjust to taste (skip if using salted butter).
- ● ¼ tsp black pepper – Freshly ground for best flavor.
- ● 1 small skillet or saucepan – Non-stick or stainless steel (10–12 inches ideal).
- ● Wooden spoon or spatula – For gentle stirring.
- ● Colander – To drain and rinse the hominy.
- ● ½ tsp garlic powder or 1 minced clove
- ● ¼ cup chopped cilantro or green onions
- ● 1 tbsp lime juice or hot sauce
- ● ¼ cup crumbled cheese (cotija, feta, or cheddar)
Instructions
Here’s exactly how to transform canned hominy into a delicious side dish in minutes.
Drain and Rinse the Hominy
Open the can of hominy and pour it into a fine-mesh strainer. Rinse thoroughly under cold running water for about 30 seconds, using your hands to gently agitate the kernels. This removes the canning liquid and any excess starch that could make your dish gummy.
Give the strainer a good shake to remove all excess water. I like to pat the hominy dry with a clean kitchen towel afterward – this helps it absorb flavors better when cooking. The kernels should look clean and feel slightly tacky but not wet to the touch.
Sauté Aromatics for Maximum Flavor
Heat 1 tablespoon of butter or oil in a large skillet over medium heat. When it’s hot but not smoking, add ½ cup of diced onion and cook for 3-4 minutes until it becomes translucent and starts to soften.
Add 2 cloves of minced garlic and cook for another 30 seconds until fragrant. Be careful not to let the garlic burn – you’ll smell it when it’s ready. This aromatic base adds depth of flavor that plain hominy lacks straight from the can.
Cook the Hominy Until Tender
Add the drained hominy to the skillet with the onions and garlic. Stir everything together and cook over medium-low heat for 5-7 minutes, stirring occasionally. You’ll notice the hominy plumping up slightly as it absorbs the flavors.
After about 3 minutes, season with ½ teaspoon of salt and ¼ teaspoon of black pepper. Taste and adjust seasoning as needed. The hominy should be heated through and tender but still hold its shape – not mushy or falling apart.
Finish with Butter and Herbs
Remove the skillet from heat and stir in 1 tablespoon of butter until it melts completely. This final addition gives the hominy a rich, velvety texture. For extra flavor, sprinkle with 1 tablespoon of chopped fresh parsley or cilantro.
Let it sit for 2 minutes off the heat before serving. This brief rest allows the flavors to meld together perfectly. The finished hominy should be creamy, slightly buttery, and infused with the aromatic flavors from the onions and garlic.
Serve Warm with Your Favorite Dishes
Transfer the hominy to a serving bowl while still warm. It pairs beautifully with Mexican dishes like tacos or enchiladas, or as a simple side with grilled meats. The texture should be tender but not mushy, with each kernel holding its shape.
For best results, serve immediately. If you need to reheat leftovers, add a splash of water or broth and warm gently on the stovetop to restore the creamy texture. This simple preparation transforms plain canned hominy into a flavorful side dish everyone will love.
Tips and Common Mistakes
Transforming canned hominy into a restaurant-worthy side is easier than you think. Here’s what I’ve learned from making this countless times.
Rinsing Technique: Don’t rush the 30-second rinse in Step 1. I use my fingers to gently rub each kernel under cold water – this removes every trace of that canned taste. You’ll notice the water runs clear when it’s properly rinsed. The extra effort makes the final dish taste fresh, not tinny.
Heat Control: When cooking the hominy in Step 3, medium-low heat is key. Too high and the kernels will burst; too low and they won’t absorb flavor. I find 5 minutes is perfect for most stoves – just when the hominy starts to look slightly plump but still holds its shape. Stir occasionally but not constantly – you want gentle heat distribution.
Butter Timing: The final tablespoon of butter in Step 4 isn’t just for richness – it creates that velvety texture. Add it off-heat and stir until completely melted before serving. I’ve tried adding it during cooking, but the flavor isn’t as pronounced. That 2-minute rest after stirring lets the butter fully coat each kernel.
Texture Check: The hominy should yield slightly when pressed with a fork but not fall apart. If yours seems too firm after 7 minutes, add 1 tablespoon of water and cook 1 more minute. Overcooked hominy gets mushy fast, so I always start checking at the 5-minute mark.
Pro Tips for Prepare Canned Hominy
- Transforming canned hominy into a restaurant-worthy side is easier than you think. Here’s what I’ve learned from maki…
- Rinsing Technique: Don’t rush the 30-second rinse in Step 1. I use my fingers to gently rub each kernel under cold wa…
- Heat Control: When cooking the hominy in Step 3, medium-low heat is key. Too high and the kernels will burst; too low…
Frequently Asked Questions
Got questions about cooking canned hominy? You’re not alone! Here are the most common queries—and quick answers—to help you nail this easy side dish every time.
Do I need to rinse canned hominy before cooking?
Yes! Always drain and rinse hominy under cold water to remove excess starch and the briny liquid from the can. This prevents a mushy texture and reduces sodium. A quick 30-second rinse does the trick!
How long does it take to cook canned hominy?
Just 5–10 minutes! Simmer rinsed hominy in broth, water, or milk until heated through. Overcooking can make it too soft—keep an eye on it after 5 minutes for the best texture.
Can I eat canned hominy straight from the can?
Technically yes (it’s pre-cooked), but it’s bland and gummy. A quick sauté with butter, garlic, or spices transforms it into a flavorful side. At minimum, heat it with salt and pepper for better taste.
What’s a good substitute for hominy in recipes?
If you’re in a pinch, try canned white corn (less chewy) or chickpeas (for texture). For pozole, great northern beans work, but the flavor won’t be identical. Hominy’s unique taste is hard to replicate!
Why did my hominy turn out mushy?
Overcooking or skipping the rinse is usually the culprit. To fix it, drain excess liquid and pan-fry the hominy in oil until it firms up. Next time, simmer gently and check doneness at 5 minutes.
Preparing canned hominy is easier than you think—with just a few simple steps, you can turn it into a fluffy, buttery side dish that pairs perfectly with tacos, stews, or grilled meats. 🌽 Whether you rinse, boil, or sauté it, the key is adding your favorite flavors to make it shine.
Now that you’ve mastered the basics, why not experiment? Try mixing in chiles, cheese, or fresh herbs for a fun twist. Ready to dive in? Grab a can and get cooking—your next delicious meal is just 10 minutes away! ⏱️

Trained in classic French technique but raised on slow-cooked ribs and spicy rubs, she blends culinary skill with smoke and soul.
- Recipe for Boneless Pork Chops in Cast Iron Skillet: Sear and Baste to Juicy Perfection - October 3, 2026
- Recipe for Boneless Cross Rib Roast: Slow-Roasted Beef with Herb Crust - October 3, 2026
- Hamburgers in Sauce Recipe Crock Pot: Slow-Cooked Savory Delight - October 3, 2026