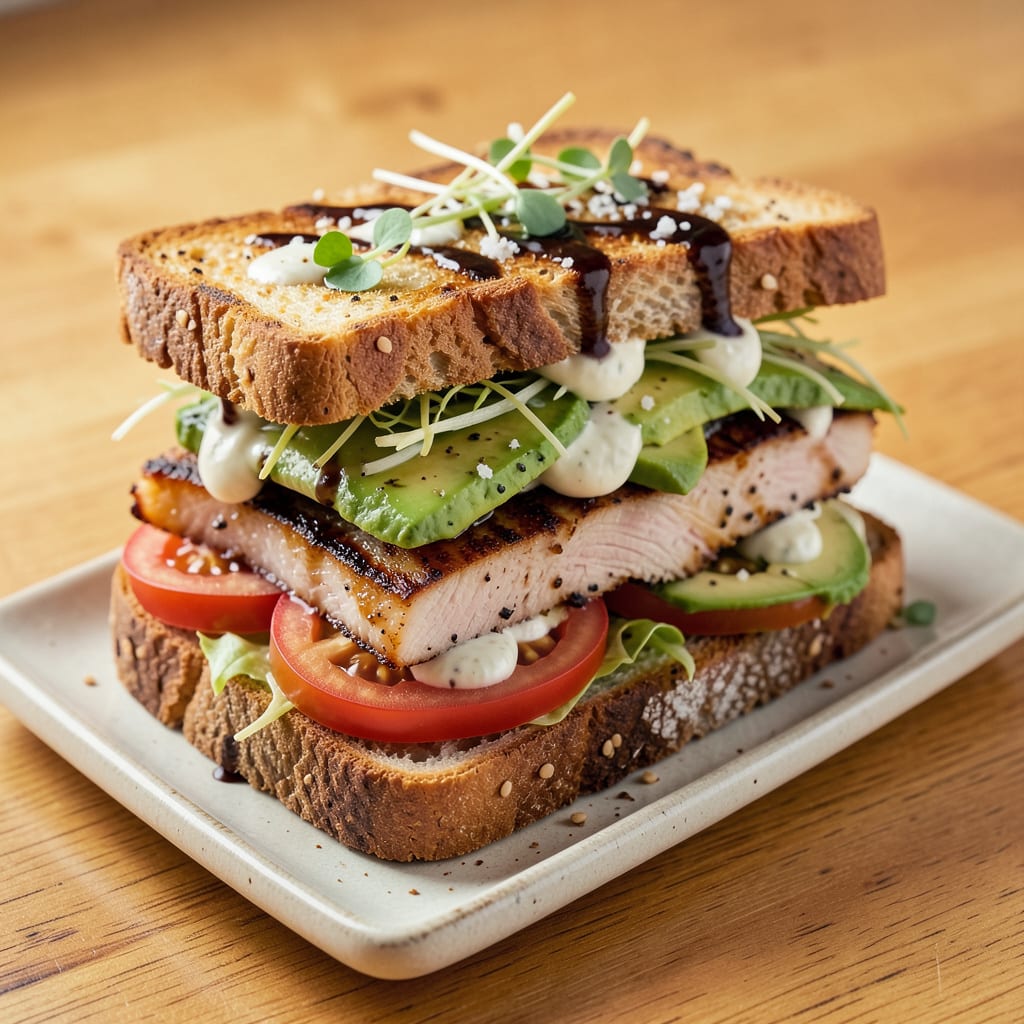
Between you and me, I’ve made more sandwiches than I can count—some legendary, others straight-up disasters. The difference? It’s all about layering and balance. This isn’t just slapping stuff between bread; it’s building a masterpiece where every bite delivers perfect harmony of textures and flavors.
I learned the hard way that toasted bread isn’t optional—it’s your foundation. Crispy on the outside, soft inside. Then comes the moisture barrier (mayo or butter) to prevent sogginess. My go-to combo starts with sharp cheddar for tang, followed by protein, then crunchy veggies. The order matters more than you’d think.
The real game-changer? Salting your tomatoes and cucumbers first. Draws out excess water so they stay crisp instead of turning your sandwich into a soggy mess. I’ve ruined too many good lunches by skipping this step—don’t make my mistake.
From classic BLTs to loaded club sandwiches, this method works for any combo. You’ll end up with a sandwich that holds together beautifully, with every ingredient shining through. No more sad, sliding-apart lunches—just perfect bites from first to last.
📚 In This Guide
- What You’ll Need
- Instructions
- Tips and Common Mistakes
What Youll Need
- ● Bread (2 slices) – Pick your favorite: whole wheat, sourdough, rye, or a soft brioche bun. Pro tip: Lightly toast it for extra crunch!
- ● Main filling (2–4 oz) – Choose one (or mix it up!): Deli meats (turkey, ham, roast beef, salami)
- ● Cheese (cheddar, Swiss, provolone, or pepper jack—1–2 slices)
- ● Plant-based proteins (tofu, tempeh, or veggie patties)
- ● Spreads (1–2 tbsp) – Mayo, mustard, hummus, pesto, or aioli for that creamy kick.
- ● Veggies (¼–½ cup total) – Crisp lettuce, tomato slices, cucumber, red onion, or avocado. Slice thin for even layers!
- ○ Optional boosters – Pickles, olives, jalapeños, sprouts, or a fried egg 🍳 for extra flair.
- ● Tools – A sharp knife (serrated works best), cutting board, and spatula (for spreads).
- ● Extras (for serving) – Toothpicks (to hold tall stacks), napkins (trust us), and a side of chips or fruit! 🍎
Step-by-Step Instructions for Making a Perfect Sandwich
This is where the magic happens—layer by layer, we’ll build something extraordinary.
Choose and Prepare Your Bread
Start with fresh bread that matches your sandwich vision. For soft sandwiches, I love fresh sourdough or brioche. For something heartier, go with a crusty baguette or whole grain loaf. Slice your bread to about ½-inch thickness—thick enough to hold fillings but not so thick it overwhelms them.
Here’s the thing—if your bread is too soft, lightly toast it to prevent sogginess. I use a toaster or dry skillet over medium heat for 1-2 minutes per side until just barely crisp. This creates a perfect barrier against moisture while keeping the interior soft. Let it cool slightly before assembling so it doesn’t steam up.
Layer Your Spreads Strategically
Spreads are your flavor foundation and moisture barrier. Apply them to both slices of bread, all the way to the edges. I always put the creamier spread (like mayo or cream cheese) on the bottom slice and the thicker spread (like mustard or hummus) on the top slice. This prevents the bread from getting soggy from below.
Use about 1 tablespoon of each spread per slice—enough to coat but not so much it squishes out when you bite. For extra flavor, I like to mix spreads: try mayo with a dash of sriracha or cream cheese with chopped herbs. The key is even distribution so every bite has balanced flavor.
Build with Texture and Temperature in Mind
Now for the fun part—layering your fillings! Start with crisp ingredients like lettuce or fresh herbs directly on the bottom spread. This creates a textural foundation. Then add your main protein—whether it’s sliced deli meats, grilled chicken, or even crispy bacon—arrange it evenly across the bread.
Here’s what I do: place cheese next if using (it’ll melt slightly from the warmth of other ingredients), then add any cooked vegetables or pickles. For hot sandwiches, I warm the protein and cheese slightly before assembling. The order matters: put wetter ingredients (like tomatoes) in the middle, not touching the bread, to prevent sogginess.
Add the Finishing Touches
This is where you make it extraordinary. Sprinkle flaky salt and freshly cracked pepper over the top layer—it enhances all the flavors. Add fresh herbs like basil or cilantro for brightness. I love a final drizzle of something special: balsamic glaze for Italian-style, hot honey for spicy sandwiches, or even a squeeze of lemon for seafood.
Don’t forget the top slice! Place it gently but firmly, then press down lightly with your palm to set everything. For extra security on tall sandwiches, I insert two toothpicks at an angle—easy to remove before eating. The perfect sandwich should hold together when lifted but not be squished flat.
Cut and Serve with Confidence
Use a sharp serrated knife to cut your sandwich cleanly. For rectangular sandwiches, I cut diagonally from corner to corner for classic triangular halves. For long sandwiches, cut into 3-4 inch sections at a slight angle for elegant presentation. Wipe the knife blade between cuts for clean lines.
Serve immediately while everything is fresh! The ideal sandwich has contrast in every bite: crisp and soft textures, cool and warm temperatures, creamy and crunchy elements. I like to serve with a simple side—chips, pickles, or fresh fruit—that complements rather than competes with the sandwich flavors. Now take that first bite and enjoy your masterpiece!
Tips and Common Mistakes for Perfect Sandwich Layers
Let me share the little details that transform a good sandwich into an unforgettable one—these are the game-changers!
The Bread Secret: In Step 1, when toasting your bread for 1-2 minutes per side on medium heat, watch for the edges to just begin turning golden while the center stays soft. This creates the perfect textural contrast! I always press gently on the center after toasting—it should spring back slightly, not feel rock hard. The difference between a mediocre sandwich and a spectacular one often comes down to this single step.
Spread Strategy: When applying your 1 tablespoon of spread in Step 2, use the back of a spoon to create an even layer right to the edges. This isn’t just about flavor—it’s your moisture barrier! I learned the hard way that skipping the edge coverage leads to soggy bites. For extra flavor impact, try mixing your spreads: mayo with smoked paprika or cream cheese with lemon zest takes things to another level.
Layering Logic: The order in Step 3 matters more than you think! Start with crisp lettuce directly on the bottom spread, then protein, then cheese (if using), then wetter ingredients like tomatoes. This sequence prevents sogginess while ensuring every bite has balanced textures. For hot sandwiches, warming your protein and cheese slightly before assembling makes all the difference—the cheese will melt beautifully from residual heat.
Final Touch Magic: Don’t underestimate the power of the finishing touches in Step 4! A sprinkle of flaky salt and fresh herbs right before adding the top slice elevates all the flavors. I love adding a final drizzle—balsamic glaze for Italian-style sandwiches or hot honey for spicy ones—it’s that unexpected element that makes people ask for your recipe.
Pro Tips for Make A Sandwitch
- Let me share the little details that transform a good sandwich into an unforgettable one—these are the game-changers!
- The Bread Secret: In Step 1, when toasting your bread for 1-2 minutes per side on medium heat, watch for the edges to…
- Spread Strategy: When applying your 1 tablespoon of spread in Step 2, use the back of a spoon to create an even layer…
Frequently Asked Questions
Got sandwich questions? We’ve got answers! Here are the most common queries about crafting the perfect sandwich—solved in a snap.
How long does it take to make a sandwich?
A basic sandwich takes 5-10 minutes if you’re prepped (sliced ingredients, spreads ready). Gourmet versions (toasted, multi-layered, or hot) may need 10-15 minutes. Pro tip: Pre-slice veggies or meats ahead to cut time in half!
Can I make a sandwich without bread?
Absolutely! Swap bread for:
- Lettuce wraps (romaine or iceberg)
- Tortillas or flatbreads
- Rice paper (for Vietnamese-style rolls)
- Portobello mushroom “buns” (grilled!)
Why does my sandwich get soggy so fast?
Moisture is the enemy! Fix it by:
- Patting wet ingredients dry (tomatoes, pickles).
- Adding a barrier (cheese, butter, or mayo directly on bread).
- Packing saucy items (like tuna salad) separately until eating.
What’s the best way to store a sandwich for later?
Wrap it tightly in parchment paper or beeswax wrap, then place in an airtight container. Refrigerate for up to 24 hours (avoid mayo-based fillings for longer storage). For hot sandwiches, reheat in a pan or toaster oven to revive crunch.
How do I make a sandwich more filling without adding meat?
Boost protein and texture with:
- Hummus or mashed avocado
- Grilled halloumi or paneer cheese
- Chickpeas, lentils, or tofu (marinated!
- Nuts/seeds (peanut butter + banana = classic combo).
And there you have it—your perfect sandwich, built from the ground up with layers of flavor and texture! 🥪 Whether you kept it classic with PB&J or went gourmet with artisanal cheeses and fresh greens, the key is balance, creativity, and a little love in every bite.
Now that you’ve mastered the basics, why not experiment with new ingredients or share your creation with friends? Tag us in your sandwich pics—we’d love to see (and maybe drool over) your masterpiece! Happy stacking! 😉

Trained in classic French technique but raised on slow-cooked ribs and spicy rubs, she blends culinary skill with smoke and soul.
- Recipe for Boneless Pork Chops in Cast Iron Skillet: Sear and Baste to Juicy Perfection - October 3, 2026
- Recipe for Boneless Cross Rib Roast: Slow-Roasted Beef with Herb Crust - October 3, 2026
- Hamburgers in Sauce Recipe Crock Pot: Slow-Cooked Savory Delight - October 3, 2026