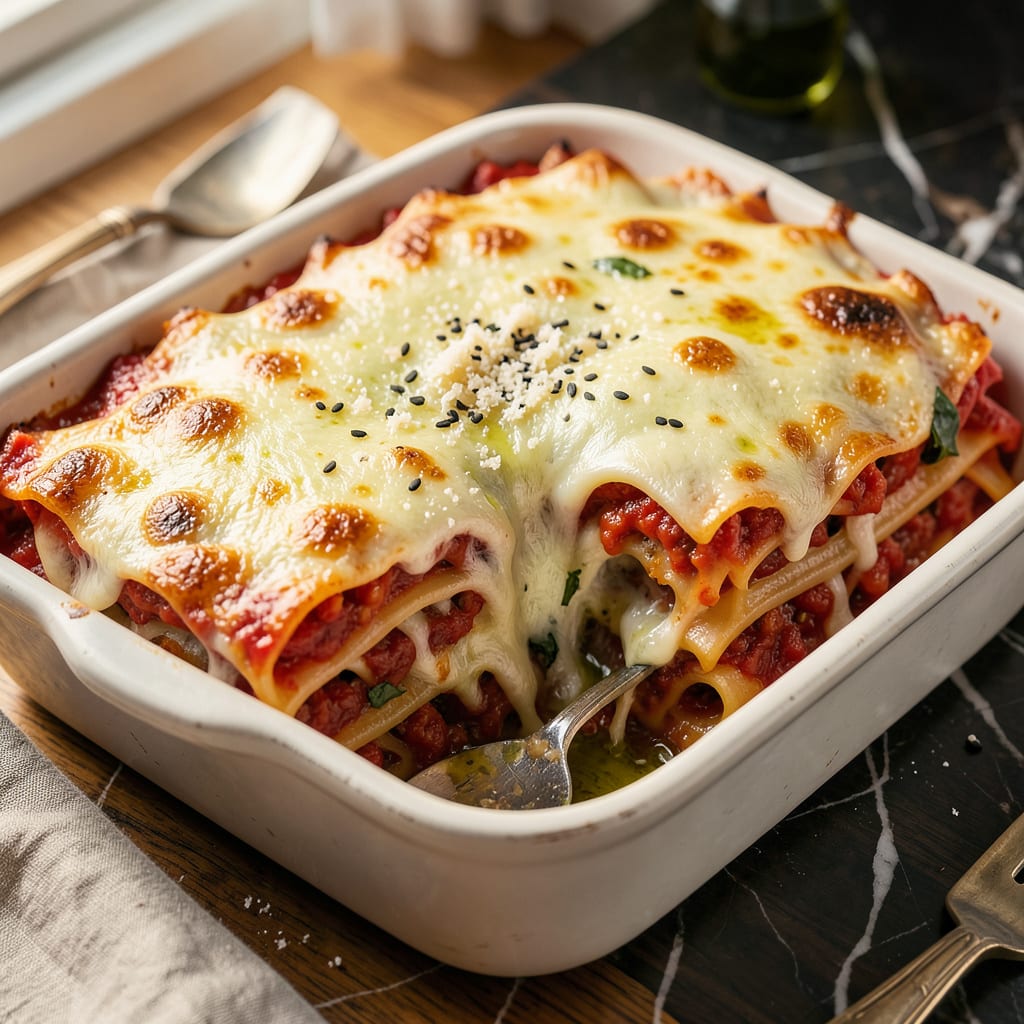
Nothing ruins a perfect lasagna faster than gummy, stuck-together noodles that turn your masterpiece into a soggy mess. After years of trial and error (and more than a few lasagna disasters), I’ve cracked the code for perfectly separated layers every single time. The solution isn’t complicated—it’s all about how you prep the noodles and build those layers.
Here’s the thing—most sticking happens because of excess starch and moisture. I start by boiling noodles in well-salted water with a splash of oil, then laying them out to dry slightly before assembling. This creates a barrier that prevents that dreaded gluey texture. And when layering, I’m religious about spreading sauce all the way to the edges—no dry spots means no sticking.
The real game-changer? My foolproof layering order: sauce first, then noodles, then cheese and filling. This creates a moisture buffer between each noodle layer. I also avoid overcrowding the pan—give those layers room to breathe, and they’ll stay distinct instead of fusing together.
Whether you’re making classic veggie lasagna or a meaty version, these techniques work. No more serving a lasagna “casserole” where everything blends into one sad layer. Just clean slices with perfect definition—exactly how lasagna should be.
📚 In This Guide
- What You’ll Need
- Instructions
- Tips and Common Mistakes
What Youll Need
- ● Lasagna noodles: 1 box (9–12 oz) of no-boil or traditional lasagna sheets—check the package for quantity needed for your dish.
- ● Large pot: 5–6 quart capacity for boiling (if using traditional noodles).
- ● Water: 4–6 quarts for boiling (add 1 tbsp salt per gallon).
- ● Olive oil or cooking spray: 1–2 tbsp to coat noodles or a light mist for non-stick layers.
- ● Tongs or pasta fork: For gently separating boiled noodles.
- ● Baking dish: 9×13-inch (or similar size) for assembly.
- ○ Parchment paper or aluminum foil: Optional, for lining the dish to prevent sticking to the pan.
- ● Sauce (marinara, béchamel, etc.): 3–4 cups total—enough to generously coat each layer.
- ○ Cheese (ricotta, mozzarella, etc.): 2–3 cups for filling (optional but recommended for texture).
- ● Kitchen towel or paper towels: For drying noodles post-boiling (if using traditional).
- ● Timer: To avoid overcooking noodles (8–10 mins for al dente).
Step-by-Step Instructions for Perfectly Layered Lasagna
Say goodbye to stuck noodles with this simple, foolproof layering technique that works every time.
Choose and Prepare Your Noodles
Start by selecting the right type of noodles for your lasagna. I always recommend using no-boil lasagna noodles (also called oven-ready) for this method—they’re specifically designed to absorb moisture from the sauce during baking, which helps prevent sticking. If you prefer traditional noodles, cook them until just al dente (about 1 minute less than package directions) and drain immediately.
Before assembling, lay out all your noodles on a clean kitchen towel. If using no-boil noodles, briefly dip each one in warm water for 10 seconds—this softens them slightly and removes excess starch that can cause sticking. Pat them dry with a paper towel. This small step makes a huge difference in how the layers hold together during baking.
Build Your Sauce Foundation
The secret to preventing sticking starts with your sauce layer. Spread a thin, even layer of your meat or tomato sauce (about ½ cup) on the bottom of your baking dish. This creates a moisture barrier that prevents the first layer of noodles from sticking to the pan. Use the back of a spoon to spread it completely to the edges—no dry spots allowed.
Next, add your first layer of noodles. Place them side by side without overlapping, leaving a ¼-inch gap between each noodle and the dish edges. This gap accounts for expansion during baking and prevents the edges from sticking. If you’re using traditional boiled noodles, lightly brush them with olive oil before placing—this creates an additional non-stick barrier.
Layer with Strategic Moisture Balance
After your first noodle layer, it’s time to add the filling components—but here’s the key: distribute moisture evenly. Spread another ½ cup of sauce over the noodles, then add your ricotta or béchamel layer. The sauce acts as a lubricant between the noodle and cheese layers, preventing them from fusing together during baking.
When adding cheese fillings, I’ve found that mixing ricotta with 1 egg creates a creamier, more stable layer that doesn’t dry out and stick to the noodles above it. Spread this mixture thinly—about ¼-inch thick—to ensure even cooking. For vegetable lasagnas, sauté your veggies first to remove excess moisture that could make noodles gummy.
Repeat Layers with Precision
Continue building your lasagna with this pattern: sauce → noodles → filling → sauce. For each noodle layer, slightly offset the noodles from the layer below—this creates a brick-like pattern that adds structural integrity and prevents large sheets from sticking together. Always end with a final layer of sauce on top to seal in moisture.
Here’s the thing—most people under-sauce their lasagna, which leads to dry, sticky layers. I use about 1 cup of sauce per noodle layer in a standard 9×13-inch dish. The sauce shouldn’t pool, but you should see it peeking through the cheese layers. This moisture distribution is what keeps everything sliding smoothly when you serve it.
Bake and Rest for Perfect Release
Cover your assembled lasagna tightly with oiled foil (oil side down) to prevent sticking during the initial baking phase. Bake at 375°F for 25 minutes, then remove the foil and bake uncovered for another 10-15 minutes until bubbly and golden. The initial covered baking allows steam to soften the noodles gently, while the uncovered time sets the top layer.
This is the moment that matters: let it rest for 15 minutes after removing from the oven. I know it’s tempting to dive right in, but this resting period allows the layers to set and the moisture to redistribute. When you cut into it, you’ll get clean slices with noodles that stay put in their layers—not stuck to the pan or each other. Use a sharp knife wiped clean between cuts for those perfect portions.
Tips and Common Mistakes
Here’s what I’ve learned from years of making lasagna—these small details make all the difference between sticky layers and perfect slices.
Noodle Preparation: That 10-second dip for no-boil noodles in Step 1 isn’t just optional—it’s crucial. I’ve found that warm water (about 110°F) works best for softening without making them mushy. If you skip this, the noodles will absorb moisture unevenly during baking, leading to some layers sticking while others fall apart. Always pat them completely dry afterward to prevent excess starch from creating a gummy texture.
Sauce Distribution: The ½ cup of sauce mentioned in Step 2 might seem like a small amount, but it’s perfectly calculated. When spreading sauce between layers, use the back of a spoon to create an even, thin coating that reaches all edges. I like to slightly tilt the dish to let excess sauce flow toward the edges—this prevents dry spots where noodles might stick. Remember, you’ll be adding more sauce with each layer, so don’t overdo it on the first one.
Layering Technique: The brick-like pattern mentioned in Step 4 isn’t just for looks—it creates air pockets that help steam circulate during baking. When offsetting your noodles, aim for about a ½-inch shift from the layer below. This also makes serving easier since you’re not trying to cut through large, continuous sheets of pasta. For the final layer, make sure your top noodles are completely covered with sauce to prevent them from drying out and sticking to the foil.
Baking and Resting: That 15-minute rest after baking in Step 5 is non-negotiable. I learned this the hard way after ruining several lasagnas by cutting too soon. The resting time allows the starches to set and the moisture to redistribute throughout the layers. If you’re in a hurry, you can extend the uncovered baking time by 2-3 minutes to evaporate more moisture, but don’t skip the rest entirely—your slices will fall apart when serving.
Pro Tips for Prevent Lasagna Noodles From Sticking
- Here’s what I’ve learned from years of making lasagna—these small details make all the difference between sticky laye…
- Noodle Preparation: That 10-second dip for no-boil noodles in Step 1 isn’t just optional—it’s crucial. I’ve found tha…
- Sauce Distribution: The ½ cup of sauce mentioned in Step 2 might seem like a small amount, but it’s perfectly calcula…
Frequently Asked Questions
Can I boil lasagna noodles ahead of time to prevent sticking later?
Yes! Parboil noodles al dente (1-2 minutes less than package instructions), rinse with cold water, and toss with a drizzle of olive oil. Store in a single layer on parchment paper—this keeps them ready for assembly without clumping.
Why do my no-boil lasagna noodles still stick together?
No-boil noodles need extra sauce (about 1/4 cup more per layer) to soften properly. If they stick, your sauce may be too thick or unevenly spread. Try thinning it with a splash of water or broth before layering.
What’s the best oil to use for preventing sticky noodles?
Neutral oils like olive, avocado, or vegetable oil work best—they won’t alter flavor. Use 1 tsp per 8 noodles (tossed post-boiling or brushed on dry sheets). Avoid butter; it can make layers greasy.
Can I use parchment paper between lasagna layers to stop sticking?
Cut parchment to fit your baking dish, place it between uncooked layers (remove before baking), or use it to separate stacked noodles pre-assembly. Just don’t bake with it—it’s not heat-safe for lasagna’s long cook time.
Do I need to rinse lasagna noodles after boiling?
Rinsing removes excess starch (the sticky culprit!) but can cool noodles too much. For best results, rinse briefly in warm water, then toss with oil immediately. Skip rinsing if using no-boil noodles.
Say goodbye to sticky lasagna disasters for good! 🎉 The secret lies in proper prep, smart layering, and moisture control—whether you boil, soak, or use no-boil noodles. With these foolproof tricks, you’ll build a lasagna that slices like a dream and holds its shape perfectly.
Ready to put your new skills to the test? Grab your ingredients and try the method that works best for you—your next lasagna might just be your best one yet! 🍝✨

Trained in classic French technique but raised on slow-cooked ribs and spicy rubs, she blends culinary skill with smoke and soul.
- Recipe for Boneless Pork Chops in Cast Iron Skillet: Sear and Baste to Juicy Perfection - October 3, 2026
- Recipe for Boneless Cross Rib Roast: Slow-Roasted Beef with Herb Crust - October 3, 2026
- Hamburgers in Sauce Recipe Crock Pot: Slow-Cooked Savory Delight - October 3, 2026