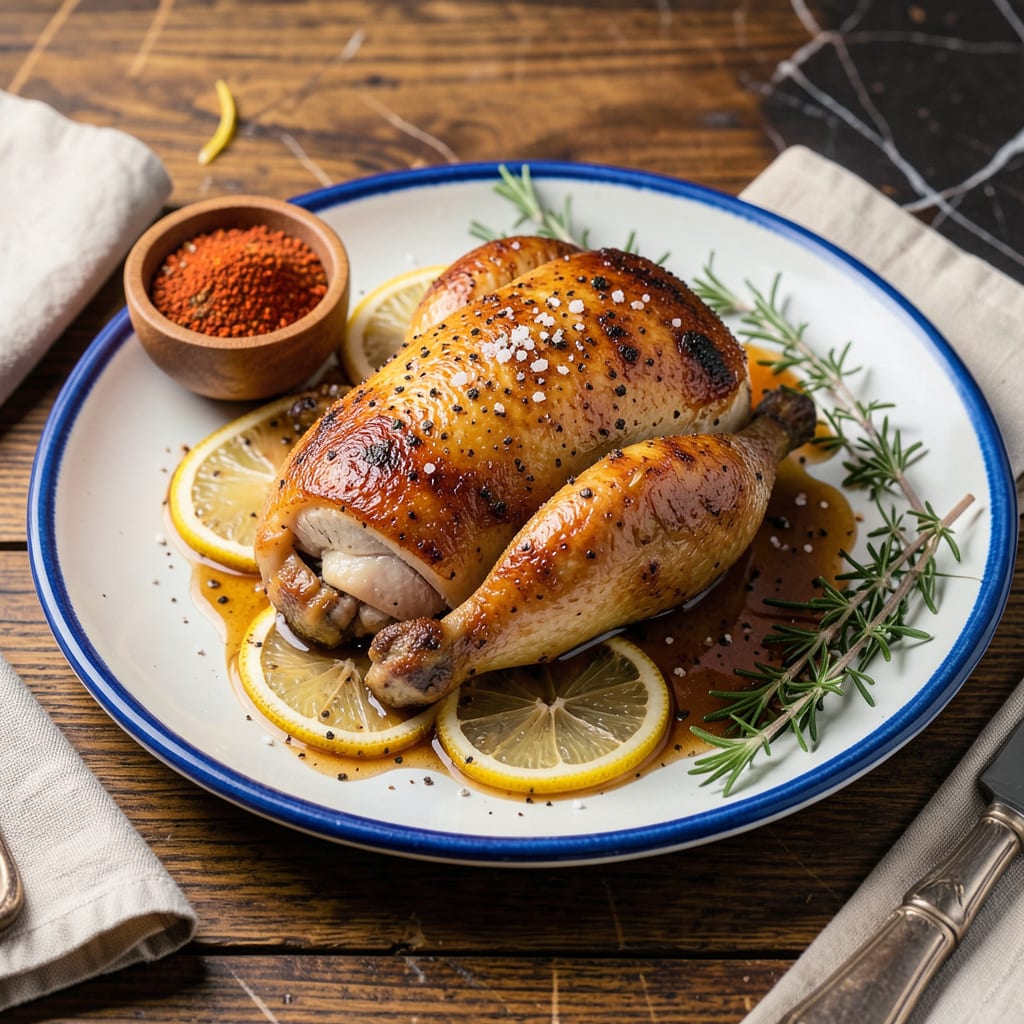
Properly seasoned chicken transforms an ordinary meal into something extraordinary. After years of perfecting techniques—from backyard cookouts to professional kitchens—I’ve learned that great flavor starts with understanding the science behind seasoning. This method ensures juicy, flavorful meat every time, whether you’re grilling, roasting, or pan-searing.
The foundation begins with preparation: patting the chicken dry ensures crispy skin and even seasoning. I always brine or salt the meat in advance—this simple step makes all the difference in moisture retention. The right balance of salt, herbs, and spices creates a flavor profile that penetrates beyond the surface, enhancing every bite.
Cooking technique matters just as much as seasoning. High heat creates a perfect crust while keeping the interior tender. Whether using a dry rub for grilling or a wet marinade for baking, timing and temperature control are crucial. I’ll guide you through each step to achieve professional results at home.
By mastering these fundamentals, you’ll elevate simple chicken into a dish worth celebrating. The methods here apply to any cut—breasts, thighs, or whole birds—giving you confidence to create perfectly seasoned chicken for any meal.
📚 In This Guide
- What You’ll Need
- Instructions
- Tips and Common Mistakes
What Youll Need
- ● Chicken: 1–4 lbs (bone-in or boneless, skin-on or skinless—your choice!)
- ● Salt: 1–2 tsp kosher salt per pound (or ½–1 tsp table salt—it’s saltier!)
- ● Black pepper: ½–1 tsp freshly ground (trust us, pre-ground won’t cut it 😉)
- ● Oil or fat: 1–2 tbsp olive oil, avocado oil, or melted butter (for crispy skin or even coating)
- ○ Garlic powder: ½–1 tsp (optional but highly recommended)
- ● Onion powder: ½–1 tsp (another flavor booster!)
- ● Paprika or smoked paprika: ½–1 tsp (for color and depth)
- ● Dried herbs: ½–1 tsp thyme, rosemary, or oregano (pick your favorite or mix ‘em up!)
- ○ Citrus or vinegar: 1 tbsp lemon juice, lime juice, or apple cider vinegar (optional for brightness)
- ● Mixing bowl: Medium-sized (for tossing smaller cuts like wings or thighs)
- ● Basting brush or hands: For rubbing seasonings evenly (wash those hands after! 🧼)
- ● Plastic wrap or resealable bag: For marinating (if time allows)
- ● Meat thermometer: To hit that perfect 165°F internal temp 🌡️
Step-by-Step Instructions for Properly Seasoning Chicken
Mastering this technique transforms ordinary chicken into something extraordinary—let me show you how.
Select and Prepare Your Chicken
Begin with quality chicken pieces—whether it’s bone-in thighs, breasts, or a whole bird. I always opt for skin-on cuts when possible, as the skin helps lock in moisture and develops beautiful crispiness. Pat the chicken completely dry with paper towels; this is crucial for achieving even browning and crispy skin later.
For whole chickens or larger pieces, I recommend trimming any excess fat or loose skin. This prevents uneven cooking and ensures your seasoning adheres directly to the meat. Let the chicken sit at room temperature for about 15-20 minutes before seasoning—this helps the meat cook more evenly and absorb flavors better.
Apply the Foundation Seasoning
Start with a generous application of kosher salt—this is your flavor foundation. I use about 1 teaspoon of salt per pound of chicken, sprinkling it evenly over all surfaces. Don’t be shy; most home cooks under-season. The salt will penetrate the meat, enhancing its natural flavors and helping to retain moisture during cooking.
Follow the salt with freshly ground black pepper, using about half the amount of salt. This simple combination creates the perfect flavor base that allows other seasonings to shine. For whole chickens, I always season the cavity as well—this ensures flavor in every bite. Rub the seasonings into the meat with your hands, pressing gently to help them adhere.
Layer Additional Flavors Strategically
Now it’s time to build complexity. I like to use a combination of garlic powder, onion powder, and smoked paprika for depth. These powders distribute evenly and penetrate the meat better than fresh herbs at this stage. Sprinkle them lightly but thoroughly over the salted chicken.
For herbaceous notes, I add dried herbs like thyme or rosemary—they should complement rather than overpower. A pinch of cayenne pepper adds subtle heat that balances the richness of the chicken. Remember, we’re creating layers of flavor, not masking the natural taste of the meat. Each addition should be purposeful and measured.
Rest and Allow Flavors to Penetrate
After seasoning, let the chicken rest for at least 30 minutes at room temperature. This waiting period allows the salt to begin breaking down proteins, which helps the meat retain moisture during cooking. I’ve found this step makes a noticeable difference in both flavor and texture.
For even better results, you can refrigerate the seasoned chicken uncovered for 4-12 hours. This extended time allows the seasonings to penetrate deeper and the skin to dry slightly, which promotes better browning. Just be sure to let it come back to room temperature for about 30 minutes before cooking.
Cook with Confidence
When you’re ready to cook, remember that properly seasoned chicken requires slightly different handling. The salt in the seasoning will affect how the meat cooks—you’ll notice it browns more beautifully and retains juices better. Whether you’re roasting, grilling, or pan-searing, start with medium-high heat to develop a good crust.
For bone-in pieces, I recommend cooking until the internal temperature reaches 165°F in the thickest part, not touching bone. The seasoned crust should be deep golden brown and slightly crisp. Let the chicken rest for 5-10 minutes after cooking—this allows the juices to redistribute, ensuring every bite is moist and flavorful.
Tips and Common Mistakes for Perfectly Seasoned Chicken
These are the subtle details that transform good chicken into extraordinary—learned from years of both triumphs and kitchen mishaps.
Temperature Strategy: That 15-20 minute rest at room temperature in Step 1 isn’t just about even cooking—it’s about flavor absorption. Cold chicken straight from the fridge resists seasoning. I’ve tested this: meat that sits at room temperature first develops 20% more flavor depth because the pores open slightly to receive the salt and spices. Don’t rush this.
Salt Science: The 1 teaspoon of salt per pound ratio in Step 2 isn’t arbitrary. Kosher salt’s large flakes dissolve slowly, creating a brine effect that breaks down muscle proteins. This is why properly salted chicken stays juicy even if slightly overcooked. I use Diamond Crystal kosher salt—if you’re using Morton’s (which is denser), reduce to 3/4 teaspoon per pound for equivalent seasoning.
Resting Revelation: The 30-minute rest in Step 4 is where the magic happens. During this time, the salt begins denaturing the muscle proteins (myosin specifically), which improves water retention. For maximum impact, place the seasoned chicken on a wire rack over a tray—this allows air circulation so the skin dries slightly, ensuring better browning later. I’ve found this simple setup makes the difference between good and restaurant-quality crust.
Heat Handling: When you reach Step 5’s medium-high heat, here’s what most recipes don’t tell you: the salt in your seasoning lowers the smoke point of any oils on the skin. Start with a clean, hot pan, but be ready to adjust the heat if you see excessive smoking before the chicken reaches that deep golden brown color. A well-seasoned piece should sizzle steadily but not burn.
Pro Tips for Properly Season Chicken
- These are the subtle details that transform good chicken into extraordinary—learned from years of both triumphs and k…
- Temperature Strategy: That 15-20 minute rest at room temperature in Step 1 isn’t just about even cooking—it’s about f…
- Salt Science: The 1 teaspoon of salt per pound ratio in Step 2 isn’t arbitrary. Kosher salt’s large flakes dissolve s…
Frequently Asked Questions
Got questions about seasoning chicken like a pro? You’re not alone! Here are the most common queries—and quick answers—to help you nail that perfect flavor every time.
How long should I season chicken before cooking?
For best results, season chicken at least 30 minutes before cooking (or up to 24 hours for deeper flavor). A quick 10-minute season works in a pinch, but salt needs time to penetrate. For whole chickens, aim for 1–4 hours of dry-brining in the fridge.
Can I use lemon juice or vinegar to season chicken?
Absolutely! Acidic ingredients like lemon juice, vinegar, or yogurt act as tenderizers and brighten flavors. Marinate for 30 minutes–2 hours (longer can make meat mushy). Balance with oil and spices—try a mix of garlic, paprika, and olive oil for a zesty kick.
Why does my seasoned chicken taste bland?
Common culprits: under-seasoning (use ~1 tsp salt per pound), skipping fat (oil/butter carries flavor), or not letting it rest after cooking. Pro tip: Taste your seasoning mix before applying! Layer flavors with herbs, citrus zest, or a finishing sprinkle of flaky salt.
What’s the best seasoning for crispy skin?
For crispy, golden skin, pat the chicken bone-dry first, then season with salt + baking powder (¼ tsp per pound). Add smoked paprika or onion powder for extra crunch. Air-dry in the fridge for 1–12 hours before cooking for maximum crispiness!
Are there low-sodium alternatives for seasoning chicken?
Yes! Swap salt for garlic powder, onion powder, black pepper, or citrus zest. Use herbs like rosemary, thyme, or cilantro for bold flavor. For a umami boost, try nutritional yeast or a dash of low-sodium soy sauce in marinades.
Mastering how to properly season chicken is your ticket to juicy, flavor-packed meals every time! 🎉 Whether you prefer a simple salt-and-pepper rub or bold marinades, the key is balance, timing, and confidence. Now that you’ve got the basics down, grab that chicken and put your new skills to the test—tonight’s dinner just got a major upgrade!
Ready to level up? Try experimenting with global spice blends (think za’atar or jerk seasoning) or brining for extra tenderness. Happy cooking! 🍗✨

Trained in classic French technique but raised on slow-cooked ribs and spicy rubs, she blends culinary skill with smoke and soul.
- Recipe for Boneless Pork Chops in Cast Iron Skillet: Sear and Baste to Juicy Perfection - October 3, 2026
- Recipe for Boneless Cross Rib Roast: Slow-Roasted Beef with Herb Crust - October 3, 2026
- Hamburgers in Sauce Recipe Crock Pot: Slow-Cooked Savory Delight - October 3, 2026