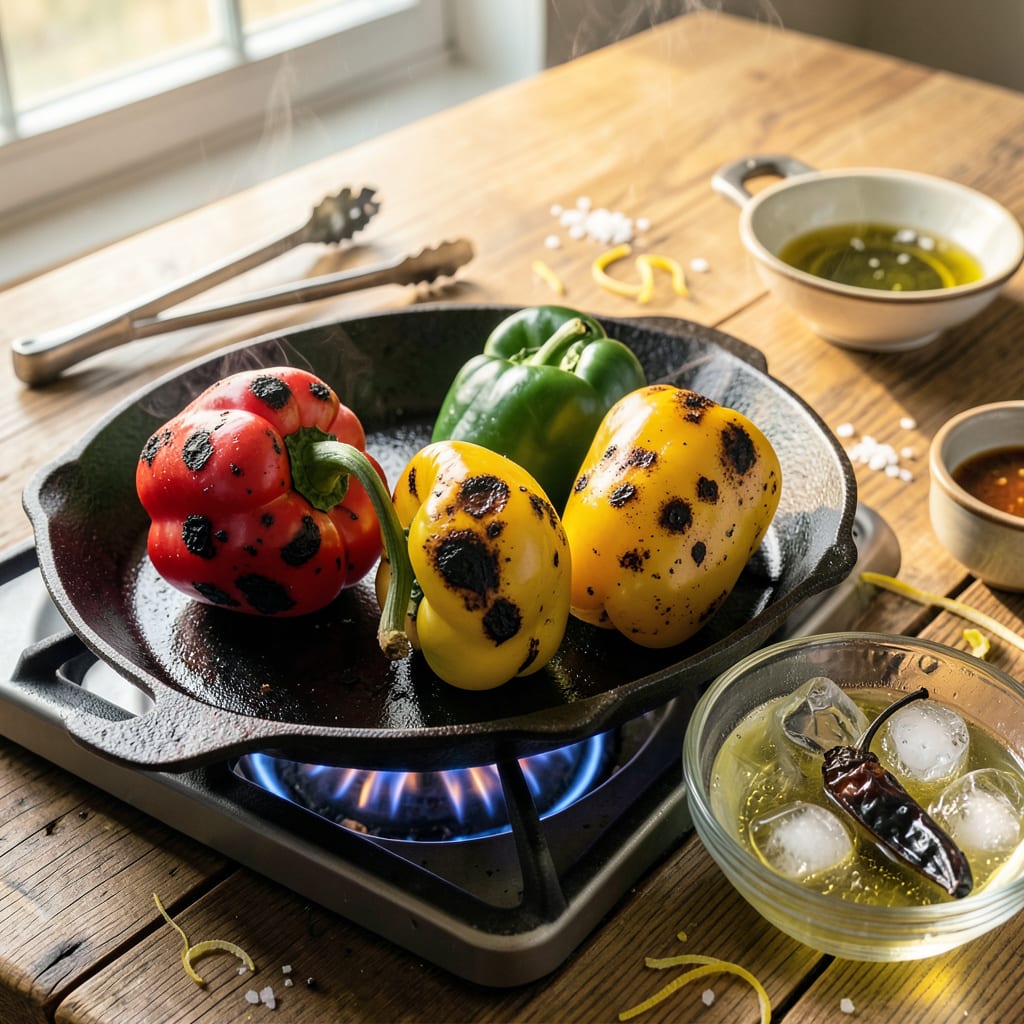
Mastering the technique of skinning peppers transforms ordinary dishes into restaurant-quality creations. This simple yet essential skill unlocks silky-smooth textures in recipes where pepper skins would otherwise be distracting or tough. Whether you’re preparing delicate romesco sauce or stuffing poblano peppers for chiles rellenos, removing the skins elevates both presentation and mouthfeel.
The process requires minimal equipment—just your peppers, a heat source, and a bowl of ice water. I’ve perfected this method through years of testing, from charring peppers over open flames to using the broiler for even results. Different pepper varieties respond best to specific techniques: thick-skinned bells benefit from roasting, while thinner poblanos char beautifully over direct flame.
Safety matters when handling peppers, especially spicy varieties. Always work in a well-ventilated area and avoid touching your face after handling chiles. The steam released during skinning can be potent, so keep your distance when removing peppers from heat sources. These precautions ensure you’ll enjoy the process as much as the results.
Once you’ve mastered this technique, you’ll find endless applications. Skinned peppers blend seamlessly into sauces, create velvety confits, and make stuffed pepper dishes truly elegant. The difference between skinned and unskinned peppers in finished dishes is remarkable—this small step yields professional-quality results every time.
📚 In This Guide
- What You’ll Need
- Instructions
- Tips and Common Mistakes
What Youll Need
- ● Fresh peppers – Any variety (bell, poblano, jalapeño, etc.) in your desired quantity. Choose firm, unblemished peppers for best results. 🌶️
- ● Sharp chef’s knife – A 7-8″ blade for precise cuts (or a paring knife for smaller peppers).
- ● Cutting board – Wood or plastic, large enough to stabilize peppers while working.
- ● Mixing bowls (2) – One for ice water (large) and one for skinned peppers (medium).
- ● Tongs or slotted spoon – For transferring peppers between bowls safely.
- ● Gas stove, grill, or broiler – For charring (a culinary torch works in a pinch!).
- ● Ice – 2 cups (for the ice bath to stop cooking).
- ○ Plastic wrap or resealable bag (optional) – Helps steam peppers post-charring for easier skin removal.
- ○ Vegetable oil (optional) – 1 tsp to lightly coat peppers before roasting (prevents sticking).
- ○ Glove (optional) – For handling hot peppers (especially spicy varieties like habaneros).
Instructions
This method works for any pepper variety—here’s how to get perfectly peeled peppers every time.
Char the Peppers Evenly
Begin by placing whole peppers directly over a gas flame on your stovetop, turning them frequently with tongs. If you don’t have a gas stove, use a grill or broiler instead. The goal is to char the skin completely—it should turn deep black and blister all over.
This process typically takes 5-7 minutes per pepper, depending on size. Don’t rush it; you want the skin thoroughly blackened but the flesh still firm. The charring creates steam between the skin and flesh, which is what makes peeling effortless later.
Steam the Charred Peppers
Immediately transfer the charred peppers to a large bowl and cover tightly with plastic wrap or a clean kitchen towel. Let them steam for 10-15 minutes. This trapped steam continues cooking the peppers slightly while loosening the charred skin from the flesh.
You’ll notice the peppers softening during this time—that’s exactly what you want. The skin should start pulling away from the flesh on its own. If you’re working with particularly thick-skinned peppers like bell peppers, you might need the full 15 minutes of steaming.
Peel and Clean the Peppers
After steaming, remove one pepper at a time and place it on your cutting board. The skin should now peel away easily with just your fingers or the help of a paring knife. Start at the stem end and work your way down—most of the skin will come off in large sheets.
For any stubborn bits, use the knife to gently scrape them away. Don’t worry about removing every last fleck of charred skin—some black specks add flavor. Once peeled, cut the pepper open and remove the seeds and core. Rinse briefly under cool water to remove any remaining loose skin or seeds.
Prepare for Your Recipe
Now that your peppers are skinned, you can use them immediately in your recipe or store them for later. If using right away, pat them dry with paper towels to remove excess moisture. The peeled peppers will have a silky texture that’s perfect for sauces, salads, or stuffing.
For storage, place the peeled peppers in an airtight container with a paper towel to absorb moisture. They’ll keep in the refrigerator for up to 5 days, or you can freeze them for up to 3 months. The flavor will be more concentrated than fresh peppers, so you might need to adjust seasoning in your recipes accordingly.
Tips and Common Mistakes
Mastering this technique comes down to understanding the science behind each step. Here’s what I’ve learned from years of charring and peeling peppers.
Perfect Char Technique: In Step 1, don’t be afraid to let the peppers get truly black during those 5-7 minutes—this isn’t burning, it’s caramelization. The deeper the char, the easier the skin will release later. I use long tongs to rotate constantly for even charring, especially important for irregularly shaped peppers like jalapeños. The flesh should remain firm, not mushy, when properly charred.
Steaming Strategy: For Step 2, the 10-15 minutes of steaming is where the magic happens. I’ve found that using a glass bowl (rather than metal) helps maintain consistent steam temperature. For particularly thick-skinned varieties like bell peppers, always go the full 15 minutes—the extra time makes peeling effortless. The peppers should feel noticeably softer when pressed through the plastic wrap.
Peeling Precision: When you reach Step 3, work with one pepper at a time while the others continue steaming. The residual heat keeps the skin pliable. I start peeling from the stem end where the skin naturally pulls away first. Don’t obsess over removing every black speck—those add wonderful smoky depth to your final dish. A quick rinse under cool water helps remove any stubborn seeds or skin fragments.
Storage Insight: The 5-day refrigerator and 3-month freezer windows in Step 4 are based on optimal texture preservation. For freezing, I recommend cutting peppers into strips first and freezing on a tray before bagging—this prevents them from freezing into a solid block. Thawed peppers work beautifully in cooked dishes but may be slightly softer for raw applications.
Pro Tips for Skin Peppers
- Mastering this technique comes down to understanding the science behind each step. Here’s what I’ve learned from year…
- Perfect Char Technique: In Step 1, don’t be afraid to let the peppers get truly black during those 5-7 minutes—this i…
- Steaming Strategy: For Step 2, the 10-15 minutes of steaming is where the magic happens. I’ve found that using a glas…
Frequently Asked Questions
Do I need to skin peppers before cooking them?
Not always! Skinning is ideal for smooth sauces, soups, or stuffed peppers where texture matters. For stir-fries or roasted dishes, the skin adds flavor and fiber—just remove it if it’s tough (like on bell peppers) or if the recipe demands it. Thin-skinned peppers (like jalapeños) often don’t need peeling.
What’s the fastest way to skin peppers without burning them?
Try the steam-and-shock method: Roast peppers whole (400°F for 15–20 mins), then transfer to a bowl, cover with plastic wrap, and let steam for 10 mins. The skin will slip off easily! Avoid open flames unless you’re charring for smoky flavor.
Can I use a vegetable peeler instead of roasting?
Yes, but it’s tricky! A peeler works best on firm, thick-skinned peppers (like bell peppers). Wash, dry, and peel before cutting to avoid slipping. Skip this for soft or wrinkled peppers—they’ll tear!
Why is my pepper skin not coming off after roasting?
Two common culprits: under-roasting (skin needs blistering) or skipping the steam step. Ensure peppers are blackened in spots, then seal them in a bowl to loosen the skin. If stubborn, scrape gently with a knife. Patience is key!
Are there peppers that don’t need skinning?
Thin-skinned varieties like shishito, poblano (when young), or Anaheim peppers often soften enough during cooking. Test by rubbing the skin—if it’s tender, skip peeling. Save time and enjoy the extra texture!
Skinning peppers doesn’t have to be a hassle—with the right technique, you can achieve perfectly smooth, flavorful peppers every time! Whether you’re roasting, grilling, or steaming, the key is patience and a gentle touch. Now that you’ve mastered the method, why not put your new skills to the test? Try incorporating skinned peppers into your favorite dishes like stuffed peppers, salsas, or creamy soups for an extra layer of depth and texture. Happy cooking! 🌶️✨

Trained in classic French technique but raised on slow-cooked ribs and spicy rubs, she blends culinary skill with smoke and soul.