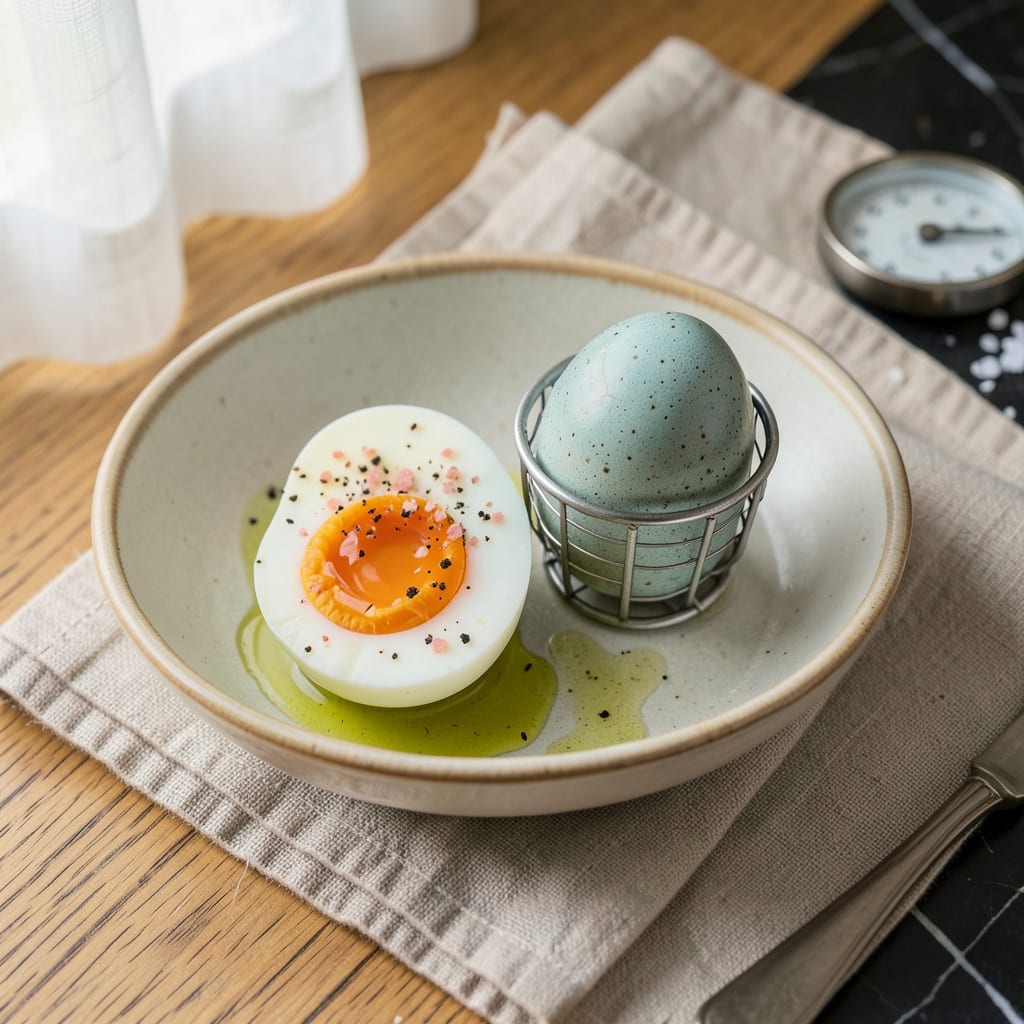
Duck eggs are the breakfast game-changer you didn’t know you needed. Honestly, I was skeptical at first—those thick shells and rich yolks seemed intimidating. But after nailing the perfect soft-boil technique, I’m hooked. The secret is all in the timing and water temperature, which I’ll walk you through step by step.
What makes duck eggs special is their creamy yolk that’s richer than chicken eggs, with a white that holds its shape beautifully when cooked just right. The thicker shell means you’ll need to adjust your approach slightly, but don’t worry—I’ve got the foolproof method that works every single time. No more rubbery whites or overcooked yolks.
You’ll end up with eggs that have that perfect runny yolk and just-set white, ready to be served on toast, dropped into ramen, or enjoyed straight from the shell. The texture is luxurious, almost custard-like, with a depth of flavor that chicken eggs can’t match. Once you try this method, you’ll never go back to the basic boiled egg.
Fair warning: these are so good, you might start keeping duck eggs on hand just for this recipe. Let’s get those eggs boiling!
📚 In This Guide
- What You’ll Need
- Instructions
- Tips and Common Mistakes
What Youll Need
- ● Duck eggs – 2 to 4 (fresh, room temperature for even cooking)
- ● Water – Enough to cover eggs by 1 inch in a pot (about 4–6 cups)
- ● Medium saucepan – With a tight-fitting lid (2–3 quart capacity)
- ● Slotted spoon – For gentle egg handling
- ● Timer – Digital or phone (precision matters! ⏰)
- ○ Ice water bath (optional) – Bowl of water + ice cubes (for stopping the cook)
- ○ Egg pricker or pin (optional) – To prevent cracking (prick the rounder end)
- ○ White vinegar (optional) – 1 tbsp (helps if an egg cracks; adds to water)
- ○ Egg cups or holders (optional) – For serving like a pro!
Instructions
This foolproof method delivers perfectly soft-boiled duck eggs with creamy centers and easy peeling—every single time!
Start with Room Temperature Eggs
Take your duck eggs out of the refrigerator and let them sit at room temperature for 20-30 minutes. I know it’s tempting to skip this step, but cold eggs straight from the fridge are more likely to crack when they hit the boiling water. Room temperature eggs also cook more evenly, giving you that perfect creamy center we’re after.
While you’re waiting, prepare a bowl of ice water—this will be your stopping bath to halt the cooking process at just the right moment. I like to add a few ice cubes to keep the water really cold. This simple step makes all the difference between a good soft-boiled egg and a perfect one.
Bring Water to a Gentle Boil
Fill a medium saucepan with enough water to cover the eggs by about 1 inch. Bring it to a gentle boil over medium-high heat. You want to see small, steady bubbles breaking the surface—not a rolling, aggressive boil. The gentler the water movement, the more control you’ll have over the cooking process.
Here’s the thing—duck eggs have a thicker shell and more fat than chicken eggs, so they need slightly different treatment. Once your water reaches that perfect gentle boil, you’re ready for the next step. Don’t add the eggs yet though! We want the water at the right temperature before they go in to ensure consistent results.
Cook for the Perfect Creamy Center
Using a slotted spoon, carefully lower the room temperature duck eggs into the gently boiling water. Set your timer for 7 minutes—this is the sweet spot for that luscious, runny yolk with just-set whites. If you prefer your yolk slightly firmer but still creamy, go for 7 minutes and 30 seconds.
Watch the heat carefully during cooking. You want to maintain that gentle boil—if it gets too vigorous, reduce the heat slightly. I’ve found that duck eggs benefit from this slightly longer cooking time compared to chicken eggs because of their larger size and richer composition. The result will be worth the extra 30 seconds!
Shock in Ice Water Immediately
As soon as your timer goes off, use that slotted spoon to transfer the eggs directly to your prepared ice bath. Let them cool for at least 2 minutes—this stops the cooking process dead in its tracks and helps the eggs contract slightly from the shell, making them easier to peel.
Real talk: this ice bath step is non-negotiable if you want that perfect creamy center. Without it, the eggs will continue cooking from residual heat, turning your beautiful soft-boiled eggs into something closer to hard-boiled. I learned this the hard way after ruining several batches before perfecting my technique!
Peel and Serve While Warm
Gently tap each egg on a hard surface, then roll it lightly to crack the shell all over. Start peeling from the wider end where the air pocket is—this is usually the easiest place to begin. The shell should come off smoothly, revealing that perfect soft-boiled egg underneath.
Serve your duck eggs immediately while they’re still warm. The contrast between the rich, creamy yolk and the just-set white is incredible. I love them with buttered toast soldiers for dipping, or simply sprinkled with flaky sea salt and freshly cracked pepper. The richer flavor of duck eggs makes them absolutely luxurious for this preparation!
Tips and Common Mistakes
Perfecting soft-boiled duck eggs is all about precision—here’s what I’ve learned from countless batches to help you nail it every time.
The Temperature Factor: Those 20-30 minutes at room temperature in Step 1 aren’t just a suggestion—they’re crucial! Duck eggs have thicker shells and more fat than chicken eggs, so starting cold means uneven cooking and potential cracking. I’ve found that exactly 25 minutes works perfectly in most kitchens. Set a timer so you don’t forget!
Boiling Technique: In Step 2, maintaining that gentle boil over medium-high heat makes all the difference. Here’s what nobody tells you—duck eggs need slightly less agitation than chicken eggs. If your boil is too vigorous, the whites can become rubbery while the yolks stay undercooked. Watch for small, steady bubbles breaking the surface, not a rolling boil.
Timing Secret: The 7 minutes in Step 3 is non-negotiable for that perfect creamy center, but here’s my pro move: use a digital timer with a loud alarm. Those 30 seconds between runny and slightly firmer yolks are critical. I actually set two timers—one for 6:30 to start checking water temperature, and one for the full 7 minutes. This prevents overcooking while ensuring perfect doneness.
Peeling Pro Tip: After the 2-minute ice bath in Step 4, here’s what changed everything for me: peel the eggs under a gentle stream of cool water. The water helps separate the membrane from the egg, making peeling effortless. Start at the wider end where the air pocket is, as mentioned in Step 5—this is absolutely the easiest entry point for perfect peeling every time!
Pro Tips for Soft Boil Duck Eggs
- Perfecting soft-boiled duck eggs is all about precision—here’s what I’ve learned from countless batches to help you n…
- The Temperature Factor: Those 20-30 minutes at room temperature in Step 1 aren’t just a suggestion—they’re crucial! D…
- Boiling Technique: In Step 2, maintaining that gentle boil over medium-high heat makes all the difference. Here’s wha…
Frequently Asked Questions
How long does it take to soft-boil a duck egg compared to chicken eggs?
Duck eggs typically need 6–7 minutes in boiling water for a runny yolk (vs. 6 minutes for chicken eggs). Their thicker shells and richer yolks require slightly more time. Start checking at 5:30 for a very soft center, and adjust based on your preferred doneness!
Why do my duck eggs crack while boiling?
Duck eggs have thicker shells, but sudden temperature changes can still cause cracks. Prevent this by:
- Using room-temperature eggs (not fridge-cold).
- Adding a pinch of vinegar to the water (strengthens the shell slightly).
- Gently lowering eggs with a spoon—no dropping!
Can I use an air fryer or Instant Pot instead of boiling?
Yes! For an Instant Pot, use 3–4 minutes on high pressure with a quick release. For an air fryer, preheat to 250°F and cook for 10–12 minutes (check frequently). Both methods yield creamy yolks but may need tweaking for your preferred texture.
How do I peel soft-boiled duck eggs without tearing them?
Duck eggs stick more due to their higher protein content. Try this trick:
- Shock in ice water for 1 minute after boiling.
- Tap the wide end gently on a hard surface.
- Peel under cool running water for smoother removal.
Are soft-boiled duck eggs safe to eat?
If sourced from a reputable farm and handled properly, yes! Duck eggs have a thicker membrane, reducing salmonella risk, but always:
- Use pasteurized eggs if concerned.
- Cook to at least 145°F (63°C) for safety.
- Consume immediately—don’t store soft-boiled eggs.
Mastering how to soft-boil duck eggs opens up a world of rich, creamy breakfasts—just a few minutes and a pot of water stand between you and perfection! 🍳 Whether you’re drizzling them over ramen or dipping toast soldiers, the key is timing and gentle handling. Now that you’ve got the technique down, why not experiment? Try pairing your soft-boiled eggs with bold flavors like soy-glazed mushrooms or spicy sriracha mayo for your next brunch. Happy cooking!

Trained in classic French technique but raised on slow-cooked ribs and spicy rubs, she blends culinary skill with smoke and soul.
- Recipe for Boneless Pork Chops in Cast Iron Skillet: Sear and Baste to Juicy Perfection - October 3, 2026
- Recipe for Boneless Cross Rib Roast: Slow-Roasted Beef with Herb Crust - October 3, 2026
- Hamburgers in Sauce Recipe Crock Pot: Slow-Cooked Savory Delight - October 3, 2026