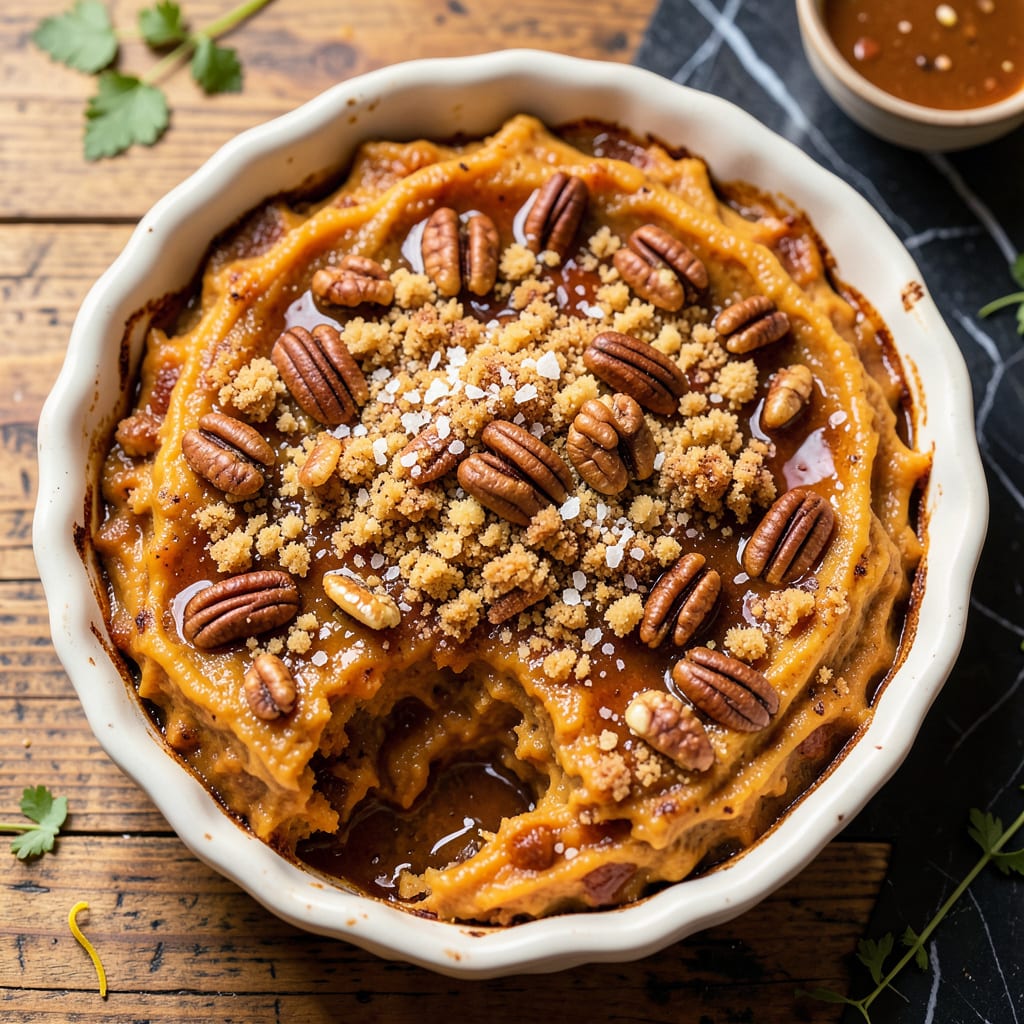
Nothing ruins a holiday table faster than a runny sweet potato casserole that slides right off your plate. I’ve been there—spending hours prepping that perfect creamy layer, only to watch it turn into sweet potato soup in the oven. The problem usually comes down to excess moisture from the potatoes themselves or not enough structure to hold everything together.
After burning through more test batches than I care to admit, I found the solution lies in two key steps: removing moisture before mixing and using the right thickener. Roasting your sweet potatoes first (instead of boiling) evaporates excess liquid, while a simple cornstarch slurry—just 1 tablespoon per cup of liquid—creates that dreamy, custard-like consistency we’re all after.
What you’ll end up with is a casserole that holds its shape when sliced, with layers that stay distinct instead of blending into mush. The top stays crisp (whether you’re team marshmallow or pecan streusel), while the filling remains rich and velvety. No more sad, watery servings that need a spoon—just perfect, fork-friendly portions every time.
Fair warning: This isn’t about masking problems with extra toppings. We’re fixing the foundation so your casserole comes out creamy, stable, and sliceable—exactly how it should be. Here’s how to make it happen without the stress.
📚 In This Guide
- What You’ll Need
- Instructions
- Tips and Common Mistakes
What Youll Need
- ● Sweet potato casserole base: 4 cups mashed sweet potatoes (about 3–4 medium sweet potatoes, cooked and peeled) 🍠
- ● Thickening agents (pick 1–2): ½ cup all-purpose flour (for roux-based thickening)
- ● 2 large eggs (for binding and structure)
- ● ¼ cup cornstarch or arrowroot powder (for gluten-free options)
- ● ½ cup crushed cornflakes or breadcrumbs (for topping texture + absorption)
- ○ Dairy/richness boosters (optional but recommended): ½ cup heavy cream or evaporated milk
- ● 4 tbsp unsalted butter, melted
- ● ½ cup shredded cheddar or cream cheese (for tangy thickness)
- ● Tools: 9×13-inch baking dish (greased)
- ● Mixing bowls (2 medium)
- ● Hand mixer or potato masher (for smooth texture)
- ● Whisk (for lump-free thickening agents)
- ● Measuring cups/spoons
- ● Prerequisites: Sweet potatoes pre-cooked (boiled, roasted, or steamed until fork-tender).
- ● Oven preheated to 350°F (175°C).
Instructions for Thickening Sweet Potato Casserole
Here’s exactly how to transform your casserole from watery to wonderfully rich and creamy.
Start with Properly Cooked Sweet Potatoes
The foundation of a thick casserole begins with how you prepare your sweet potatoes. I always recommend roasting instead of boiling—this method concentrates flavors and removes excess moisture. Pierce whole sweet potatoes with a fork, then bake at 400°F for 45-60 minutes until they’re completely tender when pierced with a knife.
When they’re done, you’ll notice the flesh pulls away from the skin easily and has a dry, mealy texture rather than being wet. This is exactly what you want. Let them cool slightly before scooping out the flesh—this brief rest allows some moisture to evaporate naturally. Never use canned sweet potatoes for this recipe; they contain too much liquid and will make your casserole soupy.
Drain Excess Liquid Before Mixing
After scooping the sweet potato flesh into your mixing bowl, you might notice some liquid at the bottom. Here’s what I do: let the cooked sweet potatoes sit in the bowl for 5 minutes, then tilt the bowl slightly to allow any accumulated liquid to pool on one side. Use a spoon to carefully remove and discard this excess moisture before proceeding.
This simple step makes a surprising difference in your final texture. You can also press the sweet potatoes gently with a potato masher or the back of a spoon to express additional liquid. The goal is to remove as much free moisture as possible before adding other ingredients. Trust me, this prevents that disappointing watery layer at the bottom of your casserole dish.
Use the Right Thickening Agents
For a perfectly creamy texture, I rely on a combination of eggs and a starch. Start by adding 2 large eggs to your sweet potato mixture—this provides structure and helps bind everything together. Then incorporate either 2 tablespoons of all-purpose flour or 1 tablespoon of cornstarch (cornstarch gives a slightly clearer result if that matters for your presentation).
The key is to mix these thickening agents thoroughly into the sweet potatoes before adding any liquid ingredients. I use an electric mixer on medium speed for about 2 minutes to ensure everything is completely combined and smooth. You’ll notice the mixture becomes noticeably thicker and more cohesive. This step is crucial—don’t skip it or your casserole might separate during baking.
Balance Your Liquid Ingredients
When adding milk, cream, or other liquids to your sweet potato mixture, go slowly. I typically start with about ½ cup less liquid than the recipe calls for, then gradually add more only if needed. The mixture should be thick enough to hold its shape when you pull the beater out—it should leave clear trails in the bowl that don’t immediately fill in.
Remember that sweet potatoes release more moisture as they cook, so what seems perfect in the bowl might become too loose in the oven. If you’re using canned milk or sweetened condensed milk, be especially cautious as these add significant liquid. The ideal consistency is similar to thick mashed potatoes—creamy but able to hold peaks when scooped.
Bake Properly for Final Thickening
Spread your mixture evenly in the baking dish and bake at 350°F for 25-30 minutes before adding any toppings. This initial baking period allows the casserole to set properly from the bottom up. You’ll know it’s ready for toppings when the edges start to pull away from the sides of the dish slightly and the center looks firm when gently shaken.
After adding your topping (whether it’s marshmallows, pecans, or streusel), return the casserole to the oven. The final 15-20 minutes of baking will complete the thickening process. Let the casserole rest for at least 10 minutes after removing from the oven—this allows the structure to fully set before serving, preventing that dreaded liquid from pooling on your plate.
Tips and Common Mistakes
After years of perfecting this dish, I’ve learned these key techniques that make all the difference between a soggy mess and creamy perfection.
Roasting is Non-Negotiable: The 45-60 minutes at 400°F in Step 1 isn’t just cooking time—it’s moisture removal time. Roasting caramelizes the natural sugars while evaporating excess water content that would otherwise pool in your casserole. I’ve tried boiling (even when pressed for time) and the texture difference is dramatic. The dry, mealy texture you get from roasting is exactly what absorbs the creamy elements without becoming waterlogged.
The 5-Minute Drain Trick: That brief 5-minute rest in Step 2 might seem insignificant, but it’s when gravity does its work. Sweet potatoes release surprising amounts of liquid as they cool. I actually tilt my bowl at a 45-degree angle and let it sit for the full 5 minutes—you’ll be amazed at how much liquid collects. Pressing them gently with a potato masher afterward (as mentioned in the instructions) removes even more moisture without making them gluey.
Mixing Method Matters: When combining the thickening agents in Step 3, those 2 minutes on medium speed aren’t arbitrary. This is when the eggs fully emulsify with the sweet potatoes and the starch (whether you’re using the 2 tablespoons of flour or 1 tablespoon of cornstarch) gets completely distributed. I notice the mixture visibly thickens and becomes glossy during this time—your visual cue that the structure is developing properly. Skipping this step or rushing it often leads to separation during baking.
Baking in Stages: The 25-30 minutes initial bake in Step 5 isn’t just about cooking—it’s about setting the base layer. This is when the eggs coagulate and the starch activates to create the structure that will hold your toppings. I check for doneness by gently shaking the dish—the center should wobble slightly but not ripple. The final 15-20 minutes with toppings then becomes about melting and browning rather than structural setting.
Pro Tips for Thicken Sweet Potato Casserole
- After years of perfecting this dish, I’ve learned these key techniques that make all the difference between a soggy m…
- Roasting is Non-Negotiable: The 45-60 minutes at 400°F in Step 1 isn’t just cooking time—it’s moisture removal time. …
- The 5-Minute Drain Trick: That brief 5-minute rest in Step 2 might seem insignificant, but it’s when gravity does its…
Frequently Asked Questions
Can I thicken sweet potato casserole after it’s already baked?
Yes! If your casserole is too runny after baking, mix 1 tbsp cornstarch or arrowroot powder with 2 tbsp cold water, then stir it into the hot filling. Return it to the oven for 10–15 minutes at 350°F to set. For a no-bake fix, let it cool—it’ll firm up slightly as it sits.
What’s the best thickener for a dairy-free sweet potato casserole?
Skip milk-based thickeners and try coconut milk powder (mix ¼ cup with the filling) or mashed banana (½ cup for natural sweetness + body). For a neutral option, blend in 2 tbsp tapioca flour or chia seeds (soaked in water first).
How long does it take for sweet potato casserole to thicken in the oven?
Most casseroles thicken in 30–45 minutes at 350°F. Check at 30 minutes—if the center jiggles slightly (like jelly), it’s done. Overbaking can dry it out, so tent with foil if the top browns too fast. A toothpick test (clean when inserted) works too!
Why did my sweet potato casserole turn out watery?
Common culprits:
- Too much liquid (reduce milk/egg by ¼ cup next time).
- Undercooked sweet potatoes (they release moisture—roast or boil until fork-tender).
- Skipping thickeners like eggs or flour.
Can I use instant mashed potatoes to thicken the filling?
Stir in ½ cup dry instant mashed potatoes to absorb moisture and add creaminess. It’s a quick fix for runny fillings—just avoid overmixing to prevent a gluey texture. Bonus: It boosts the fluffy factor!
Now you’ve got all the tricks to turn a runny sweet potato casserole into a rich, velvety masterpiece! 🎉 Whether you used a slurry, extra eggs, or a quick bake to evaporate moisture, the key is patience and the right technique. Don’t be afraid to experiment—your perfect texture is just a tweak away.
Ready to put your skills to the test? Whip up a batch and wow your guests with layers so creamy, they’ll ask for seconds (and the recipe!). For more holiday side dish hacks, check out our guide on crispy marshmallow toppings next!

Trained in classic French technique but raised on slow-cooked ribs and spicy rubs, she blends culinary skill with smoke and soul.
- Recipe for Boneless Pork Chops in Cast Iron Skillet: Sear and Baste to Juicy Perfection - October 3, 2026
- Recipe for Boneless Cross Rib Roast: Slow-Roasted Beef with Herb Crust - October 3, 2026
- Hamburgers in Sauce Recipe Crock Pot: Slow-Cooked Savory Delight - October 3, 2026