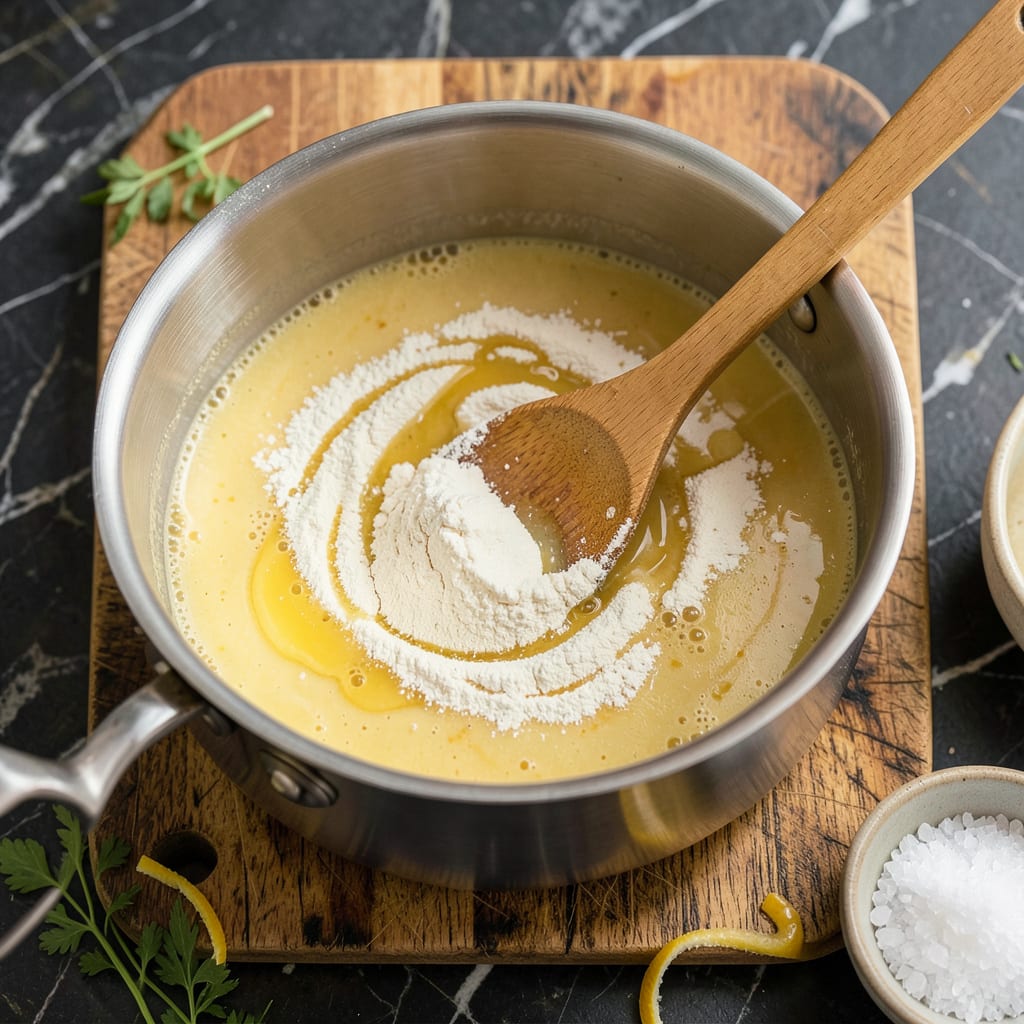
Here’s the thing—potato soup without a proper roux is like a campfire without smoke. It’s missing that rich, velvety foundation that turns good soup into something unforgettable. I’ve made this mistake before, skipping the roux and ending up with thin, watery soup that just didn’t satisfy. Never again.
This simple butter-and-flour paste is your secret weapon for creamy, restaurant-quality potato soup every time. The key is cooking it just long enough to lose that raw flour taste but not so long it burns—think golden blonde color with a faint nutty aroma. I learned this the hard way after burning three batches in a row (yes, really).
What you get is a smooth, velvety base that thickens your soup naturally without any weird aftertaste. It’s the difference between soup that’s just okay and soup that people ask for seconds of. And here’s where it gets interesting—you can make it ahead and store it for weeks, so creamy potato soup is always just minutes away.
Between you and me, once you master this technique, you’ll start using roux for everything. Gravies, sauces, even mac and cheese get that same rich, velvety texture. Let’s get that pot heating and make some magic happen.
📚 In This Guide
- What You’ll Need
- Instructions
- Tips and Common Mistakes
What Youll Need
- ● Butter (unsalted) – ½ cup (1 stick), cut into small cubes for even melting
- ● All-purpose flour – ½ cup, sifted to avoid lumps
- ● Heavy cream or whole milk – 2 cups (for blending into the roux later)
- ● Salt – ½ tsp (adjust to taste)
- ● White or black pepper – ¼ tsp (freshly ground preferred)
- ○ Optional: Garlic powder or onion powder – ½ tsp (for extra flavor depth)
- ○ Optional: Cayenne pepper – pinch (for a subtle kick)
- ● Heavy-bottomed saucepan (2-3 qt) – prevents burning
- ● Whisk – essential for smooth, lump-free roux
- ● Wooden spoon – for stirring once the roux thickens
- ● Measuring cups and spoons – precision matters!
- ○ Optional: Fine-mesh strainer – if you want ultra-smooth results
Instructions
Here’s the foolproof method I use to create a velvety roux that transforms your potato soup.
Melt the Butter Gently
Start with a heavy-bottomed saucepan over medium-low heat. Add your butter and let it melt completely, watching for the foaming to subside. This should take about 2-3 minutes – you want the butter fully liquid but not browning at all.
The key here is patience. If the butter gets too hot, it will burn and give your roux an unpleasant bitter taste. I always use unsalted butter so I can control the seasoning later. You’ll know it’s ready when the foam disappears and the butter turns clear.
Whisk in the Flour Gradually
Once your butter is ready, add the flour all at once. Immediately start whisking vigorously to combine it with the melted butter. You’ll notice the mixture thickens almost instantly and forms a smooth paste.
Keep whisking constantly for 3-4 minutes until the raw flour smell disappears. The roux should look like wet sand and maintain a pale yellow color. This cooking step removes the starchy taste of raw flour and develops the base flavor for your soup.
Cook to the Perfect Blonde Stage
Continue cooking the roux over medium-low heat, stirring frequently with a wooden spoon. You’re aiming for a light golden color, which usually takes about 5-7 minutes of cooking time.
Watch carefully as the color changes – it goes from pale to golden quickly. The moment you see it turn a light caramel color, remove it from heat immediately. This “blonde” stage gives your potato soup that perfect creamy texture without any raw flour taste.
Incorporate the Warm Liquid
Slowly pour in your warm milk or broth while whisking constantly. I recommend heating your liquid first (about 180°F) to prevent the roux from seizing up. Add it in a thin, steady stream.
The mixture will thicken dramatically at first – this is normal. Keep whisking until all the liquid is incorporated and you have a smooth, velvety base. Return to medium heat and cook for another 2-3 minutes until it reaches your desired consistency.
Season and Finish
Now’s the time to add salt and pepper to taste. I start with ½ teaspoon salt and adjust from there. Remember, your soup ingredients will add more flavor, so don’t over-salt at this stage.
Let the roux cool slightly before adding it to your potato soup. The finished roux should coat the back of a spoon and have a silky, smooth texture. This creamy base will give your potato soup that rich, velvety consistency everyone loves.
Tips and Common Mistakes
Mastering this creamy base is all about patience and attention to detail—here’s what I’ve learned from years of making roux.
Heat Control: In Step 1, those 2-3 minutes of melting butter are critical. Use a heavy-bottomed pan to prevent hot spots, and keep the heat at medium-low—never let the butter foam aggressively or turn brown. I like to swirl the pan occasionally rather than stir to avoid breaking the butter’s emulsion, which helps create that velvety texture we’re after.
The Technique That Changed Everything: When adding flour in Step 2, don’t just dump it in. Hold your whisk at a slight angle and pour the flour in a steady stream while whisking vigorously. This prevents clumping and ensures every grain of flour gets coated with butter. The 3-4 minutes of constant whisking might feel tedious, but it’s what removes that raw flour taste completely.
Color Watch: Step 3’s 5-7 minutes of cooking to the blonde stage is where most people go wrong. The color change happens fast—pale yellow to light caramel in seconds. I use a white plate as a color reference: when the roux matches light honey, it’s perfect. Remove it immediately; even residual heat will darken it further.
Liquid Temperature: For Step 4, heating your milk or broth to exactly 180°F makes all the difference. Too cold and the roux will seize into lumps, too hot and it might break. I use an instant-read thermometer to check—it’s worth the extra step for that perfectly smooth, velvety consistency we want in our potato soup.
Pro Tips for Roux For Potato Soup
- Mastering this creamy base is all about patience and attention to detail—here’s what I’ve learned from years of makin…
- Heat Control: In Step 1, those 2-3 minutes of melting butter are critical. Use a heavy-bottomed pan to prevent hot sp…
- The Technique That Changed Everything: When adding flour in Step 2, don’t just dump it in. Hold your whisk at a sligh…
Frequently Asked Questions
How long should I cook the roux for potato soup?
For a classic blonde roux (perfect for potato soup), cook it for 3–5 minutes over medium heat, stirring constantly, until it turns a light golden color. A darker roux (6–8 minutes) adds nuttier flavor but may overpower delicate potato soup. Watch closely—it burns fast!
Can I make roux ahead of time for potato soup?
Cook and cool your roux, then store it in an airtight container in the fridge for up to 2 weeks or freeze for 3 months. Reheat gently in a saucepan before adding liquids—it’ll thicken just like fresh!
What’s a good roux substitute for potato soup?
No roux? No problem! Try these swaps:
- Cornstarch slurry (1 tbsp cornstarch + 2 tbsp cold water per cup of liquid).
- Instant mashed potatoes (whisk 2 tbsp into warm broth for thickness).
- Cream cheese or sour cream (adds richness but less thickening power).
Mastering a roux for potato soup is your secret weapon for that restaurant-quality creaminess every time! 🥘 With just butter, flour, and patience, you’ll transform simple ingredients into a rich, velvety base that elevates your soup from good to unforgettable. Whether you prefer a light blond roux or a deeper, nuttier flavor, the key is low heat and steady stirring—no shortcuts!
Ready to put your new skills to the test? Grab your whisk and a pot of simmering potatoes, and dive into that cozy bowl of soup you’ve been craving. Don’t forget to experiment with add-ins like cheese, bacon, or fresh herbs for extra flair. Happy cooking—your taste buds will thank you! 😊

Trained in classic French technique but raised on slow-cooked ribs and spicy rubs, she blends culinary skill with smoke and soul.
- Recipe for Boneless Pork Chops in Cast Iron Skillet: Sear and Baste to Juicy Perfection - October 3, 2026
- Recipe for Boneless Cross Rib Roast: Slow-Roasted Beef with Herb Crust - October 3, 2026
- Hamburgers in Sauce Recipe Crock Pot: Slow-Cooked Savory Delight - October 3, 2026