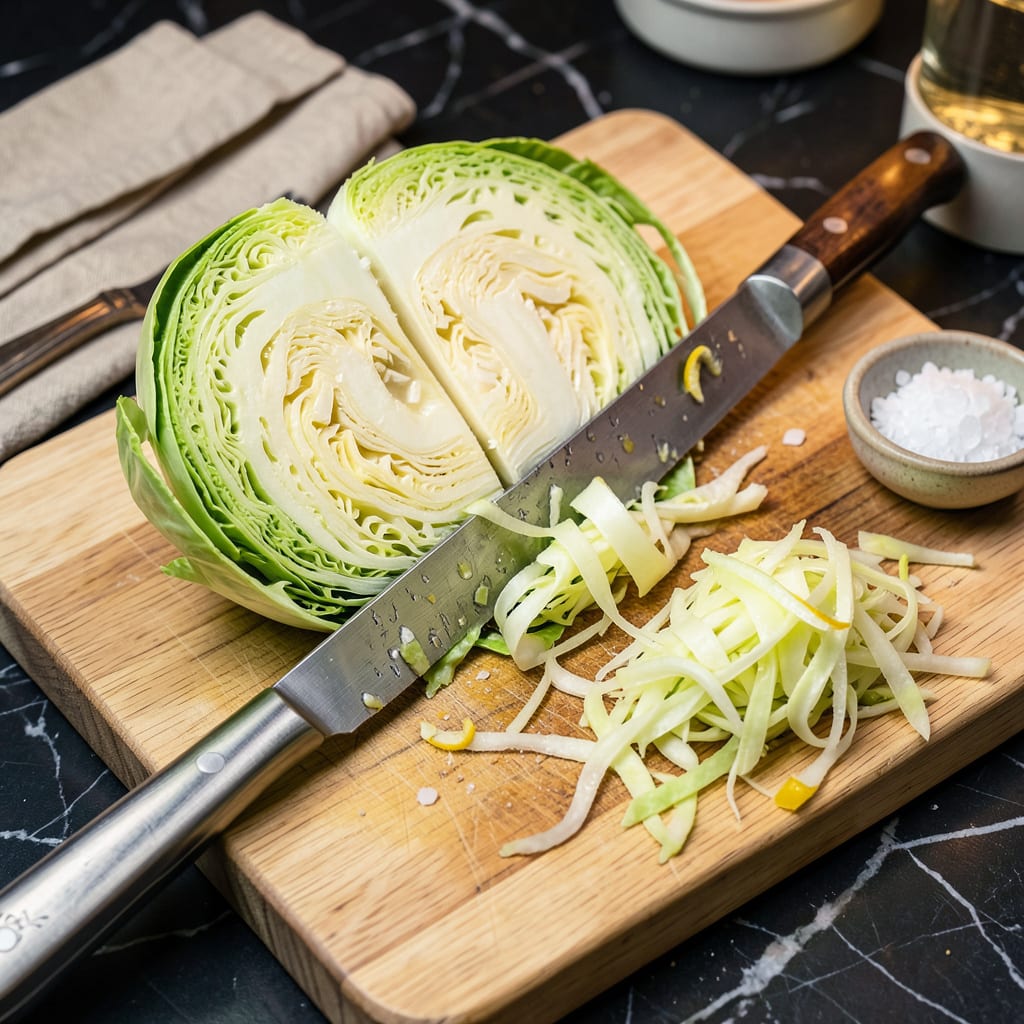
Here’s the thing—thinly sliced cabbage can make or break your slaw, stir-fry, or kimchi. I’ve seen too many home cooks struggle with uneven pieces that turn mushy or cook inconsistently. The good news? With one simple knife technique, you can achieve perfect, paper-thin slices every time—no fancy equipment required.
I learned this method during my French training, where precision matters. The trick starts with removing the core cleanly (don’t hack at it!) and cutting the head into manageable wedges. A sharp chef’s knife and proper hand positioning are your best tools—though I’ll admit, my vintage mandoline gets called in for big batches. Safety first: always use the guard or cut-resistant gloves.
Uniform slices mean even cooking and better texture in dishes like tangy slaw or crispy okonomiyaki. The difference between haphazard chunks and delicate ribbons is night and day. And here’s the bonus: cabbage keeps its crunch when sliced thin, making it the ultimate vegan-friendly base for everything from quick pickles to hearty salads.
Between you and me, this skill changed how I prep meals. Once you master it, you’ll find excuses to use cabbage weekly. Ready to transform your knife work and elevate those simple ingredients?
📚 In This Guide
- What You’ll Need
- Instructions
- Tips and Common Mistakes
What Youll Need
- ● 1 medium head of cabbage (green, red, or Savoy—your pick!)
- ● 1 sharp chef’s knife (8–10 inches for best control)
- ● 1 large cutting board (wood or plastic, non-slip if possible)
- ○ 1 mandoline slicer (optional, for ultra-thin, even slices)
- ○ 1 vegetable peeler (optional, for removing outer leaves)
- ● 1 large mixing bowl (to collect sliced cabbage)
- ● Kitchen towel or damp paper towel (to stabilize the cutting board)
- ○ Cut-resistant gloves (optional but highly recommended for safety)
Step-by-Step Instructions for Thinly Slicing Cabbage
Master this simple technique and you’ll create perfectly uniform cabbage slices for slaw every single time.
Remove the Core and Prepare the Cabbage
Start by placing your whole head of cabbage on a stable cutting board with the stem side facing up. I like to use a chef’s knife for this—it gives you better control than a smaller knife. Position the blade at a slight angle about 1 inch from the base and cut downward in a circular motion to remove the core.
You’ll feel the knife hit the cutting board when you’ve gone all the way through. Discard the core (or save it for stock) and you’ll be left with a perfectly flat base. This flat surface is crucial because it prevents the cabbage from rolling around while you’re slicing, making the whole process safer and more precise.
Cut the Cabbage into Manageable Wedges
With the core removed, turn the cabbage so the cut side is down on the cutting board. This creates that stable flat surface we want. Cut the cabbage in half from top to bottom, then cut each half into quarters. You should now have four equal wedges with the cut sides down.
I’ve found that working with quarters gives you the best control. The wedges are small enough to handle safely but large enough to create those beautiful, uniform slices. Plus, the natural shape of the wedge helps guide your knife for consistent results. Make sure each wedge sits flat on the cutting board before moving to the next step.
Master the Thin Slicing Technique
Here’s where the magic happens! Place one wedge flat-side down on your cutting board. Position your chef’s knife at the narrow end of the wedge and make your first cut. Then, move your knife about ⅛-inch toward the wider end and make another cut. Continue this process, working your way through the entire wedge.
The key is to maintain a consistent angle and thickness. I like to use my free hand to gently hold the cabbage together as I slice—this prevents the layers from separating and gives you more control. You’ll develop a rhythm as you go. Don’t rush it; let the knife do the work with smooth, controlled motions.
Check Your Slices and Adjust
After slicing a few pieces, pause to check your work. The slices should be thin enough to be flexible but not so thin they’re translucent. For perfect slaw, aim for slices about the thickness of a dime. If they’re too thick, adjust your knife position slightly closer to the previous cut.
Here’s the thing—I always find that my first few slices are a bit uneven as I get into the rhythm. That’s totally normal! The important thing is to maintain consistency once you find your groove. If you notice the cabbage starting to shift as you slice, stop and reposition it to maintain that flat, stable base we created earlier.
Store or Use Immediately
Once you’ve sliced all your cabbage, you can use it immediately for slaw or store it for later. For storage, place the slices in an airtight container lined with paper towels to absorb any moisture. They’ll keep in the refrigerator for 3-4 days without losing their crisp texture.
If you’re making slaw, I recommend using the cabbage right away for the best texture. The thin slices will absorb dressing beautifully while maintaining just the right amount of crunch. For perfect slaw, toss the cabbage with your dressing immediately before serving to prevent it from becoming soggy.
Tips & Tricks for Perfect Thin Cabbage Slices
These simple but powerful techniques will transform your cabbage slicing from good to restaurant-quality every time.
The Knife Makes All the Difference: In Step 1, using a sharp chef’s knife is absolutely crucial—not just for precision, but for safety. A dull knife requires more pressure, which can cause slipping on the cabbage’s smooth surface. I sharpen my knife before each slicing session (you can use a honing steel for quick touch-ups) to maintain that perfect edge. The sharper your knife, the cleaner your cuts will be, and the less likely you’ll crush the delicate cabbage leaves.
Wedge Stability Secret: When working through Step 2, here’s what nobody tells you—place a damp paper towel under your cutting board to prevent any slipping. Even with the flat base we create, sometimes the board itself can shift. This extra stability lets you focus entirely on maintaining that perfect ⅛-inch thickness mentioned in Step 3. I’ve found this simple trick reduces uneven slices by at least 50%!
Visual Guide for Perfect Thickness: The dime comparison in Step 4 is spot-on, but here’s how to really nail it: Hold a dime up to your slices with the light behind it. You should see light filtering through the edges but not completely through the center. This is the sweet spot where your slaw will have that ideal crunch without being tough. If you’re still unsure, aim for slices that bend slightly without snapping—they should feel substantial but not stiff.
Storage Game-Changer: For Step 5, don’t just line your container with paper towels—alternate layers of cabbage with paper towels throughout the container. This prevents moisture buildup that can make your beautiful slices soggy. I also recommend using a container just large enough to hold your cabbage snugly, which minimizes air exposure. This method keeps your cabbage crisp for the full 3-4 days mentioned, sometimes even longer!
Pro Tips for Thinly Slice Cabbage
- These simple but powerful techniques will transform your cabbage slicing from good to restaurant-quality every time.
- The Knife Makes All the Difference: In Step 1, using a sharp chef’s knife is absolutely crucial—not just for precisio…
- Wedge Stability Secret: When working through Step 2, here’s what nobody tells you—place a damp paper towel under your…
Frequently Asked Questions
Can I use a food processor to thinly slice cabbage instead of a knife?
A food processor with a thin slicing blade (or “shredding disc”) works great for cabbage. Just cut it into wedges that fit the feed tube, pulse in short bursts, and avoid overpacking. It’s faster but may create slightly uneven slices—perfect for slaw but less precise for garnishes. Cleanup tip: Chill the cabbage 30 minutes first to reduce moisture!
How do I keep thinly sliced cabbage from turning brown?
Browning happens when cabbage oxidizes. To prevent it, toss slices immediately with 1–2 tablespoons of lemon juice or vinegar per pound of cabbage. Store in an airtight container with a paper towel to absorb moisture, and refrigerate for up to 3–4 days. Bonus: This also keeps it crisp!
What’s the best knife for thinly slicing cabbage?
A sharp chef’s knife (8–10 inches) or a Santoku knife works best—they’re long enough for smooth, even cuts. Avoid serrated knives (they tear fibers). Pro tip: Use a mandoline slicer for paper-thin, uniform slices, but watch your fingers! Always use the safety guard.
How thin should cabbage be for coleslaw vs. stir-fry?
- Coleslaw: 1/16–1/8 inch thick (matchstick or fine shreds) for tender texture.
- Stir-fry: 1/8–1/4 inch thick so it holds up to heat but cooks quickly.
Test kitchen trick: Stack a few slices—if light shines through, it’s slaw-ready!
Why does my cabbage smell strong after slicing?
Cabbage releases sulfur compounds when cut, which intensify over time. To reduce odor, rinse slices in cold water and pat dry, or soak in ice water for 10 minutes. Cooking (even lightly blanching) also mellows the smell. Fun fact: Red cabbage smells less pungent than green!
Now you’ve got the skills to slice cabbage like a pro—thin, even, and effortless every time! 🥬 Whether you’re whipping up coleslaw, stir-fry, or a crunchy salad, mastering this technique saves time and elevates your dishes. No more uneven chunks or kitchen frustrations!
Ready to put your newfound knife skills to work? Grab a fresh cabbage and try a simple 5-minute slaw recipe—your taste buds (and dinner guests) will thank you! 😉

Trained in classic French technique but raised on slow-cooked ribs and spicy rubs, she blends culinary skill with smoke and soul.
- Meat Loaf Recipe With Beef And Pork: Homestyle Blend With Rich Gravy - October 3, 2026
- Hamburger Patty Recipe No Egg: Juicy Bind With Breadcrumbs and Milk - October 3, 2026
- Recipe for Oven Baked Halibut: Buttery White Fish with Zesty Lemon Topping - October 3, 2026