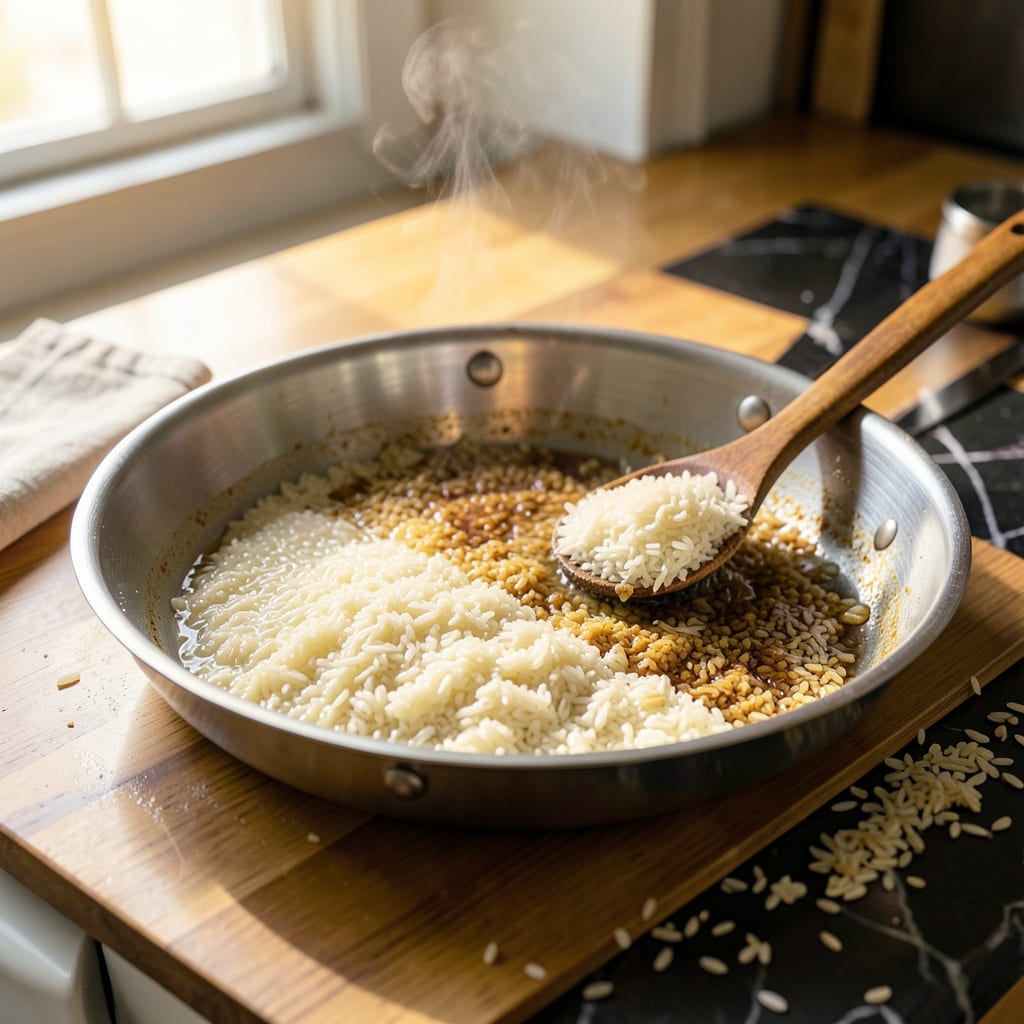
I’ll be real with you—toasting rice before cooking is the single easiest way to take your grains from basic to perfectly aromatic with almost no extra effort. That first whiff of nutty, buttery scent rising from the pot? That’s your signal that plain rice is about to become something special. I started doing this years ago when I noticed my pilafs lacked depth, and now I won’t make rice any other way.
Here’s the thing: toasting rice works by coaxing out its natural oils and creating a caramelized base layer. You don’t need fancy equipment—just a dry pan and about 3-5 minutes of attention. Basmati, jasmine, even Arborio for risotto all benefit from this simple step. The difference is night and day: fluffier texture, richer flavor, and that coveted nutty aroma that makes people ask for seconds.
I use toasted rice as my secret weapon for everything from fried rice (way more flavor than takeout) to creamy risottos. The technique is foolproof: heat your pan, add dry rice, and stir until it smells like popcorn and turns just slightly golden. That’s your cue to add liquid and proceed as usual. The whole process adds maybe 5 extra minutes but pays off in every bite.
Fair warning: once you try this, you’ll never skip the toasting step again. It’s the kind of small upgrade that makes home-cooked meals taste like they came from a restaurant kitchen. Ready to transform your rice game? Let’s get that pan heating.
📚 In This Guide
- What You’ll Need
- Instructions
- Tips and Common Mistakes
What Youll Need
- ● Uncooked rice: 1–2 cups (white, brown, basmati, or jasmine—pick your favorite!)
- ● Cooking oil or butter: 1–2 tbsp (neutral oils like vegetable or canola work best; butter adds richness 🧈)
- ● Heavy-bottomed pan or skillet: Medium-sized (stainless steel or cast iron for even heating)
- ● Wooden spoon or heat-resistant spatula: For stirring without scratching
- ○ Fine-mesh strainer (optional): If rinsing rice pre-toast (reduces starch for crispier grains)
- ○ Aromatics (optional): 1–2 garlic cloves, 1 small onion (diced), or spices like cumin/pepper for extra flavor 🌿
- ● Timer: To nail that perfect golden hue (3–5 minutes, no guesswork! ⏰)
- ○ Air-tight container (optional): For storing pre-toasted rice (keeps freshness for up to 2 weeks)
Instructions
Here’s how to achieve that perfect nutty flavor and fluffy texture—simple steps, big results.
Choose Your Rice and Prep the Pan
Start with long-grain white rice for the best results—I like jasmine or basmati for their fragrance and separate grains. Measure your rice carefully (typically 1 cup rice per 4 servings) and rinse it under cold water until the water runs clear. This removes excess starch and prevents clumping later.
Select a heavy-bottomed pot or saucepan with a tight-fitting lid. The even heat distribution prevents scorching. Place the dry pot over medium heat for 1-2 minutes to warm it up—you’ll feel the heat radiating when you hover your hand above it. This preheating ensures the rice toasts evenly from the first moment it hits the pan.
Toast the Rice to Golden Perfection
Add the drained rice to the warm pot and spread it into an even layer. Let it toast undisturbed for 1-2 minutes until you hear a faint crackling sound and smell a warm, nutty aroma. This is the magic moment when the rice begins to transform.
Now stir the rice constantly with a wooden spoon for another 2-3 minutes until it turns a light golden color and gives off a toasty fragrance. Watch closely—you want golden, not brown. The grains should look slightly translucent at the edges when they’re perfectly toasted. This step builds the foundation for all that nutty depth in your final dish.
Add Liquid and Bring to a Simmer
Carefully pour in your liquid—typically 1½ cups water or broth per 1 cup rice. I prefer using warm liquid (about 110°F) because it jumpstarts the cooking process and prevents the toasted rice from cooling too quickly. You’ll hear a satisfying sizzle as the liquid hits the hot pan.
Stir just once to distribute the rice evenly, then let the mixture come to a gentle boil. This usually takes 2-3 minutes. You’ll see steam rising and small bubbles breaking the surface consistently. Once boiling, immediately reduce the heat to low—this is crucial to prevent burning while allowing the rice to absorb the liquid properly.
Cover and Cook Undisturbed
Cover the pot with its tight-fitting lid and let the rice cook undisturbed for 15-18 minutes. I know it’s tempting to peek, but resist! Every time you lift the lid, you release precious steam that’s essential for even cooking. The rice needs this trapped steam to cook perfectly from top to bottom.
After 15 minutes, you can check for doneness by tilting the pot slightly—if you don’t see any standing water and the rice looks fluffy, it’s ready. If there’s still liquid, recover and cook for another 2-3 minutes. The grains should be tender but still have a slight bite, and the bottom should have developed a delicate, crispy layer (the prized “socarrat” if you’re making paella-style rice).
Rest and Fluff for Perfect Texture
Turn off the heat but leave the covered pot on the warm burner for an additional 5-10 minutes. This resting period is when the magic happens—the steam redistributes throughout the rice, ensuring every grain is perfectly cooked. You’ll notice the aroma becomes even more pronounced during this time.
Finally, remove the lid and use a fork to gently fluff the rice from the bottom up. This separates the grains and releases any remaining steam. Taste a few grains—they should be tender with a subtle crunch from the toasted exterior, and the overall flavor should have a beautiful nutty depth that plain rice just can’t match. Serve immediately while still steaming for the best texture and flavor.
Tips and Common Mistakes
This simple technique transforms plain rice into something extraordinary—here’s how to nail it every time.
The Toasting Secret: In Step 2, when you’re toasting the rice for those 1-2 minutes undisturbed, listen for that faint crackling sound—it’s your audio cue that the rice is starting to transform. I always hover my hand above the pot to feel the heat radiating up; when it’s warm against my palm, I know the pan is perfectly preheated. This initial toast creates that signature nutty aroma that makes this rice so special.
Color Control: During the 2-3 minutes of constant stirring in Step 2, aim for a light golden color—think of the shade of honey. If your rice starts turning brown, you’ve gone too far and risk bitter flavors. The grains should look slightly translucent at the edges when perfectly toasted. I like to pull a few grains out to check their color against the white of my plate for accuracy.
Steam Management: When covering the pot in Step 4 for the 15-18 minutes of cooking, make absolutely sure your lid fits tightly. I learned this the hard way after making mushy rice—every peek releases steam that’s crucial for even cooking. If your lid doesn’t seal well, place a clean kitchen towel between the pot and lid to trap that essential steam inside.
Resting Period: Don’t skip the 5-10 minutes of resting in Step 5 with the heat off. This is when the rice absorbs any remaining moisture and the flavors fully develop. I can always tell when someone rushes this step—the grains won’t have that perfect tender-yet-firm texture. The aroma becomes noticeably richer during this resting time too.
Pro Tips for Toast Rice
- This simple technique transforms plain rice into something extraordinary—here’s how to nail it every time.
- The Toasting Secret: In Step 2, when you’re toasting the rice for those 1-2 minutes undisturbed, listen for that fain…
- Color Control: During the 2-3 minutes of constant stirring in Step 2, aim for a light golden color—think of the shade…
Frequently Asked Questions
Can I toast rice in a microwave?
No, microwaving isn’t ideal for toasting rice. The dry heat needed for even browning is hard to achieve, and you risk uneven cooking or burning. Stick to a stovetop (skillet or pot) or oven for best results—just 3–5 minutes of direct heat makes all the difference!
How long does it take to toast rice before cooking?
Toast raw rice in a dry skillet over medium heat for 2–4 minutes, stirring constantly, until golden and fragrant. For brown rice, extend to 4–5 minutes—its thicker bran layer needs extra time. Over-toasting can make rice bitter, so keep it moving!
What’s the best oil for toasting rice (or can I skip it)?
You can toast rice dry for a pure nutty flavor, but a teaspoon of neutral oil (like avocado or vegetable) or butter prevents sticking and adds richness. For extra flavor, try sesame oil (Asian dishes) or olive oil (Mediterranean). Skip oil if watching calories!
Why does my toasted rice taste burnt or bitter?
Burnt flavor usually means the heat was too high or the rice sat too long in one spot. Use medium heat, stir constantly, and pull it off the heat as soon as it turns light golden. If it’s bitter, rinse the rice after toasting to remove excess starch.
Can I toast cooked rice for fried rice or other dishes?
Yes! Spread cooked, cooled rice in a skillet with a little oil over medium-high heat. Stir-fry for 3–5 minutes until slightly crispy—perfect for fried rice! Pro tip: Day-old rice toasts better since it’s drier.
Now that you’ve mastered how to toast rice, you’re ready to unlock a world of deeper, nuttier flavors in every dish! 🌾✨ Whether you’re prepping for a stir-fry, pilaf, or simple side, toasting rice is a quick trick that elevates even the simplest meals. Next, try experimenting with different grains—like quinoa or barley—or pair your toasted rice with a flavorful broth for extra richness. Happy cooking!

Trained in classic French technique but raised on slow-cooked ribs and spicy rubs, she blends culinary skill with smoke and soul.
- Recipe for Boneless Pork Chops in Cast Iron Skillet: Sear and Baste to Juicy Perfection - October 3, 2026
- Recipe for Boneless Cross Rib Roast: Slow-Roasted Beef with Herb Crust - October 3, 2026
- Hamburgers in Sauce Recipe Crock Pot: Slow-Cooked Savory Delight - October 3, 2026