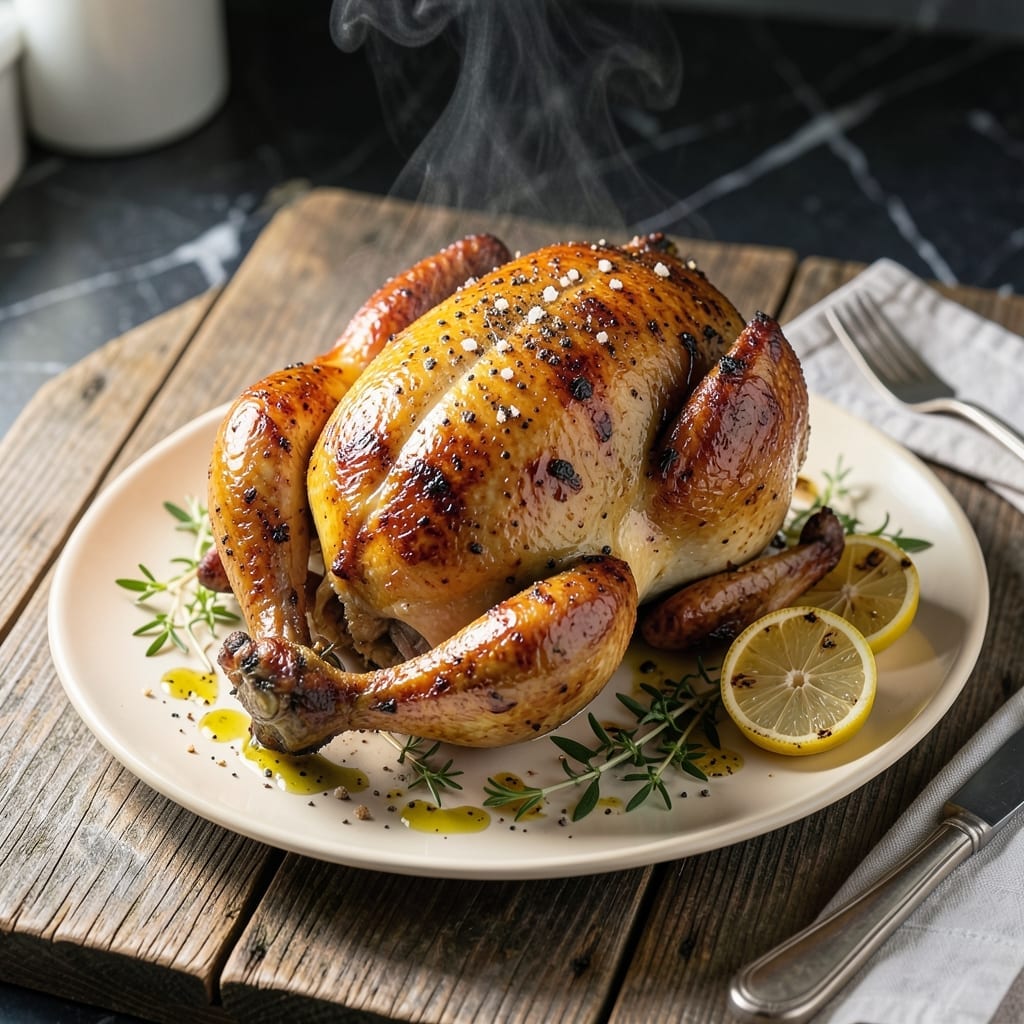
I’ve burned through more chicken recipes than I care to admit, but this baked version finally nails it. The secret? High heat and a simple trick for crispy skin without drying out the meat.
What makes this different is starting with dry chicken skin and baking it on a wire rack. This allows hot air to circulate all around, creating that perfect golden crust while keeping the inside juicy and tender.
You’ll end up with chicken that’s crispy on the outside, succulent inside, and packed with flavor from a simple seasoning blend. It’s the kind of meal that feels special but comes together with minimal effort.
Serve it with roasted vegetables or mashed potatoes for a complete dinner. Here’s how to make it right every time.
Ingredients for I Need a Recipe for Baked Chicken
Simple ingredients, extraordinary results. Just what you need for perfect baked chicken.
| Ingredient | Amount | Notes |
|---|---|---|
| Whole Chicken 🍗 | 1 whole | Pat dry inside and out |
| Olive Oil 🫒 | 2 tbsp | Extra-virgin preferred |
| Kosher Salt 🧂 | 1 ½ tsp | Divided for seasoning |
| Black Pepper 🌶️ | 1 tsp | Freshly ground preferred |
| Garlic Powder 🧄 | 1 tsp | For even flavor distribution |
| Onion Powder 🧅 | 1 tsp | Complements the garlic |
| Smoked Paprika 🌶️ | ½ tsp | Adds depth and color |
| Dried Thyme 🌿 | ½ tsp | Earthy herb note |
| Lemon 🍋 | 1 whole | Zested and juiced |
| Fresh Rosemary 🌿 | 2 pieces | Sprigs for aroma |
| Butter 🧈 | 1 tbsp | Melted for basting |
[recipe_ingredient_scaler]
The chicken is everything here. Look for a 4-5 lb bird with smooth, unblemished skin—this ensures even cooking and that crispy finish. I grab mine from Whole Foods or the local butcher, but any reputable grocery store works. Pat it bone-dry before seasoning (this is non-negotiable for crispy skin). If you’ve got time, let it sit uncovered in the fridge overnight to really dry out the skin.
No fresh rosemary? Dried at half the amount works, but fresh has that piney brightness you can’t beat. Out of smoked paprika? Regular paprika plus a pinch of cayenne gets close. The lemon is key—don’t skip it. If you’re feeling fancy, add orange zest too. For the butter baste, any neutral oil works if you’re avoiding dairy, but butter adds that rich flavor we all crave.
Leftovers keep 3-4 days in the fridge, though the skin softens. Reheat in a 400°F oven for 10 minutes to crisp it back up. Carve only what you need—whole bird keeps best. Freeze for up to 3 months if you’re prepping ahead.
Why You’ll Love This Recipe
- Set It and Forget: I rub the chicken with olive oil and spices, pop it in the oven, and walk away—no babysitting required.
- Crispy, Juicy Magic: That garlic powder in the skin creates the most addictive crust, while the meat stays tender every time.
- Feeds Everyone: Honestly, one whole chicken means dinner for my family of four plus leftovers for sandwiches tomorrow.
- Pantry Staples Only: Between us, I always have olive oil, salt, pepper, and garlic powder on hand—no last-minute grocery runs.
Step-by-Step Instructions for Baked Chicken
Here’s the method I use to get crispy skin and juicy meat every single time.
Step 1: Prep and Season the Chicken
Pat the whole chicken completely dry inside and out with paper towels. I can’t stress this enough—any moisture will steam the skin instead of crisping it. Place it on a rack set in a rimmed baking sheet to allow airflow underneath.
Rub the whole chicken with 2 tbsp olive oil, then season generously with 1.5 tsp kosher salt, 1 tsp black pepper, 1 tsp garlic powder, 1 tsp onion powder, 0.5 tsp smoked paprika, and 0.5 tsp dried thyme. Get the seasoning under the skin and inside the cavity for maximum flavor.
Let it sit uncovered at room temperature for 30 minutes while you preheat the oven. This step ensures even cooking and helps the skin dry out further.
Step 2: Add Aromatics for Extra Flavor
Zest the lemon directly over the chicken, then cut it in half and place both halves inside the cavity along with the 2 pieces fresh rosemary. The zest adds bright citrus notes, while the rosemary infuses the meat with aromatic depth as it roasts.
Tuck the wings under the body and tie the legs together with kitchen twine if you have it—this keeps the chicken compact for even cooking. Drizzle any remaining olive oil over the top and rub it in one last time.
This step might seem small, but it makes a big difference in flavor. The aromatics steam inside the bird, keeping the meat moist while adding complexity.
Step 3: Roast at High Heat for Crispy Skin
Preheat your oven to 425°F. Once hot, place the chicken breast-side up on the middle rack. Roast for 20 minutes, then carefully flip it breast-side down. This ensures the skin crisps evenly on all sides.
After another 20 minutes, flip it breast-side up again and baste with 1 tbsp butter melted with a little of the pan juices. Continue roasting for 20-25 minutes more, basting once or twice, until the skin is deep golden brown and crispy.
You’ll know it’s done when an instant-read thermometer inserted into the thickest part of the thigh reads 165°F. The juices should run clear, and the skin should be irresistibly crisp.
Step 4: Rest and Serve
Transfer the chicken to a cutting board and tent loosely with foil. Let it rest for 15 minutes before carving. This resting period allows the juices to redistribute, so every bite is moist and flavorful.
Carve the chicken into pieces, making sure to serve some of that crispy skin with each portion. Pour any pan juices over the top for extra richness. The skin should be crispy, the meat tender, and the aroma intoxicating.
Serve immediately while hot. The contrast between the crispy skin and succulent meat is what makes this dish so satisfying.
Pro Tips For Making I Need A Recipe For Baked Chicken
- Dry the Skin: Pat the chicken thoroughly with paper towels before seasoning—this guarantees a crispy, golden skin. I learned this the hard way after pulling out too many soggy birds.
- Start Hot: Roast at 425°F for the first 20 minutes, then drop to 375°F to finish. This high-heat start locks in moisture while giving the skin a head start on browning.
- Season Inside Out: Don’t just sprinkle salt on the outside—rub it inside the cavity and under the skin too. Kosher salt penetrates better when it’s in direct contact with the meat.
- Rest Before Carving: Let the chicken rest uncovered for 15 minutes after baking. I skip this when I’m in a rush, but the juices stay in the meat instead of pooling on the cutting board.
Creative Variations of These Flavors
Herb-Infused Lemon
Swap the rosemary for 4 sprigs fresh thyme and add 3 smashed garlic cloves inside the cavity with the lemon. The thyme adds a subtle earthiness that pairs beautifully with the citrus. I love this version when I’m craving brighter, more aromatic flavors. 🌿
Spicy Southwestern
Add 1 tbsp chili powder and 1 tsp cumin to your seasoning mix, and replace the lemon with lime zest and juices. Stuff the cavity with 1 chopped jalapeño and a quartered onion for extra heat and depth. This gives the chicken a bold, smoky kick perfect for tacos or burrito bowls.
Honey Mustard Glaze
Whisk together 3 tbsp honey, 2 tbsp Dijon mustard, and 1 tbsp apple cider vinegar. Baste the chicken with this glaze during the last 15 minutes of roasting. The result is a sticky, sweet, and tangy skin that’s irresistible. I always make extra glaze to drizzle over the carved pieces.
Mediterranean Style
Add 1 tsp dried oregano and ½ tsp ground coriander to your seasoning blend. Stuff the cavity with lemon wedges, 1 sliced onion, and 5-6 Kalamata olives. The briny olives and citrus create a Mediterranean-inspired flavor profile that’s light yet deeply satisfying.
Garlic Butter Baste
Melt 3 tbsp butter with 4 minced garlic cloves and 1 tbsp fresh parsley. Baste the chicken every 10 minutes during the last 30 minutes of roasting. This creates a rich, garlicky crust that’s a hit with my family, especially my daughter Lily. 💛
Simple Smoked Flavor
If you love smoky depth, add ½ tsp smoked salt to your seasoning mix or use 1 tsp liquid smoke brushed on the skin before baking. This gives the chicken a subtle barbecue-like flavor without firing up the grill. It’s a trick I picked up from Portland pitmasters.
Nutrition Facts
Frequently Asked Questions
What temperature should the oven be?
Set your oven to 425°F for optimal crispiness and even cooking. This high heat helps render the fat under the skin, creating that perfect golden crust while keeping the meat juicy inside.
How long should I let it rest?
Let the chicken rest for 15 minutes before carving. This allows the juices to redistribute throughout the meat, ensuring every bite stays moist and flavorful. Skipping this step can leave you with dry chicken.
Can I use chicken pieces instead of a whole bird?
Yes! Use bone-in, skin-on pieces and reduce the cooking time to 35-40 minutes. The method remains the same, but keep an eye on the internal temperature to avoid overcooking.
Why is my skin not crispy?
Dry the skin thoroughly before seasoning and ensure the oven is fully preheated. Placing the chicken on a wire rack allows air to circulate underneath, which is key for achieving that crispy texture.

Trained in classic French technique but raised on slow-cooked ribs and spicy rubs, she blends culinary skill with smoke and soul.
- Recipe for Boneless Pork Chops in Cast Iron Skillet: Sear and Baste to Juicy Perfection - October 3, 2026
- Recipe for Boneless Cross Rib Roast: Slow-Roasted Beef with Herb Crust - October 3, 2026
- Hamburgers in Sauce Recipe Crock Pot: Slow-Cooked Savory Delight - October 3, 2026