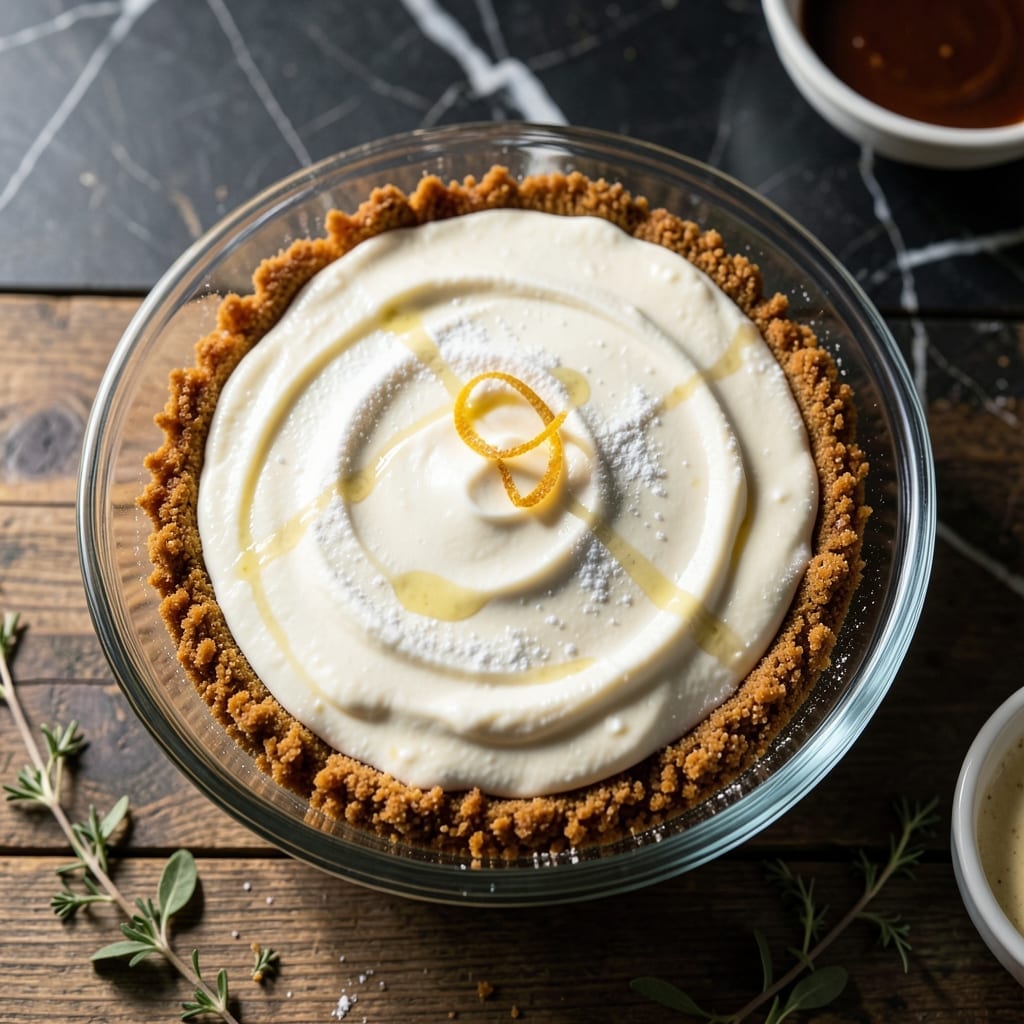
This no-bake cheesecake delivers creamy perfection without turning on the oven. I developed this method after years of testing baked versions, seeking a simpler approach that still tastes luxurious.
The secret lies in the combination of cream cheese, whipped topping, and a touch of gelatin for structure. It sets in the refrigerator overnight, creating a smooth, velvety texture that rivals any traditional cheesecake.
You’ll end up with a dessert that’s light yet rich, with a buttery graham cracker crust and a filling that melts in your mouth. The beauty of this method is its reliability—no cracks, no water baths, just consistent results every time.
Perfect for warm weather or when you want an impressive dessert without the fuss. This approach never fails to satisfy.
Ingredients for Impossible Cheesecake
Creamy, dreamy, and oven-free with these pantry staples and fridge essentials.
| Ingredient | Amount | Notes |
|---|---|---|
| Graham Cracker Crumbs 🍪 | 1 ½ cups | Fine crumbs, store-bought or homemade |
| Unsalted Butter 🧈 | ½ cup | Melted for crust binding |
| Granulated Sugar 🍚 | ¼ cup | Divided for crust and filling |
| Full-Fat Cream Cheese 🧀 | 24 oz | Room temperature, block style |
| Powdered Sugar 🍚 | 1 cup | Sifted for smooth texture |
| Vanilla Extract 🌿 | 2 tsp | Pure extract for best flavor |
| Unflavored Gelatin 💊 | 1 tbsp | For structure, vegetarian approved |
| Cold Water 💧 | ¼ cup | For gelatin blooming |
| Heavy Whipping Cream 🥛 | 1 cup | Chilled for stiff peaks |
| Lemon Juice 🍋 | 1 tbsp | Freshly squeezed for brightness |
| Salt 🧂 | ¼ tsp | Fine sea salt preferred |
[recipe_ingredient_scaler]
The cream cheese is non-negotiable here—Philadelphia brand gives that ultra-smooth texture we’re after. Don’t sub low-fat; it won’t set right. Gelatin is the magic for structure without baking. Knox works perfectly and sets up reliably overnight. For the crust, Honey Maid graham crackers are my go-to, but any brand’s fine crumbs will do. Just avoid the cinnamon variety unless you’re into that flavor twist.
No gelatin on hand? Agar-agar at the same amount works for vegetarian needs (use the powder form). Short on time? Pre-made graham crust saves the step, but homemade tastes better. Heavy cream can be swapped for Cool Whip (thawed) if that’s your preference—just fold it in gently. The lemon juice? Bottled’s okay, but fresh brightens the whole dessert.
This keeps 5-7 days in the fridge, covered. Actually tastes better after 24 hours as flavors meld. Freeze for up to 2 months—slice first, then wrap individual pieces. Thaw overnight before serving for best texture.
Why You’ll Love This Recipe
- No-Fuss Mixing: I just dump everything in one bowl—no water bath, no springform pan, no stress.
- Rich & Creamy: That full-fat cream cheese and powdered sugar combo? Pure, velvety bliss in every bite.
- Crowd Pleaser: From potlucks to last-minute desserts, this one disappears fast every single time.
- Budget Friendly: Graham crackers and cream cheese are cheap, and it feeds a whole group without breaking the bank.
Step-by-Step Instructions for No-Bake Creamy Cheesecake
Here’s the method that delivers a silky, set cheesecake without turning on the oven.
Step 1: Create the Graham Cracker Crust Base
Combine the 1.5 cups Graham Cracker Crumbs with the 0.25 cup Granulated Sugar and 0.5 cup Unsalted Butter in a bowl. I use my hands for this—the warmth helps the butter bind everything together perfectly.
Press the mixture firmly into the bottom of a 9-inch springform pan. Use the bottom of a glass to compact it evenly. You want a solid, even layer that will hold up to the creamy filling. Chill this in the refrigerator while you prepare the filling.
Step 2: Bloom the Gelatin for Structure
Sprinkle the 1 tbsp Unflavored Gelatin evenly over the 0.25 cup Cold Water in a small bowl. Let it stand for 5-10 minutes until the gelatin absorbs all the water and looks spongy.
This blooming step is crucial—it activates the gelatin so it can properly set your cheesecake. Don’t stir it yet; just let it sit. The mixture will look cloudy at first, then become clear as it hydrates fully.
Step 3: Prepare the Cream Cheese Filling
In a large bowl, beat the 24 oz Full-Fat Cream Cheese until smooth. I always use room temperature cream cheese to avoid lumps. Add the 1 cup Powdered Sugar, 2 tsp Vanilla Extract, 1 tbsp Lemon Juice, and 0.25 tsp Salt, mixing until fully combined and creamy.
Now gently warm the bloomed gelatin in the microwave for 10-15 seconds until just liquid. With the mixer running on low, slowly pour this into the cream cheese mixture. This ensures even distribution and prevents clumping. The mixture should look glossy and smooth.
Step 4: Fold in the Whipped Cream
In a separate bowl, whip the 1 cup Heavy Whipping Cream to stiff peaks. I watch for the moment when the beaters leave clear tracks in the cream—that’s your visual cue it’s ready.
Gently fold the whipped cream into the cream cheese mixture using a spatula. This lightens the filling while maintaining all that air we just incorporated. Work slowly and carefully to keep as much volume as possible in your cream.
Step 5: Assemble and Chill to Perfection
Pour the filling over your chilled crust and smooth the top with a spatula. Tap the pan gently on the counter to remove any air bubbles—this gives you that professional, flawless finish.
Refrigerate for at least 6 hours, but overnight is even better. The gelatin needs this time to fully set, and the flavors meld together beautifully. When ready to serve, run a warm knife around the edge before releasing the springform. The result should be a firm yet creamy cheesecake that slices cleanly.
Pro Tips For Making Impossible Cheesecake
- Room-Temp Cream Cheese: Pull your full-fat cream cheese out at least 2 hours before baking—I learned this the hard way after ending up with lumps that no amount of mixing could smooth out.
- Press Crust Firmly: Pack those graham cracker crumbs and melted butter into the pan like you mean it, using a glass to compress it evenly. A loose crust turns to crumbs when you slice.
- Skip Low-Fat Substitutes: After trying it once with reduced-fat cream cheese, I can tell you: the texture suffers. Stick with full-fat for that dense, creamy finish.
- Cool Gradually: Once it’s out of the oven, let it sit in the turned-off oven with the door cracked for 30 minutes to prevent cracks—yes, even if you’re impatient like me.
Perfect Pairings for This Recipe
Berry Compote Topping
Simmer 2 cups mixed berries with ¼ cup sugar and 1 tbsp lemon juice for 10 minutes until thickened. The tartness cuts through the richness beautifully. I always use fresh berries from the farmers market when they’re in season. 🍓
Chocolate Ganache Drizzle
Heat ½ cup heavy cream to steaming, then pour over 4 oz chopped dark chocolate. Let sit 5 minutes, then stir until smooth. Drizzle over slices for an elegant finish. Ghirardelli 70% is my go-to for depth.
Caramel Sauce Pairing
Warm ½ cup store-bought caramel with 1 tbsp bourbon for a boozy twist. The salted caramel from Trader Joe’s works perfectly. Drizzle just before serving so it stays runny and pools around each slice.
Coffee Accompaniment
A strong espresso or cold brew balances the sweetness. I serve mine with a sprinkle of cocoa powder on top. The bitterness contrasts beautifully with the creamy filling. Try Peet’s Major Dickason’s Blend for bold flavor. ☕
Fresh Fruit Garnish
Arrange sliced strawberries, kiwi, or raspberries in concentric circles on top. Not only does this add freshness, it creates a stunning presentation. A light dusting of powdered sugar makes it look even more professional.
Crunchy Toppings
Toast ¼ cup chopped pecans or almonds in a dry pan for 3-4 minutes until fragrant. The texture contrast is amazing. I sometimes add crushed toffee bits for a sweet crunch that reminds me of coastal rides. 💛
Nutrition Facts
Frequently Asked Questions
Why use gelatin in a no-bake version?
Gelatin provides the structure that baking normally would. Without it, the filling wouldn’t hold its shape when sliced. 1 tbsp sets 24 oz of cream cheese perfectly overnight.
Can I make this without a springform pan?
Yes, use a pie dish or line a regular pan with parchment. A springform just makes removal easier. Press the crust firmly against the sides if using a pie pan.
How do I know when it’s fully set?
The center should feel firm when gently pressed, like set Jell-O. If it jiggles, give it more time. 6 hours minimum, but overnight guarantees perfect texture.
What’s the best way to slice it cleanly?
Dip a sharp knife in hot water and wipe between cuts. This prevents sticking and creates smooth edges. Serve chilled for the cleanest slices.

Trained in classic French technique but raised on slow-cooked ribs and spicy rubs, she blends culinary skill with smoke and soul.
- Recipe for Boneless Pork Chops in Cast Iron Skillet: Sear and Baste to Juicy Perfection - October 3, 2026
- Recipe for Boneless Cross Rib Roast: Slow-Roasted Beef with Herb Crust - October 3, 2026
- Hamburgers in Sauce Recipe Crock Pot: Slow-Cooked Savory Delight - October 3, 2026