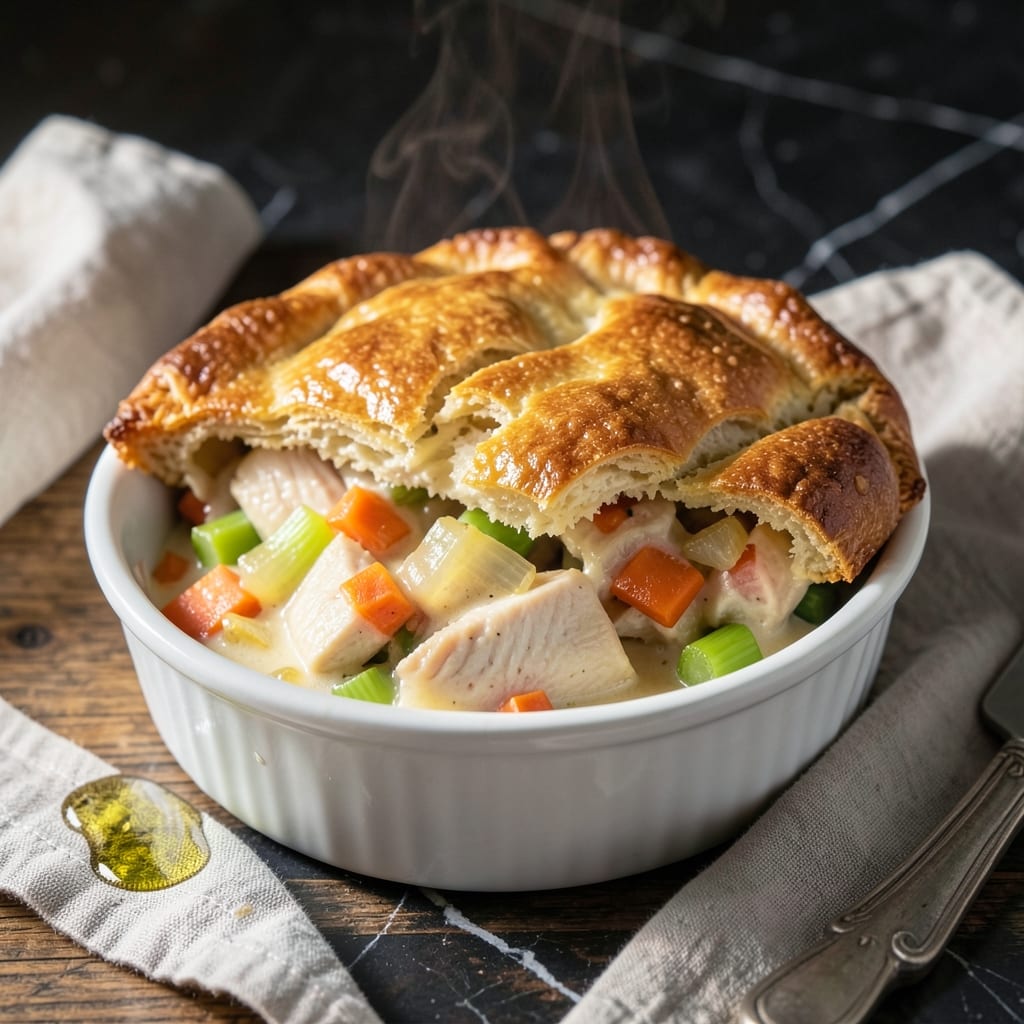
There’s something special about pulling a golden pot pie from the oven, knowing it’s made just for you. This version uses Bisquick for a shortcut that doesn’t sacrifice flavor or texture.
I’ve streamlined the process to get dinner on the table in under 45 minutes, with all the cozy appeal of a classic. The filling is creamy and packed with tender chicken and vegetables, while the Bisquick topping bakes into a flaky, buttery crust.
Each serving is perfectly portioned, making it ideal for a comforting solo meal or a family-friendly dinner. The aroma alone will have everyone gathered around the kitchen.
Serve with a simple side salad for a complete, satisfying meal.
Ingredients for Individual Chicken Pot Pie Recipe with Bisquick
Golden, flaky Bisquick tops creamy chicken and veggies. Comfort in every single-serving bite.
| Ingredient | Amount | Notes |
|---|---|---|
| Boneless Skinless Chicken Breasts 🍗 | 1 ½ lb | Diced into bite-sized pieces |
| All-Purpose Flour 🌾 | ⅓ cup | For thickening the filling |
| Unsalted Butter 🧈 | ⅓ cup | Divided for filling and topping |
| Yellow Onion 🧅 | 1 whole | Finely diced (about 1 cup) |
| Carrots 🥕 | 2 whole | Peeled and diced |
| Celery Stalks 🌿 | 2 whole | Diced (about 1/2 cup) |
| Frozen Green Peas 🌱 | 1 cup | No need to thaw |
| Chicken Broth 🍲 | 1 ½ cups | Low-sodium preferred |
| Whole Milk 🥛 | 0.67 cup | For creamy filling |
| Garlic Cloves 🧄 | 2 cloves | Minced for depth |
| Dried Thyme 🍃 | 1 tsp | Or 1 tbsp fresh |
| Salt 🧂 | 1 tsp | Kosher or sea salt |
| Black Pepper 🌶️ | ½ tsp | Freshly ground preferred |
| Bisquick Baking Mix 🍞 | 2 cups | For golden biscuit topping |
| Whole Milk 🥛 | 0.67 cup | For Bisquick topping |
[recipe_ingredient_scaler]
The chicken is the foundation here. Boneless, skinless breasts stay tender and cook quickly—avoid pre-cut strips (they dry out). Costco has great bulk options, or grab a family pack from your regular grocery store. For the veggies, fresh is ideal but frozen works in a pinch (just thaw and drain first). The Bisquick is non-negotiable for that shortcut flakiness we’re after.
No Bisquick? Homemade baking mix (1 cup flour, 1.5 tsp baking powder, 0.5 tsp salt) plus 1/3 cup cold butter gets you close. Swap the peas for corn or green beans if that’s what you’ve got. Vegetable broth works for a lighter filling. For extra richness, a splash of cream in the filling never hurt anybody (trust me on this one).
Assemble and refrigerate for up to 1 day before baking. Leftovers? They’ll keep 3-4 days in the fridge, but that golden crust is best fresh. Freeze unbaked pies for 2 months—just add 5-10 minutes to baking time.
Why You’ll Love This Recipe
- One Pan Magic: I mix the Bisquick topping right in the same bowl I used for the chicken and veggies – fewer dishes, more flavor.
- That Buttery Crust: The Bisquick gives it this golden, flaky top that soaks up the creamy chicken and carrot filling perfectly.
- Freezer Friendly: I make a double batch, bake some now, and freeze the rest for those no-time-to-cook nights.
- Budget Stretcher: One pound of chicken breasts makes four generous pot pies, and the veggies are just onions and carrots – simple and affordable.
Step-by-Step Instructions for Individual Chicken Pot Pie With Bisquick
Here’s the method I swear by—simple steps, cozy results, ready in no time.
Step 1: Sauté Aromatics and Cook Chicken
Heat a large skillet over medium-high heat and melt ¼ cup of the unsalted butter. Add the diced yellow onion, carrots, and celery stalks, cooking for 5-6 minutes until the vegetables soften slightly and the onion becomes translucent.
Push the vegetables to one side and add the 1.5 lb boneless skinless chicken breasts pieces. Cook for 6-7 minutes, stirring occasionally, until the chicken is no longer pink and reaches an internal temperature of 165°F. The chicken should be fully cooked but still tender—overcooking here will make it dry in the final dish.
Step 2: Create the Creamy Filling Base
Sprinkle the 0.33 cup all-purpose flour over the chicken and vegetables, stirring well to coat everything evenly. This creates a roux that will thicken the filling beautifully. Cook for 1-2 minutes to remove the raw flour taste, stirring constantly.
Gradually pour in the 1.5 cups chicken broth while stirring to prevent lumps from forming. Add the 0.67 cup whole milk, minced garlic cloves, dried thyme, salt, and black pepper. Stir in the 1 cup frozen green peas—no need to thaw them first. Bring to a gentle simmer and cook for 5-7 minutes until the mixture thickens to a creamy consistency.
Step 3: Portion the Filling and Prepare for Baking
Divide the chicken and vegetable mixture evenly among four oven-safe ramekins or small baking dishes, filling each about ¾ full. This leaves room for the topping to rise without spilling over. Preheat your oven to 375°F while you prepare the topping.
In a separate bowl, combine the 2 cups Bisquick baking mix with the remaining 0.67 cup whole milk. Stir just until the dry ingredients are moistened—don’t overmix, as this can make the biscuits tough. The dough will be slightly sticky, which is exactly what you want.
Step 4: Add Biscuit Topping and Bake to Golden Perfection
Drop spoonfuls of the Bisquick mixture evenly over each ramekin, spreading gently to cover the filling completely. The topping should be slightly mounded in the center to allow for rising.
Bake for 20-25 minutes until the biscuit topping is golden brown and the filling is bubbling around the edges. Check at the 20-minute mark—if the topping is browning too quickly, tent with foil. The pot pies are done when the biscuit is firm to the touch and the filling is thick and bubbly. Let them cool for 5 minutes before serving—the filling will be extremely hot straight from the oven.
Pro Tips For Making Individual Chicken Pot Pie Recipe With Bisquick
- Precook the Chicken: I learned this the hard way—poach or sauté the chicken breasts first, then dice and add to the filling. Raw chicken in the pot pie often doesn’t cook through before the Bisquick topping is done.
- Sauté Veggies Longer: Cook the onion and carrots until they’re just starting to soften, about 5-6 minutes. It builds flavor and ensures they’re tender after baking, not crunchy.
- Chill the Filling: After making the gravy, let it cool for 10 minutes before assembling the pot pies. It prevents the Bisquick topping from getting soggy or undercooked.
- Use Cold Butter: Cut the butter for the Bisquick topping straight from the fridge and don’t overmix. Cold butter creates a flakier crust, and a light hand keeps it tender.
Perfect Pairings for This individual chicken pot pie recipe with bisquick
Side Salad Pairings
A crisp mixed greens salad with a light lemon vinaigrette cuts through the richness of this dish. I toss 4 cups greens with 2 tbsp olive oil, 1 tbsp lemon juice, and a pinch of salt and pepper. The acidity brightens each bite. 🥗
Wine Recommendations
A buttery Chardonnay from California complements the creamy filling beautifully. For white wine lovers, try Pinot Grigio—its crispness balances the dish. I always keep a bottle of Kendall-Jackson on hand for nights like this.
Vegetable Sides
Steamed green beans or roasted brussels sprouts add a fresh, slightly bitter contrast. Toss 1 lb brussels sprouts with 2 tbsp olive oil and roast at 400°F for 20 minutes until crispy.
Bread Options
Warm crusty bread is perfect for soaking up any leftover filling. I grab a baguette from New Seasons Market and slice it thin. A light garlic butter spread takes it to the next level. 💫
Beverage Alternatives
For non-alcoholic options, sparkling water with a squeeze of lemon refreshes your palate. Iced hibiscus tea adds a floral note that pairs surprisingly well with the savory flavors.
Nutrition Facts
Frequently Asked Questions
Can I use rotisserie chicken instead?
Shred 2 cups of cooked rotisserie chicken and skip the cooking step. This saves 10-15 minutes and adds extra flavor. Just stir it into the filling at the end.
What size ramekins should I use?
Standard 8-10 oz ramekins work perfectly for single servings. Fill them ¾ full with filling to allow room for the Bisquick topping to rise without overflowing.
Can I make these ahead of time?
Yes! Assemble the pies and refrigerate for up to 1 day before baking. Add 5 minutes to the baking time if chilled. For longer storage, freeze unbaked pies for up to 2 months.
Why is my topping not rising?
Overmixing the Bisquick batter is the most common cause. Stir just until moistened—lumps are fine! Also ensure your baking powder in the Bisquick is fresh and your oven is fully preheated to 375°F.

Trained in classic French technique but raised on slow-cooked ribs and spicy rubs, she blends culinary skill with smoke and soul.
- Recipe for Boneless Pork Chops in Cast Iron Skillet: Sear and Baste to Juicy Perfection - October 3, 2026
- Recipe for Boneless Cross Rib Roast: Slow-Roasted Beef with Herb Crust - October 3, 2026
- Hamburgers in Sauce Recipe Crock Pot: Slow-Cooked Savory Delight - October 3, 2026