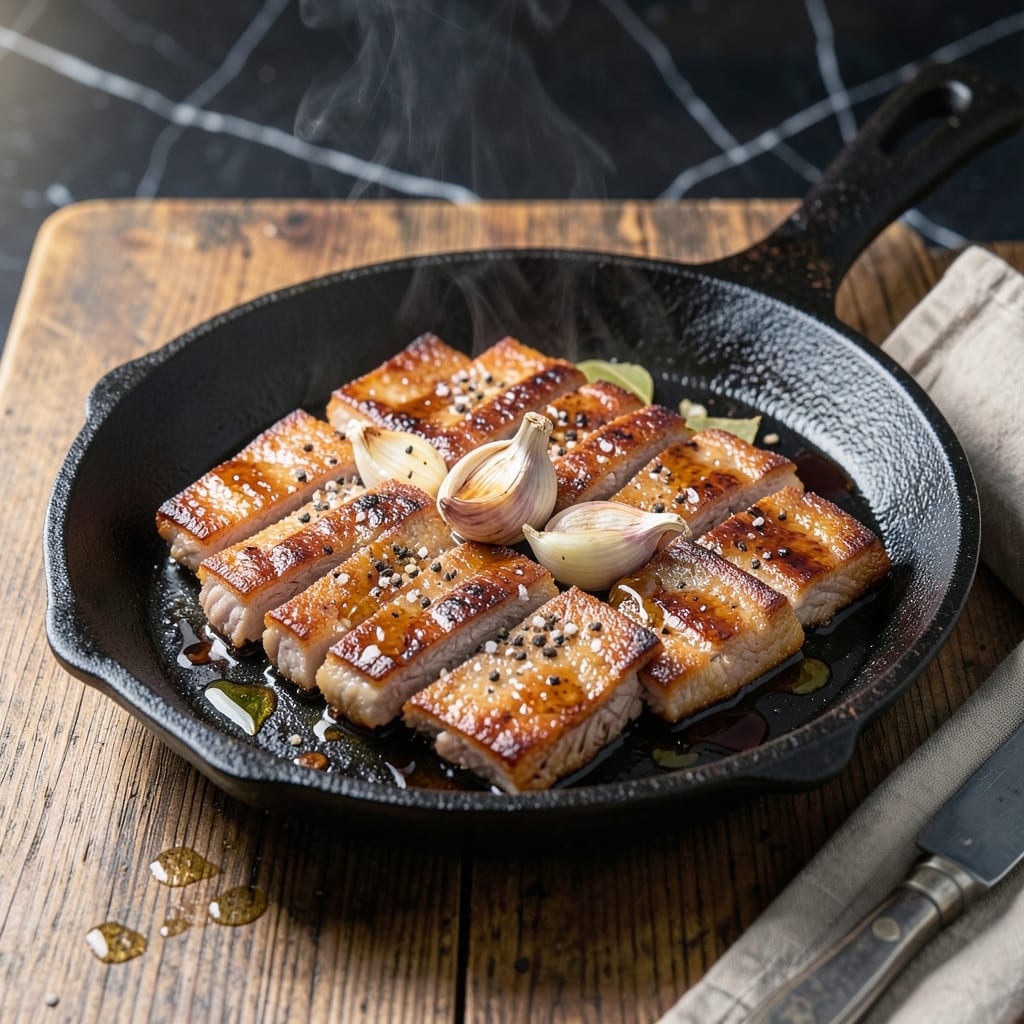
Achieving crispy edges and juicy centers with pan-fried liempo is all about the right technique. This method transforms affordable pork belly into a dish with restaurant-quality texture and flavor.
The secret is scoring the fat cap before cooking, which allows it to render down while creating maximum crispiness. A hot pan and careful timing ensure the meat stays tender inside as the skin develops that perfect crunch.
You’ll end up with pork belly that’s golden and shatteringly crispy on the outside, with layers of juicy, flavorful meat underneath. The contrast between the textures makes every bite satisfying.
Serve with steamed rice and a tangy dipping sauce to balance the richness. Here’s how to get it right every time.
Ingredients for Liempo Recipe Pan Fry
Transform affordable pork belly into restaurant-quality perfection with these essential ingredients.
| Ingredient | Amount | Notes |
|---|---|---|
| Pork Belly 🥓 | 2 lb | Skin-on, cut into 1-inch strips |
| Kosher Salt 🧂 | 2 tsp | Diamond Crystal preferred for even seasoning |
| Black Pepper 🌶️ | 1 tsp | Freshly ground for best aroma |
| Garlic Cloves 🧄 | 6 cloves | Minced for maximum flavor infusion |
| Soy Sauce 🫒 | ¼ cup | Low-sodium for controlled seasoning |
| White Vinegar 💧 | 2 tbsp | For tangy dipping sauce balance |
| Brown Sugar 🍚 | 1 tbsp | Light or dark for caramelized crust |
| Bay Leaves 🍃 | 2 whole | Dried, for aromatic depth |
| Water 💧 | 1 cup | For initial boiling stage |
| Vegetable Oil 🫒 | ¼ cup | High smoke point for frying |
| Red Chili Flakes 🌶️ | ½ tsp | Optional for heat in sauce |
| Green Onions 🧅 | 4 whole | Thinly sliced for garnish |
[recipe_ingredient_scaler]
The pork belly is non-negotiable here—skin-on, well-marbled pieces from a trusted butcher or Asian market deliver the best texture. Look for strips with even fat distribution; this ensures consistent rendering. Diamond Crystal kosher salt is ideal for seasoning due to its coarse texture and clean flavor. For the soy sauce, Kikkoman or Pearl River Bridge offer reliable quality without overpowering the dish.
No pork belly? Pork shoulder with fat cap works in a pinch, though the texture won’t be identical. Swap soy sauce for tamari if gluten-free is needed. Apple cider vinegar can replace white vinegar at a 1:1 ratio. The bay leaves are subtle but important—if unavailable, a pinch of ground allspice adds similar depth. Skip the sugar if avoiding sweetness, but expect less caramelization.
Store raw pork belly in the coldest part of your fridge for up to 3 days. The dipping sauce keeps 1 week refrigerated. For best results, render the fat completely—this prevents soggy skin. Always bring pork to room temperature before cooking for even crisping.
Why You’ll Love This Recipe
- One Pan Wonder: I literally just sear the pork belly, toss in crushed garlic, and let the soy sauce do its magic—no fancy techniques.
- Crispy & Juicy: That first bite with the caramelized edges and tender fat? The kosher salt and black pepper make it irresistible.
- Weeknight Hero: Between us, I’ve served this for casual dinners and surprise guests—always a hit.
- Budget Stretch: A pound of pork belly feeds my family for two meals, and the leftovers taste even better the next day.
Step-by-Step Instructions for Liempo Pan Fry
Master the technique for achieving that perfect balance of crispy skin and tender meat.
Step 1: Boil and Season the Pork Belly
In a pot, combine the 2 lb Pork Belly, 1 cup Water, 2 whole Bay Leaves, 2 tsp Kosher Salt, 1 tsp Black Pepper, and 6 cloves Garlic Cloves. Bring to a boil over medium-high heat, then reduce to a simmer for 30-40 minutes until the meat is slightly tender but still holds its shape.
This initial boiling removes impurities and infuses the pork with aromatic flavors. The bay leaves add subtle depth, while the garlic cloves mellow into the meat. Drain carefully, reserving the broth for potential sauce adjustments.
Step 2: Dry and Prepare for Frying
Pat the boiled pork belly strips completely dry with paper towels. This step is crucial—any moisture will cause splattering and prevent crisping. I press each strip firmly to extract all water from the skin side.
In a small bowl, mix the 0.25 cup Soy Sauce, 2 tbsp White Vinegar, 1 tbsp Brown Sugar, and 0.5 tsp Red Chili Flakes to create a dipping sauce. Set aside while you fry the pork belly.
Step 3: Pan Fry to Crispy Perfection
Heat the 0.25 cup Vegetable Oil in a large skillet over medium heat until shimmering. Add the dried pork belly strips skin-side down, being careful not to overcrowd the pan. Fry in batches if necessary to maintain even cooking.
Cook undisturbed for 8-10 minutes until the skin turns deep golden brown and crispy. Flip and cook the other side for 5-7 minutes until equally browned. The pork should be fully tender inside with an audible sizzle when pressed.
Step 4: Rest and Serve with Dipping Sauce
Transfer the fried pork belly to a paper towel-lined plate to drain excess oil. Let rest for 5 minutes—this allows the juices to redistribute, ensuring each bite remains moist. The skin should stay crispy during this brief rest.
Thinly slice the 4 whole Green Onions and sprinkle over the pork belly. Serve immediately with the prepared soy-vinegar dipping sauce on the side. The contrast of crispy skin, juicy meat, and tangy sauce delivers the authentic liempo experience.
Pro Tips For Making Liempo Recipe Pan Fry
- Score the Skin: Use a sharp knife to make shallow, crosshatch cuts on the pork belly skin before seasoning. I learned this the hard way—without scoring, the fat doesn’t render evenly, and you’ll miss that perfect crispy texture. —
- Pat It Dry: Blot the pork belly thoroughly with paper towels before seasoning. Sounds weird, but it works: moisture is the enemy of a good sear, and dry skin crisps up faster. —
- Start Hot, Finish Low: Sear the liempo over high heat for 3-4 minutes per side to get that golden crust, then drop to medium-low to cook through without burning the garlic. After burning two batches, I finally figured out this balance. —
- Rest Before Slicing: Let the pork belly rest for 5-10 minutes after cooking—yes, even if you’re impatient like me. It keeps the juices from pooling on the cutting board instead of in the meat.
Dietary Considerations for This Dish
Gluten-Free Option
Swap the soy sauce for tamari to eliminate gluten while keeping that rich umami flavor. San-J Tamari is my go-to brand for consistent quality. The rest of the recipe remains unchanged, so you won’t sacrifice any texture or taste. 💪
Lower-Sodium Version
Use low-sodium soy sauce and reduce the kosher salt to 1 tsp during boiling. The pork belly’s natural richness means you can cut back without losing depth. I often add extra garlic to compensate for the reduced salt.
Sugar-Free Adaptation
Skip the brown sugar in the dipping sauce if you’re avoiding added sugars. The white vinegar and soy sauce still provide plenty of tangy, savory flavor. For a touch of sweetness, try 1 tsp honey instead.
Keto-Friendly Tweaks
This dish is naturally keto-friendly, but you can boost the fat content by using extra pork belly fat for frying. Skip the sugar entirely in the sauce, or replace it with erythritol for a low-carb alternative. 🔥
Dairy-Free Note
No dairy is used in this recipe, so it’s naturally safe for those avoiding lactose. Just double-check your soy sauce brand for hidden dairy derivatives, though most traditional options are dairy-free.
Allergen Awareness
The primary allergens here are soy (in soy sauce) and garlic. For soy allergies, use coconut aminos as a substitute. If garlic is a concern, omit it and boost other seasonings like black pepper or bay leaves.
Nutrition Facts
Frequently Asked Questions
Do I need to score the pork belly before frying?
Yes, scoring the skin in a crosshatch pattern helps render the fat and creates more crispy surface area. Use a sharp knife to make shallow cuts, about 1/4-inch apart, without cutting into the meat.
Can I skip the boiling step?
Skipping boiling may leave impurities and reduce tenderness. The 30-40 minute simmer removes excess blood and softens the meat, ensuring a cleaner, more flavorful result. Don’t rush this step!
How do I prevent the skin from curling while frying?
Make shallow cuts on the skin side before boiling, and pat it completely dry afterward. Cook skin-side down first in a hot pan with medium heat to keep it flat.
What’s the best oil for pan-frying liempo?
Use oils with a high smoke point like vegetable, canola, or peanut oil. Avoid olive oil, as its lower smoke point can burn at frying temperatures.

Trained in classic French technique but raised on slow-cooked ribs and spicy rubs, she blends culinary skill with smoke and soul.
- Recipe for Boneless Pork Chops in Cast Iron Skillet: Sear and Baste to Juicy Perfection - October 3, 2026
- Recipe for Boneless Cross Rib Roast: Slow-Roasted Beef with Herb Crust - October 3, 2026
- Hamburgers in Sauce Recipe Crock Pot: Slow-Cooked Savory Delight - October 3, 2026