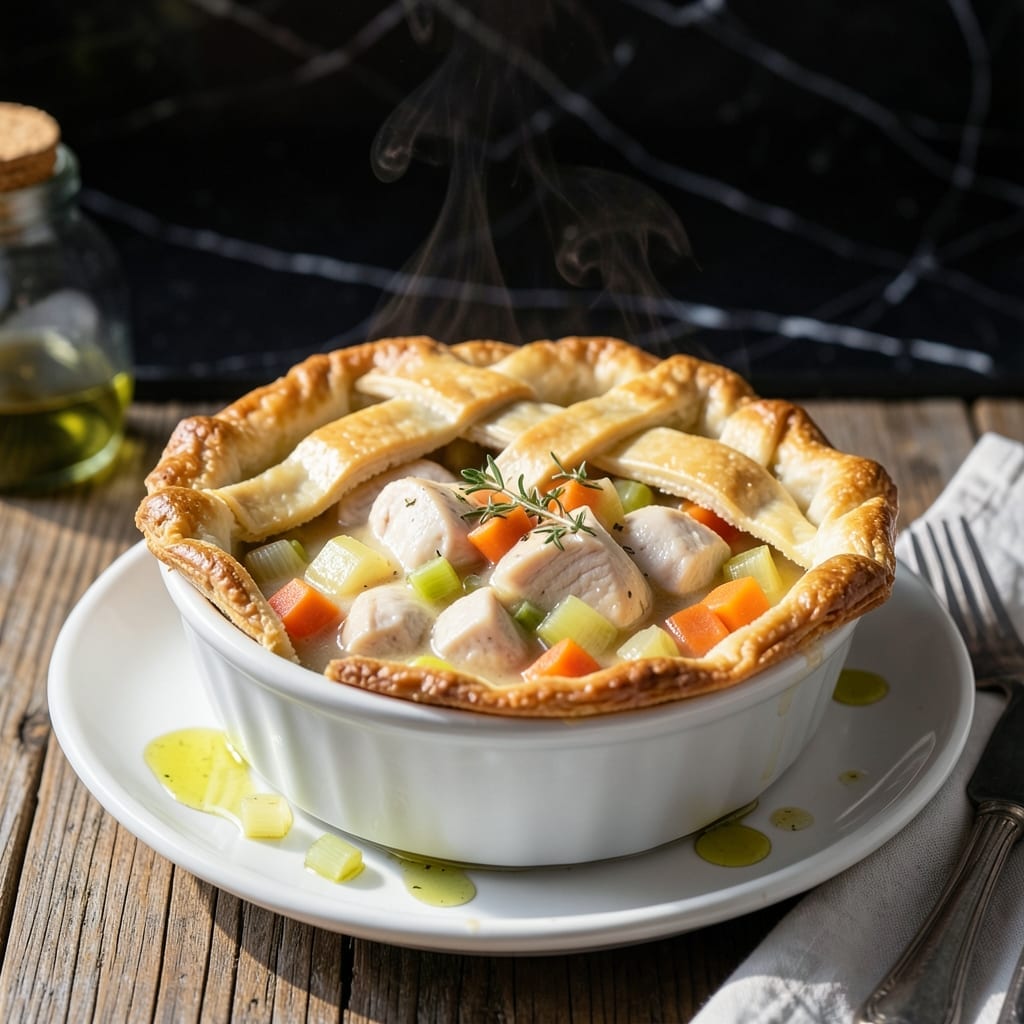
There’s something special about serving individual chicken pot pies with their own golden lids. This approach transforms a classic comfort dish into personal portions that look as impressive as they taste.
I developed this method after years of making one large pie that always collapsed when serving. The individual format solves that problem while creating perfect crust-to-filling ratios in every serving.
The filling comes together with tender chicken, hearty vegetables, and a velvety sauce that thickens beautifully as it bakes. Each bite delivers that nostalgic pot pie experience we all love.
These savory pockets make any meal feel like a special occasion. The crust bakes to a perfect golden finish while sealing in all the rich flavors below.
Ingredients for Individual Chicken Pot Pie Recipe with Pie Crust
Golden, flaky crusts meet hearty chicken filling in these personal pot pies. Probably have most already.
| Ingredient | Amount | Notes |
|---|---|---|
| Chicken Breast 🍗 | 1 ½ lb | Boneless, skinless, diced |
| Unsalted Butter 🧈 | ½ cup | Cubed for roux |
| All-Purpose Flour 🌾 | ½ cup | For roux and crust |
| Yellow Onion 🧅 | 1 whole | Medium, finely diced |
| Carrots 🥕 | 2 whole | Peeled, diced |
| Celery Stalks 🌿 | 2 whole | Diced for aroma |
| Garlic Cloves 🧄 | 3 cloves | Minced for depth |
| Chicken Stock 💧 | 2 cups | Low-sodium preferred |
| Heavy Cream 🥛 | ½ cup | Full-fat for richness |
| Frozen Peas 🌱 | 1 cup | No need to thaw |
| Fresh Thyme Leaves 🍃 | 1 tbsp | Stems removed |
| Salt 🧂 | 1 tsp | Kosher or sea salt |
| Black Pepper 🌶️ | ½ tsp | Freshly ground preferred |
| Pre-Made Pie Crust 🥧 | 2 sheets | Thawed if frozen |
| Large Egg 🥚 | 1 whole | For egg wash |
[recipe_ingredient_scaler]
The chicken is the foundation—use boneless, skinless breasts for even cooking and easy dicing. I grab mine from Whole Foods or Costco for consistent quality. The pie crust matters too; Pillsbury sheets work in a pinch (trust me, nobody judges). For the veggies, fresh is ideal, but frozen carrots and peas are totally fine if that’s what’s on hand.
No chicken stock? Vegetable broth with a pinch of poultry seasoning gets you close. Short on time? Rotisserie chicken shreds beautifully here. Heavy cream can be swapped for half-and-half (slightly less rich) or whole milk in a bind. Fresh thyme not available? Dried thyme at one-third the amount works—just rehydrate it in the warm stock first.
Assemble these up to a day ahead—just keep them chilled until baking. Leftovers? They reheat like a dream. Store in the fridge for 3-4 days or freeze unbaked pies for 2 months. That golden crust stays crisp if you warm them in the oven.
Why You’ll Love This Recipe
- One Pan Magic: I just dump the chicken, carrots, and onion in the same skillet, then top with crust—no extra bowls or mess.
- Buttery Comfort: The butter and flour make this rich, velvety filling that’s pure comfort in every bite.
- Portion Control: Individual pies mean everyone gets their own crispy crust, and they’re ideal for packing lunches.
- Budget Stretch: A single chicken breast and basic pantry staples make four generous servings. Honestly, it’s a steal.
Step-by-Step Instructions for Individual Chicken Pot Pie With Pie Crust
This method delivers flaky golden lids over creamy chicken filling every single time.
Step 1: Cook and Shred the Chicken Breast
Bring a medium pot of water to a boil. Add the 1.5 lb Chicken Breast and poach for 12-15 minutes until the internal temperature reaches 165°F. You’ll know it’s done when the chicken is opaque throughout and shreds easily with a fork.
Remove the chicken and let it cool slightly before shredding into bite-sized pieces. I use two forks for this—it separates the meat cleanly without over-shredding. Set the chicken aside and save that flavorful poaching liquid for soup later.
Step 2: Make the Roux and Build the Filling
In a large skillet, melt the 0.5 cup Unsalted Butter over medium heat. Whisk in the 0.5 cup All-Purpose Flour and cook for 2-3 minutes until the mixture turns a light golden color and smells nutty. This is your roux—the foundation of the creamy filling.
Immediately add the finely diced 1 whole Yellow Onion, diced 2 whole Carrots, diced 2 whole Celery Stalks, and minced 3 cloves Garlic Cloves. Cook for 5-6 minutes until the vegetables soften and the onion turns translucent.
Slowly pour in the 2 cups Chicken Stock, whisking constantly to prevent lumps. Stir in the 0.5 cup Heavy Cream, 1 cup Frozen Peas, 1 tbsp Fresh Thyme Leaves, 1 tsp Salt, and 0.5 tsp Black Pepper. Simmer for 5-7 minutes until the sauce thickens enough to coat the back of a spoon.
Finally, fold in the shredded chicken. Taste and adjust seasoning if needed. Remove from heat and let the filling cool completely before assembly—this prevents soggy crusts.
Step 3: Assemble the Individual Pies
Preheat your oven to 375°F. Unroll the 2 sheets Pre-Made Pie Crust on a lightly floured surface. Using a round cutter or a bowl as a guide, cut out circles large enough to line the bottoms and sides of your ramekins with some overhang.
Press the dough into the ramekins, ensuring it covers the bottom and sides completely. Trim any excess dough from the edges. Divide the cooled chicken filling evenly among the ramekins, pressing down gently to remove air pockets.
Cut additional circles from the remaining dough for the lids. Place a lid on each ramekin and crimp the edges with a fork to seal. Cut a small slit in the center of each lid to allow steam to escape during baking.
Step 4: Bake to Golden Perfection
Beat the 1 whole Large Egg with 1 tablespoon of water to make an egg wash. Brush this over the tops of the pies, which will give them that beautiful golden finish. Place the ramekins on a baking sheet to catch any potential spills.
Bake for 30-35 minutes until the crusts are golden brown and the filling is bubbling. If the tops start browning too quickly, tent with foil for the remaining baking time.
Let the pies rest for 5-10 minutes before serving. This allows the filling to set slightly and makes them easier to handle. Serve warm with a side salad or steamed vegetables for a complete meal.
Pro Tips For Making Individual Chicken Pot Pie Recipe With Pie Crust
- Pre-Cook the Chicken: Poach or sear the chicken breast first—raw chicken in the filling can dry out or undercook before the crust is done. I learned this the hard way after pulling out a pie with perfect crust but rubbery meat.
- Chill the Dough: Give your pie crust 15-20 minutes in the fridge before rolling it out. Sounds tedious, but it keeps the butter from melting too fast, which means a flakier, sturdier crust for those individual pies.
- Sauté the Onions: Cook the yellow onions until soft and just starting to brown—about 5-7 minutes over medium heat. Skipping this step leaves them harsh and watery, and nobody wants a soggy pot pie.
- Vent the Tops: Cut a small slit or two in the top crust of each individual pie before baking. After my first batch exploded in the oven, I finally realized steam needs an escape route or it’ll ruin your crust.
Essential Equipment for Great individual chicken pot pie recipe with pie crust
Ramekins for Baking
I use 6-ounce ramekins for perfect single servings—OvenStuff brand holds up well. They should be 1.5-2 inches deep to contain the filling without overflowing. Check thrift stores for budget-friendly options too. 💛
Rolling and Cutting
A 9-inch pie crust yields about 4 individual lids. I use a 4-inch round cutter for the bases and slightly smaller for tops. A floured surface prevents sticking when rolling out the dough.
Sealing the Edges
A fork works perfectly for crimping edges, but I love my Pastry Docking Tool for decorative fluting. Press firmly to prevent filling from leaking during baking. Don’t skip the steam vents in the lids!
Egg Wash Brush
Invest in a silicone pastry brush—it spreads egg wash evenly without absorbing liquid like natural bristles. I keep one dedicated just for baking. The wash gives that beautiful golden finish we all love.
Baking Sheet
Always place ramekins on a half-sheet pan lined with parchment. Nordic Ware makes my favorite. This catches any drips and makes transferring in and out of the oven safer. 🔥
Cooling Rack
After baking, transfer pies to a wire rack for 5-10 minutes. This prevents the bottom crusts from getting soggy. I use a OXO Good Grips cooling rack—it’s sturdy and easy to clean.
Nutrition Facts
Frequently Asked Questions
Can I use store-bought rotisserie chicken?
Shred 3 cups of rotisserie chicken for a quick shortcut. It adds great flavor and saves 15-20 minutes of cooking time. Just skip the poaching step and start with the roux.
How do I prevent a soggy bottom crust?
Pre-bake the bottom crust for 8-10 minutes before adding filling. Also, ensure filling is completely cooled before assembling. This creates a barrier that keeps the crust crisp.
Can I make these ahead of time?
Yes! Assemble pies up to a day ahead and refrigerate. Add 5-10 minutes to baking time if starting cold. You can also freeze unbaked pies for up to 2 months.
What if my filling is too thin?
Simmer the filling for an extra 3-5 minutes to thicken. If needed, mix 1 tablespoon cornstarch with 1 tablespoon cold water and stir into the filling. It should coat the back of a spoon.

Trained in classic French technique but raised on slow-cooked ribs and spicy rubs, she blends culinary skill with smoke and soul.
- Recipe for Oven Baked Halibut: Buttery White Fish with Zesty Lemon Topping - October 3, 2026
- Meatball Curry Recipe Kerala Style: Coconut-Spiced Gravy With Tender Bites - October 3, 2026
- Recipe for Curried Tofu: Aromatic Spices With Crispy Edges - October 3, 2026