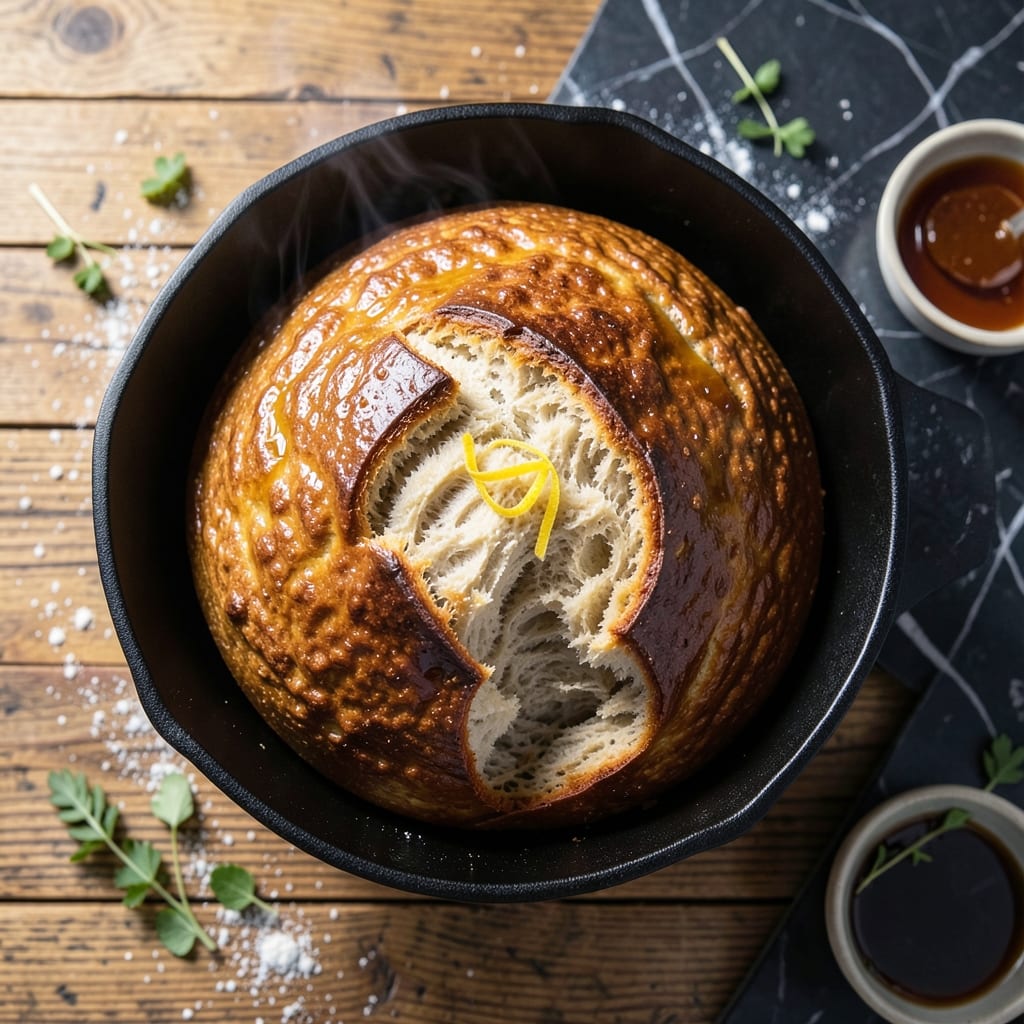
I learned the value of patience from Nana Mae’s diner, where good bread always took time. This Dutch oven method rewards that patience with crusty, artisan results using minimal effort.
The instant yeast does the heavy lifting overnight, developing complex flavors without kneading. By morning, you’ll have dough ready for baking with just 15 minutes of active prep.
Baking in a preheated Dutch oven traps steam, creating that signature crackling crust and airy interior. The result is a loaf that rivals any bakery’s—golden, fragrant, and perfectly textured.
David confirmed this is now our go-to bread recipe. The process is simple, but the taste is anything but.
Ingredients for Instant Yeast Bread Recipe Dutch Oven
Eight simple ingredients for that bakery-quality crusty artisan loaf at home.
| Ingredient | Amount | Notes |
|---|---|---|
| Bread Flour 🌾 | 4 cups | Unbleached, all-purpose works too |
| Instant Yeast 🍞 | ¾ tsp | Active dry yeast acceptable |
| Salt 🧂 | 2 tsp | Diamond Crystal kosher preferred |
| Warm Water 💧 | 1 ½ cups | 105-110°F, not hot |
| Olive Oil 🫒 | 1 tbsp | For bowl greasing |
| Honey 🍯 | 1 tbsp | Optional for slight sweetness |
| Cornmeal 🌽 | 2 tbsp | For dusting Dutch oven |
| All-Purpose Flour 🌾 | ¼ cup | For dusting work surface |
[recipe_ingredient_scaler]
The flour is key here—King Arthur Bread Flour gives the best structure and chew. Instant yeast is non-negotiable for that overnight rise (I use SAF Red from the bulk section at Whole Foods). Salt matters more than you think—Diamond Crystal kosher dissolves evenly. If your water’s too hot, you’ll kill the yeast. Aim for bathwater-warm, about 105-110°F.
No bread flour? All-purpose with 1 tbsp vital wheat gluten per cup gets you close. Out of honey? Sugar or maple syrup work at the same ratio. Forgot to grease the bowl? Just oil your hands when shaping—no stress. The cornmeal prevents sticking, but parchment paper works if that’s what you’ve got (just cut a circle to fit).
Dough rises best in a warm spot—turning your oven light on creates the perfect environment. Baked loaf keeps 3-4 days at room temperature in a bread box or paper bag. Slice and freeze for up to 3 months (toast straight from frozen).
Why You’ll Love This Recipe
- No-Fuss Rising: I just mix the flour, instant yeast, salt, water, and a drizzle of olive oil—no proofing, no waiting.
- Crispy Golden Crust: That dutch oven gives it a bakery-style crust with a soft, airy center every single time.
- Meal Prep Hero: I bake two loaves on Sunday and we’re set for sandwiches and toast all week.
- Pantry Staples Only: Flour, yeast, salt, water, oil—things I always have, so I can make fresh bread whenever the craving hits.
Step-by-Step Instructions for No-Knead Crusty Artisan Loaf
This method delivers bakery-style bread with minimal effort and maximum flavor.
Step 1: Mix and Proof the Dough
In a large mixing bowl, whisk together the 4 cups Bread Flour, 0.75 tsp Instant Yeast, and 2 tsp Salt until evenly combined. Create a well in the center and add the 1.5 cups Warm Water, 1 tbsp Olive Oil, and 1 tbsp Honey.
Using a wooden spoon, stir until a shaggy dough forms—it will be sticky and rough. Don’t worry about lumps; the hydration will even out during proofing. Cover the bowl with a damp towel and let it rise at room temperature for 12-18 hours until doubled in size and bubbly throughout.
Step 2: Shape the Dough and Prepare for Final Rise
After the initial proof, lightly dust your work surface with 0.25 cup All-Purpose Flour. Turn the dough out onto the floured surface—it will be soft and slightly sticky. Fold the edges toward the center to form a loose round shape, using a bench scraper to help lift and turn the dough if needed.
Place the shaped dough on a piece of parchment paper and let it rest for 15 minutes. Meanwhile, generously dust the inside of a Dutch oven with 2 tbsp Cornmeal to prevent sticking and add texture to the crust. After the short rest, reshape the dough into a tight boules by pulling the edges under and pinching them together.
Step 3: Final Proof and Preheat the Dutch Oven
Transfer the shaped dough (still on parchment) into the Dutch oven. Cover with the lid and let it proof at room temperature for 1-2 hours until it has risen by about 50% and springs back slowly when poked with a finger.
About 30 minutes before the final proof is complete, preheat your oven to 450°F. This ensures the Dutch oven is screaming hot when the dough goes in, which is critical for achieving a crisp, golden crust with a good oven spring.
Step 4: Bake to Perfection
Once the dough is fully proofed, place the Dutch oven (with lid on) into the preheated oven. Bake covered for 30 minutes. This initial covered bake traps steam, allowing the bread to rise fully and develop a chewy interior.
After 30 minutes, carefully remove the lid and continue baking uncovered for 15-20 minutes until the loaf is deep golden brown and the internal temperature reaches 205-210°F. The crust should be hard and hollow-sounding when tapped on the bottom.
Step 5: Cool and Serve
Remove the bread from the Dutch oven and transfer it to a wire rack. Let it cool for at least 1 hour before slicing—this allows the crumb structure to set and prevents a gummy texture. Resist the temptation to cut into it early; the wait is worth it for that perfect, airy interior.
Once cooled, slice and enjoy as is, or toast and spread with butter. The crust should be thick and crackly, while the inside stays soft and open. Store leftovers in a paper bag to maintain the crust’s texture.
Pro Tips For Making Instant Yeast Bread Recipe Dutch Oven
- Preheat the Dutch Oven: Stick it in the oven for at least 30 minutes at 450°F before adding your dough—I learned this the hard way after my first few loaves came out pale and dense.
- Use Room-Temp Water: Warm water straight from the tap can kill instant yeast. Aim for 100-110°F, or just dip your finger in—it should feel like a warm bath, not hot.
- Skip Overproofing: Resist the urge to let the dough rise too long; instant yeast works fast, and overproofed dough collapses in the Dutch oven, leaving you with a flat, sad loaf.
- Score Before Baking: A sharp slash with a razor or knife right before baking lets the bread expand properly and keeps the crust from cracking in weird places—sounds small, but it actually changes the outcome.
Make-Ahead Tips for This Recipe
Overnight Dough Prep
Mix your dough in the evening and let it rise at room temperature for 12-18 hours. I often start mine after dinner so it’s ready for shaping in the morning. The slow fermentation develops deep flavor. David swears he can taste the difference when we rush it.
Cold Fermentation Option
For even more complexity, refrigerate the dough after initial mixing for up to 24 hours. This slows yeast activity, creating a more sour tang. Just bring it to room temperature before shaping. I tested this method after learning it from a baker at Central Market in Austin. 💡
It works best with King Arthur Bread Flour for structure.
Pre-Shaping the Night Before
After the initial rise, shape the dough into a boule, place it on parchment, and refrigerate overnight. In the morning, let it warm and proof for 1-2 hours before baking. This method saves time and still delivers that perfect crust.
Baking Schedule
Preheat your Dutch oven while the shaped dough does its final proof. With 30 minutes of preheating at 450°F, you’ll get maximum oven spring. I set a timer to
Freeze for Later
Bake the loaf, let it cool completely, then slice and freeze in a ziplock bag for up to 3 months. Toast slices straight from frozen for fresh-baked taste. This is how I keep bread on hand for busy school mornings with Emma and Jack.
Nutrition Facts
Frequently Asked Questions
Can I use active dry yeast instead?
Yes, but dissolve it in the warm water first. Let it sit for 5-10 minutes until foamy before mixing with dry ingredients. The texture may vary slightly.
Why is my bread dense inside?
This usually means the dough didn’t proof long enough. Check that it’s doubled in size and bubbly before shaping. Also ensure your oven is fully preheated to 450°F.
Do I need to grease the Dutch oven?
No, just dust it with 2 tbsp cornmeal as directed. This prevents sticking and adds a rustic texture to the crust. Parchment paper works too.
How do I know when it’s done?
Tap the bottom—it should sound hollow. The internal temperature should reach 205-210°F. A deep golden-brown color is another good sign.

Trained in classic French technique but raised on slow-cooked ribs and spicy rubs, she blends culinary skill with smoke and soul.
- Recipe for Boneless Pork Chops in Cast Iron Skillet: Sear and Baste to Juicy Perfection - October 3, 2026
- Recipe for Boneless Cross Rib Roast: Slow-Roasted Beef with Herb Crust - October 3, 2026
- Hamburgers in Sauce Recipe Crock Pot: Slow-Cooked Savory Delight - October 3, 2026