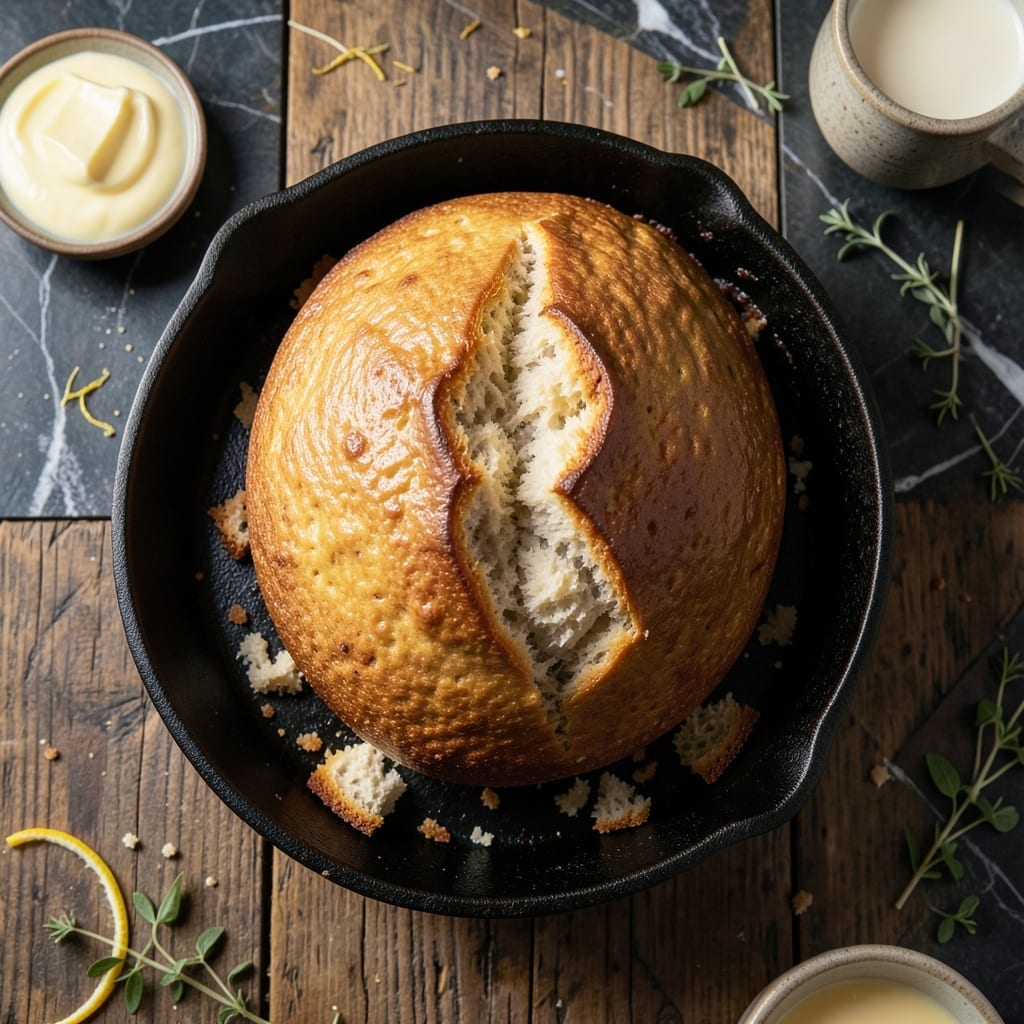
This one-bowl Irish soda bread proves you don’t need yeast to create a rustic, golden loaf with a tender crumb. The traditional method relies on a simple chemical reaction between baking soda and buttermilk, yielding a dense yet airy texture.
Using a standard loaf pan simplifies the process, ensuring even baking and a perfectly shaped loaf every time. The dough comes together in minutes with basic pantry staples, making it ideal for spontaneous baking sessions.
The result is a slightly crisp crust giving way to a soft interior, with a mild tang from the buttermilk that pairs beautifully with butter or jam. Its simplicity makes it a staple worth revisiting.
Bake it fresh for breakfast or as a comforting side to soups and stews. The method is straightforward, yet the flavor feels timeless.
Ingredients for Irish Soda Bread Recipe Loaf Pan
Basic pantry staples create a no-yeast, golden loaf with rustic charm and tender crumb.
| Ingredient | Amount | Notes |
|---|---|---|
| All-Purpose Flour 🌾 | 4 cups | Plus extra for dusting |
| Baking Soda 🧂 | 1 tsp | Fresh for best rise |
| Salt 🧂 | 1 tsp | Table salt preferred |
| Buttermilk 🥛 | 1 ¾ cups | Full-fat for richness |
| Unsalted Butter 🧈 | 2 tbsp | Melted and cooled |
| Large Egg 🥚 | 1 whole | Room temperature |
| Raisins 🍇 | ½ cup | Optional for sweetness |
| Old-Fashioned Oats 🥣 | ¼ cup | For texture contrast |
[recipe_ingredient_scaler]
The buttermilk is non-negotiable here—full-fat from a trusted dairy brand gives that signature tang and moisture. For flour, King Arthur or Gold Medal all-purpose work perfectly. Baking soda loses potency over time, so check the expiration date. If you’re using raisins, plump them in warm water first for juicier bites (the good stuff, not the sad, dry kind).
No buttermilk? Stir 1 tbsp lemon juice or vinegar into regular milk and let sit 5 minutes. Swap raisins for currants or chopped dates. Using salted butter? Reduce the added salt by half. The egg can be skipped for a denser loaf, but it adds structure. Oats can be quick oats, but old-fashioned gives better texture.
The dough keeps 2 days in the fridge, but it’s best baked fresh. Baked loaves stay good wrapped at room temperature for 3-4 days, or freeze for up to 3 months. Slice before freezing for easy toasting later (worth the extra minute).
Why You’ll Love This Recipe
- No Yeast Needed: I love that this comes together with just baking soda and buttermilk—no waiting for dough to rise.
- Buttery Crust: The melted butter brushed on top gives it that rich, golden finish I crave.
- Breakfast to Dinner: It’s just as good with jam at breakfast as it is soaking up stew at dinner.
- Budget Staple: Flour, butter, buttermilk—pantry basics that cost pennies but taste like a million bucks.
Step-by-Step Instructions for Irish Soda Bread Loaf Pan
This straightforward method delivers a rustic, no-yeast loaf with minimal effort and maximum flavor.
Step 1: Combine Dry Ingredients and Prepare Wet Mixture
In a large mixing bowl, whisk together the 4 cups All-Purpose Flour, 1 tsp Baking Soda, and 1 tsp Salt until evenly distributed. I always sift the flour first to prevent lumps in the finished bread.
In a separate bowl, beat the 1 whole Large Egg lightly, then stir in the 1.75 cups Buttermilk and 2 tbsp Unsalted Butter until fully combined. The buttermilk should be at room temperature to prevent the melted butter from solidifying.
Step 2: Create the Dough and Incorporate Add-Ins
Make a well in the center of the dry ingredients and pour in the wet mixture. Using a wooden spoon, stir just until the dough begins to come together. It will be shaggy and slightly sticky—that’s perfect.
Fold in the 0.5 cup Raisins and 0.25 cup Old-Fashioned Oats gently. I use my hands for this step to ensure even distribution without overmixing. The oats add a delightful texture contrast, while the raisins provide bursts of sweetness.
Step 3: Shape and Prepare for Baking
Lightly dust your work surface with extra all-purpose flour. Turn the dough out onto the floured surface and knead gently for 1-2 minutes just until it forms a cohesive ball. Avoid overworking the dough, as this can make the bread dense.
Shape the dough into a round loaf that will fit comfortably in your loaf pan. The dough should be slightly domed in the center. Use a sharp knife to score an “X” about ½ inch deep on the top—this helps the bread expand evenly and creates that traditional rustic appearance.
Step 4: Bake to Golden Perfection
Place the shaped loaf in a greased 9×5-inch loaf pan. Bake in a preheated 375°F oven for 45-50 minutes, or until the bread is deep golden brown and a toothpick inserted in the center comes out clean.
If the top begins to brown too quickly, tent the pan loosely with aluminum foil. The bread is done when it sounds hollow when tapped on the bottom. I always check at the 45-minute mark to prevent over-baking.
Step 5: Cool and Serve
Remove the bread from the pan immediately and transfer it to a wire rack. Let it cool for at least 30 minutes before slicing. This resting period allows the crumb to set properly.
The finished loaf should have a crisp, rustic crust with a tender, slightly dense interior studded with raisins and oats. Serve warm with butter for the best experience. The bread keeps well wrapped at room temperature for up to 3 days.
Pro Tips For Making Irish Soda Bread Recipe Loaf Pan
- Chill the Buttermilk: I learned this the hard way—use ice-cold buttermilk straight from the fridge. It keeps the butter from melting too fast when you cut it in, giving you that perfect flaky texture.
- Don’t Overmix: After adding the buttermilk, stir just until the dough comes together. Overworking it makes the bread dense—I ruined two loaves before I figured that out.
- Test with a Toothpick: Soda bread can look done but still be raw inside. Stick a toothpick in the center at 35 minutes—if it comes out clean, it’s ready.
- Butter the Pan Well: Sounds obvious, but grease the loaf pan thoroughly with softened butter, not oil. It browns the crust better and prevents sticking—my grandmother swore by this.
Pro Cooking Tips for This Recipe
Dough Handling Tips
Work quickly once the wet and dry ingredients meet. The chemical reaction between baking soda and buttermilk starts immediately, so I recommend having your loaf pan ready before mixing. Overworking the dough develops gluten, which can make your bread tough instead of tender. 💡
Perfect Loaf Pan Prep
Grease your 9×5-inch loaf pan thoroughly with butter or nonstick spray, including the corners. I use a pastry brush to ensure even coverage. A well-greased pan prevents sticking and helps the bread release cleanly after baking.
Oven Temperature Control
Preheat your oven for at least 15 minutes to ensure consistent heat. Place the rack in the center position for even baking. I always check my oven temperature with an oven thermometer to confirm accuracy.
Even Baking Trick
If your oven has hot spots, rotate the pan 180 degrees halfway through baking. This ensures the bread browns uniformly. For extra browning, move the pan to the upper third of the oven for the last 10 minutes. 🔥
Testing for Doneness
The toothpick test is reliable, but I also tap the bottom of the loaf—it should sound hollow. If it doesn’t, return it to the oven for 5 more minutes and test again. Internal temperature should read 200°F.
Resting Matters
Resist slicing for at least 30 minutes after baking. This allows the bread to finish setting, preventing a gummy crumb. I place mine on a wire rack to cool evenly, which also prevents the bottom from getting soggy.
Nutrition Facts
Frequently Asked Questions
Why do I need buttermilk for this bread?
Buttermilk reacts with baking soda to create lift without yeast. Its acidity also tenderizes the crumb.
Can I bake this without a loaf pan?
Yes! Shape into a round on a baking sheet for free-form baking. Adjust time to 40-45 minutes at 375°F.
How do I prevent a dense texture?
Avoid overmixing the dough. Stir just until combined and knead only 1-2 minutes.
Can I make this ahead?
Prepare dough the night before. Cover and refrigerate, then bake in the morning.

Trained in classic French technique but raised on slow-cooked ribs and spicy rubs, she blends culinary skill with smoke and soul.
- Recipe for Boneless Pork Chops in Cast Iron Skillet: Sear and Baste to Juicy Perfection - October 3, 2026
- Recipe for Boneless Cross Rib Roast: Slow-Roasted Beef with Herb Crust - October 3, 2026
- Hamburgers in Sauce Recipe Crock Pot: Slow-Cooked Savory Delight - October 3, 2026