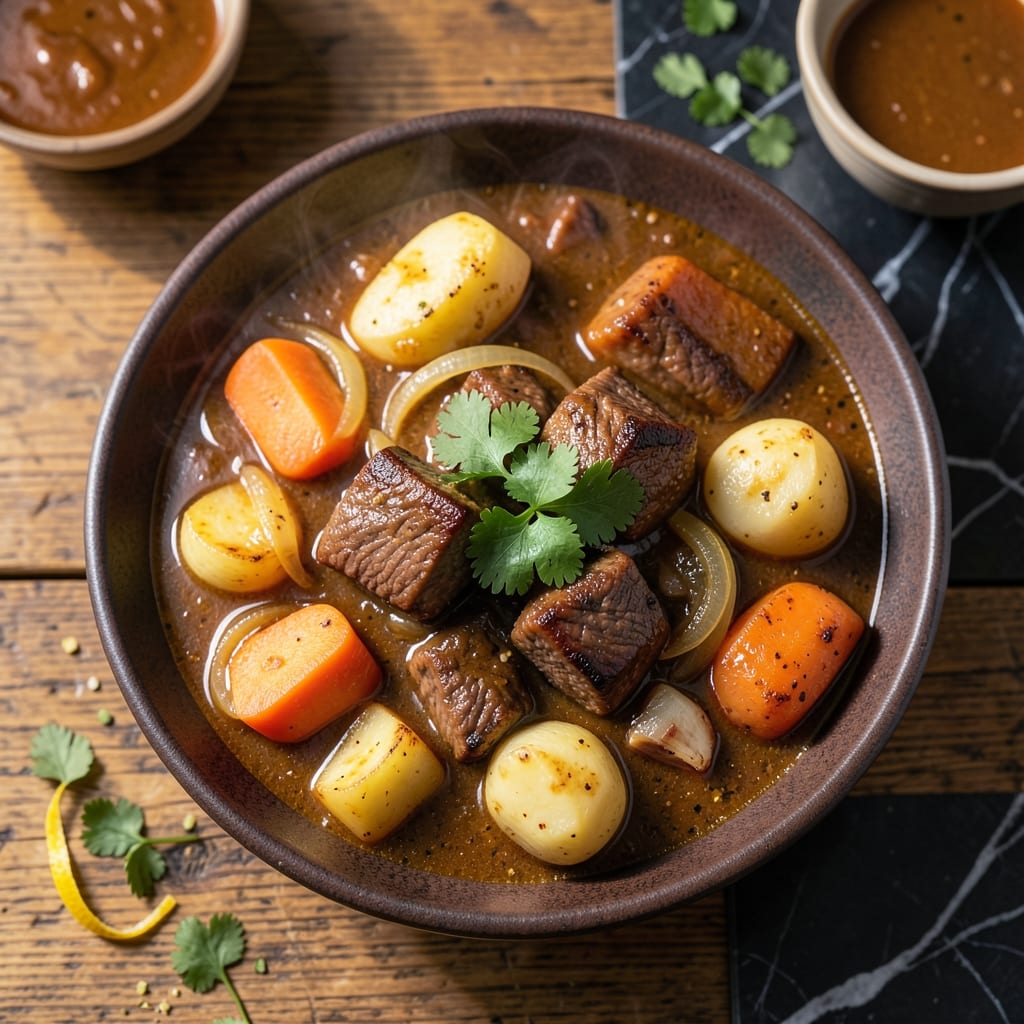
Traditional Japanese curry comes alive in your Instant Pot, delivering the same rich comfort in a fraction of the time. This method preserves all the warm, spiced depth you expect from a slow-simmered dish.
The pressure cooker transforms tough cuts of meat and root vegetables into tender, flavorful perfection. Golden potatoes, sweet carrots, and onions melt into the velvety sauce, creating a dish that’s hearty and satisfying.
What sets this apart is the authentic Japanese curry roux, which builds layers of complex, aromatic flavor. The result is a bowl of comfort that tastes like it simmered all day—without the wait.
Serve it over steamed rice for a complete meal that’s sure to become a family favorite. The Instant Pot makes it effortless.
Ingredients for Japanese Curry Recipe Instant Pot
Rich, velvety curry with tender meat and root vegetables. Pantry staples meet a few fresh picks.
| Ingredient | Amount | Notes |
|---|---|---|
| Beef Chuck Roast 🥩 | 1 ½ lb | Cut into 1-inch cubes |
| Yukon Gold Potatoes 🥔 | 3 whole | Peeled and cubed |
| Carrots 🥕 | 3 whole | Peeled and sliced |
| Yellow Onion 🧅 | 1 whole | Thinly sliced |
| Garlic Cloves 🧄 | 4 cloves | Minced |
| Ginger Root 🌿 | 1 tbsp | Freshly grated |
| Japanese Curry Roux 🍛 | 4 oz | 1 box, S&B Golden recommended |
| Beef Stock 💧 | 2 cups | Low-sodium preferred |
| Soy Sauce 🫒 | 2 tbsp | Low-sodium variety |
| Apple 🍎 | 1 whole | Peeled and grated |
| Honey 🍯 | 1 tbsp | For balancing flavors |
| Vegetable Oil 🫒 | 1 tbsp | For sautéing |
| Steamed Rice 🍚 | 4 cups | Cooked, for serving |
[recipe_ingredient_scaler]
The beef is key here. Chuck roast gives you that melt-in-your-mouth texture after pressure cooking—skip the lean cuts. I grab mine from Whole Foods or Costco when it’s on sale. Look for good marbling (those white fat streaks) for the best results. The Japanese curry roux is non-negotiable for authentic flavor—S&B Golden is the brand to hunt for at Asian markets or Amazon.
No beef stock? Water plus a bouillon cube works in a pinch. Out of apple? Skip it or use a spoonful of applesauce. The soy sauce adds depth—tamari for gluten-free. Want it sweeter? A pinch of brown sugar does the trick. For the roux, don’t be tempted to use less—it’s the soul of the dish. And if you’re worried about salt, use low-sodium stock and adjust at the end.
Leftovers taste even better the next day once flavors meld. Keeps 4-5 days in the fridge, freezes for 3 months (the sauce thickens, so thin with a splash of water when reheating). I always double the batch—this freezes like a dream for lazy weeknights (just add fresh rice).
Why You’ll Love This Recipe
- Set and Forget: The Instant Pot does all the work while I prep the carrots and potatoes—no babysitting required.
- Deep, Rich Flavor: The beef chuck soaks up the garlic and onion, making every bite ridiculously good.
- Meal Prep Hero: I make a big batch Sunday and it reheats beautifully for lunches all week.
- Budget Stretcher: One cheap chuck roast feeds my family for two nights, with leftovers for the freezer.
Step-by-Step Instructions for Japanese Curry Instant Pot
Here’s how I make this comforting dish quickly while keeping all the rich, spiced flavors intact.
Step 1: Sear the Beef Chuck Roast
Set your Instant Pot to Sauté mode and add the 1 tbsp Vegetable Oil. Once hot, add the 1.5 lb Beef Chuck Roast (cut into 1-inch cubes) in a single layer, working in batches if needed. Sear for 3-4 minutes per side until deeply browned.
This step builds a flavor foundation for the curry. You’ll see the beef develop a rich, caramelized crust—this adds depth to the final dish. Avoid overcrowding the pot, as this will steam the beef instead of searing it.
Step 2: Sauté Aromatics and Build the Base
Remove the beef and set aside. In the same pot, add the 1 whole Yellow Onion (thinly sliced), 4 cloves Garlic Cloves (minced), and 1 tbsp Ginger Root (freshly grated). Sauté for 2-3 minutes until the onion softens and becomes translucent.
Next, add the 1 whole Apple (peeled and grated), 2 tbsp Soy Sauce, and 1 tbsp Honey. Stir for 1 minute until the mixture is fragrant. The apple adds natural sweetness that balances the curry’s spices beautifully.
Step 3: Pressure Cook the Curry
Return the beef to the pot and add the 3 whole Yukon Gold Potatoes (peeled and cubed), 3 whole Carrots (peeled and sliced), 2 cups Beef Stock, and 4 oz Japanese Curry Roux. Stir well to dissolve the roux and combine all the ingredients.
Secure the Instant Pot lid, set the valve to Sealing, and cook on High Pressure for 10 minutes. Once cooking completes, allow a natural pressure release for 10 minutes, then manually release any remaining pressure. The curry should be thick and the beef fork-tender.
Step 4: Adjust and Serve
Open the lid and stir the curry. If it’s too thick, add a splash of water or additional Beef Stock to reach your desired consistency. Taste and adjust seasoning if needed—though the curry roux is well-seasoned, a pinch of salt or extra Honey can fine-tune the flavors.
Serve the curry hot over 4 cups Steamed Rice, ensuring each bowl has a mix of beef, potatoes, and carrots. The sauce should be rich and velvety, clinging perfectly to the rice and ingredients.
Pro Tips For Making Japanese Curry Recipe Instant Pot
- Sear the Beef First: I learned this the hard way—browning the chuck roast in batches before pressure cooking adds depth to the curry. Skip it and you’ll miss that rich, meaty base.
- Cut Potatoes Evenly: Yukon Golds cook faster than carrots, so slice them into 1.5-inch chunks. Any smaller and they’ll turn mushy before the beef is tender.
- Deglaze the Pot: After searing, pour in a splash of water or broth and scrape the bottom. Those browned bits are pure flavor, and skipping this risks a burn notice.
- Add Potatoes Later: Sounds weird, but it works: pressure cook the beef and carrots first, then add potatoes for the last 5 minutes. They’ll stay intact instead of dissolving.
Storing and Reheating This Recipe
Refrigerator Storage
Let the curry cool for no more than 2 hours before transferring to airtight containers. I use glass containers with locking lids. It’ll keep in the fridge at 40°F or below for up to 4-5 days. The flavors actually deepen overnight. ❄️
Freezer Storage
This dish freezes beautifully for up to 3 months. I portion it into quart-sized freezer bags, leaving 1 inch of headspace for expansion. Squeeze out excess air to prevent freezer burn. Label with the date so you can track freshness.
Stovetop Reheating
My preferred method for best texture. Transfer curry to a pot, add ¼ cup water or beef stock, and heat over medium-low heat for 8-10 minutes, stirring occasionally. The sauce will loosen as it warms. 🔥
Microwave Reheating
For quick meals, microwave individual portions covered with a damp paper towel. Heat on 70% power for 2-3 minutes, stir, then continue in 30-second intervals until reaching 165°F. Add a splash of water if needed.
Thawing Frozen Curry
Move the bag from freezer to fridge 24 hours before reheating. For faster thawing, submerge the sealed bag in cold water, changing water every 30 minutes. Never thaw at room temperature to avoid bacterial growth.
Nutrition Facts
Frequently Asked Questions
Can I use chicken instead of beef?
Use 1.5 lb boneless chicken thighs cut into chunks. Reduce pressure cook time to 6 minutes to prevent overcooking. Chicken absorbs flavors quickly, making it a great alternative.
What if my curry is too thick after cooking?
Stir in ¼ cup water or stock at a time until it reaches your desired consistency. The roux thickens as it cools, so adjust while hot. Avoid adding too much liquid at once.
Can I add other vegetables?
Yes! Try 1 cup cauliflower or 1 bell pepper. Add delicate veggies like zucchini during the last 5 minutes of cooking. Harder vegetables can go in with the potatoes.
Why do I need to sear the beef first?
Searing develops deep, rich flavors through caramelization. It creates a fond (browned bits) that dissolves into the sauce. Skipping this step may result in a flatter-tasting dish.

Trained in classic French technique but raised on slow-cooked ribs and spicy rubs, she blends culinary skill with smoke and soul.
- Recipe for Boneless Pork Chops in Cast Iron Skillet: Sear and Baste to Juicy Perfection - October 3, 2026
- Recipe for Boneless Cross Rib Roast: Slow-Roasted Beef with Herb Crust - October 3, 2026
- Hamburgers in Sauce Recipe Crock Pot: Slow-Cooked Savory Delight - October 3, 2026