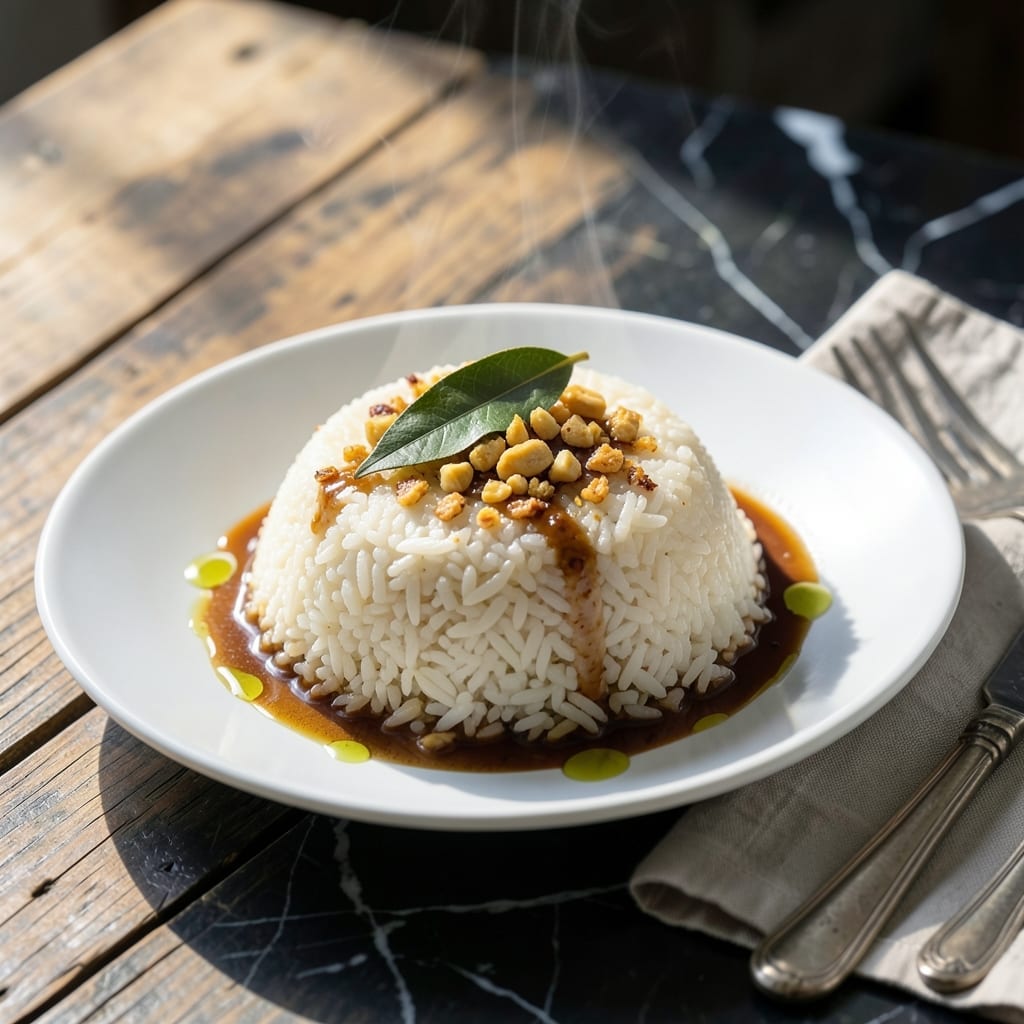
I fell in love with this dish during my first trip to the Philippines. The garlic hits you first, then the rich, savory rice with just a touch of soy.
This one-pot wonder comes together faster than takeout. You’ll brown the garlic until golden, then let the rice soak up all that flavor while it cooks.
What you get is fluffy, fragrant rice with crispy garlic bits throughout. It’s simple comfort food that feels special.
Serve it with fried chicken or eggs for a meal that’s satisfying any time of day.
Ingredients for Java Rice Recipe Pinoy
Simple ingredients, bold Filipino flavors in every bite. Nothing exotic here—just good stuff.
| Ingredient | Amount | Notes |
|---|---|---|
| Jasmine Rice 🍚 | 2 cups | Rinsed until water runs clear |
| Garlic Cloves 🧄 | 10 cloves | Minced, divided for frying and cooking |
| Neutral Cooking Oil 🫒 | ½ cup | For frying garlic and rice |
| Soy Sauce 💧 | 2 tbsp | Use Filipino brands like Silver Swan |
| Chicken Broth 🍲 | 2 ½ cups | Low-sodium preferred to control saltiness |
| Bay Leaf 🍃 | 1 whole | Dried or fresh |
| Ground Black Pepper 🌶️ | ½ tsp | Freshly ground for best flavor |
| Salt 🧂 | ½ tsp | Adjust to taste after cooking |
| Green Onions 🧅 | 3 whole | Thinly sliced for garnish |
| Butter 🧈 | 1 tbsp | Optional for richer flavor |
| Water 💧 | ½ cup | For rinsing rice and adjusting liquid |
[recipe_ingredient_scaler]
Garlic is the soul of this dish. Fresh heads from the Asian market have the best aroma, but grocery store garlic works too—just avoid the pre-minced kind in jars. I use Silver Swan soy sauce (Filipino brand, found at most Asian grocers or Amazon) for that authentic taste. The jasmine rice should be rinsed until the water runs clear to remove excess starch, which keeps it fluffy.
No jasmine rice? Long-grain white rice is the closest swap. Out of soy sauce? Coconut aminos works in a pinch. The chicken broth can be vegetable broth if you want to keep it meat-free. For extra richness, a pat of butter stirred in at the end (trust me on this) takes it to the next level. Skip the bay leaf if you don’t have it—won’t ruin the dish.
This tastes even better the next day once the flavors meld. Store leftovers in an airtight container for up to 4 days in the fridge, or freeze for 3 months. Reheat with a splash of water to keep it from drying out.
Why You’ll Love This Recipe
- One Pot Wonder: I love that this comes together in a single pot—just sauté the garlic, add rice and broth, then let it simmer.
- Garlic Bomb: The garlic fries up crispy in oil before the rice cooks, infusing every bite with that deep, savory punch.
- Feeds a Crowd: Honestly, it’s my go-to for parties because it stretches easily and pairs with anything from adobo to grilled meats.
- Budget Stretch: Jasmine rice and chicken broth keep costs low, and leftovers taste even better the next day with a quick reheat.
Step-by-Step Instructions for Java Rice
Here’s how I make this garlicky Filipino favorite in one pot with minimal cleanup.
Step 1: Rinse Rice and Fry Garlic
First, rinse the 2 cups Jasmine Rice in a fine-mesh strainer under cold water until the water runs clear. This removes excess starch and prevents gummy rice. While the rice drains, mince 8 cloves Garlic Cloves for frying and 2 cloves Garlic Cloves for cooking.
Heat the 0.5 cup Neutral Cooking Oil in a large pot over medium heat. Add the minced garlic for frying and cook for 2-3 minutes until golden brown and crispy. Remove with a slotted spoon and set aside on paper towels to drain. This fried garlic will be your garnish, so don’t let it burn.
Step 2: Sauté Aromatics and Toast Rice
In the same pot with the remaining oil, add the minced garlic for cooking, 1 whole Bay Leaf, 0.5 tsp Ground Black Pepper, and 0.5 tsp Salt. Sauté for 30 seconds until fragrant. Immediately add the drained rice and stir to coat every grain in the garlicky oil.
Cook the rice for 2-3 minutes, stirring constantly, until the grains turn slightly translucent at the edges. This toasting step enhances the nutty flavor of the rice and prevents it from turning mushy. You’ll start to smell a wonderful, toasty aroma—this is your cue to move to the next step.
Step 3: Add Liquids and Simmer
Pour in the 2 tbsp Soy Sauce, 2.5 cups Chicken Broth, and 0.5 cup Water. Stir well to distribute the soy sauce evenly and ensure no rice is sticking to the bottom of the pot. Add the 1 tbsp Butter for extra richness, if using. Bring the mixture to a boil over medium-high heat.
Once boiling, reduce the heat to low, cover the pot with a tight-fitting lid, and let it simmer undisturbed for 15-20 minutes. Resist the urge to peek—steam is your friend here, and lifting the lid releases it, which can lead to uneven cooking.
Step 4: Rest and Garnish
After 20 minutes, turn off the heat but leave the covered pot on the burner for an additional 5-10 minutes. This resting period allows the rice to steam and absorb any remaining liquid, ensuring every grain is perfectly cooked and fluffy.
Fluff the rice gently with a fork, then discard the bay leaf. Transfer to a serving dish and top with the crispy fried garlic and thinly sliced 3 whole Green Onions. The contrast of textures—fluffy rice, crispy garlic, and fresh green onions—makes this dish irresistible.
Pro Tips For Making Java Rice Recipe Pinoy
- Toast the Garlic: Cook the minced garlic in oil over medium-low heat until golden but not brown—about 2 minutes. I learned this the hard way after burning three batches and ruining the flavor.
- Rinse the Rice: Wash the jasmine rice until the water runs clear to remove excess starch. Skip this and you’ll end up with gummy, sticky java rice instead of fluffy grains.
- Use Warm Broth: Heat the chicken broth before adding it to the rice. Cold broth slows down cooking and makes the rice absorb unevenly, leaving some grains undercooked.
- Let It Steam: After cooking, turn off the heat and let the rice sit covered for 10 minutes. This step guarantees the grains finish absorbing the soy-garlic broth and stay moist.
Make-Ahead Tips for This Dish
Prep Garlic Ahead
Mince all 10 cloves Garlic Cloves the night before and store in an airtight container in the fridge. This saves 10 minutes on cooking day. I learned this trick from my grandmother—prepped ingredients make cooking joyful, not stressful. 💡
Pre-Rinse Rice
Rinse the 2 cups Jasmine Rice in the morning and leave it in the strainer in the fridge. This removes excess starch and gives you a head start. Just
Batch Cooking
Double the recipe and cook a big batch on Sunday. The rice freezes beautifully for up to 3 months in quart-size freezer bags. I always make extra—it’s perfect for busy weeknights when you need a quick, flavorful side.
Reheating Tips
For refrigerated rice, add 2 tbsp water per cup and reheat in a covered pot over low heat for 5-7 minutes. For frozen rice, thaw overnight in the fridge first, then reheat with a splash of water to restore moisture. 🔥
Garnish Prep
Slice the 3 whole Green Onions and store in a small container with a damp paper towel. They’ll stay fresh for 2-3 days. Crispy fried garlic can be made a day ahead—just store it at room temperature in a dry container.
Flavor Boost
The dish tastes even better the next day as the flavors meld. If you’re meal prepping, undercook the rice slightly by 2-3 minutes so it doesn’t turn mushy when reheated. Trust me, the garlic flavor deepens beautifully overnight.
Nutrition Facts
Frequently Asked Questions
Can I use regular white rice instead of jasmine?
Yes, long-grain white rice works well as a substitute. It may be slightly less fragrant but still absorbs the garlic and soy flavors beautifully. Just follow the same cooking method and timing.
Why do I need to rinse the rice?
Rinsing removes excess starch from the surface of the grains. This prevents the rice from becoming gummy or sticky during cooking, ensuring light and fluffy results every time.
What if my garlic burns while frying?
If it burns, discard it and start fresh—burnt garlic tastes bitter. Lower the heat to medium-low and watch closely. The color should turn golden in 2-3 minutes.
Can I make this in a rice cooker?
Sauté the garlic and toast the rice in a pan first, then transfer everything to the rice cooker with the liquids. Use the standard white rice setting.

Trained in classic French technique but raised on slow-cooked ribs and spicy rubs, she blends culinary skill with smoke and soul.
- Hamburger Patty Recipe No Egg: Juicy Bind With Breadcrumbs and Milk - October 3, 2026
- Recipe for Oven Baked Halibut: Buttery White Fish with Zesty Lemon Topping - October 3, 2026
- Meatball Curry Recipe Kerala Style: Coconut-Spiced Gravy With Tender Bites - October 3, 2026