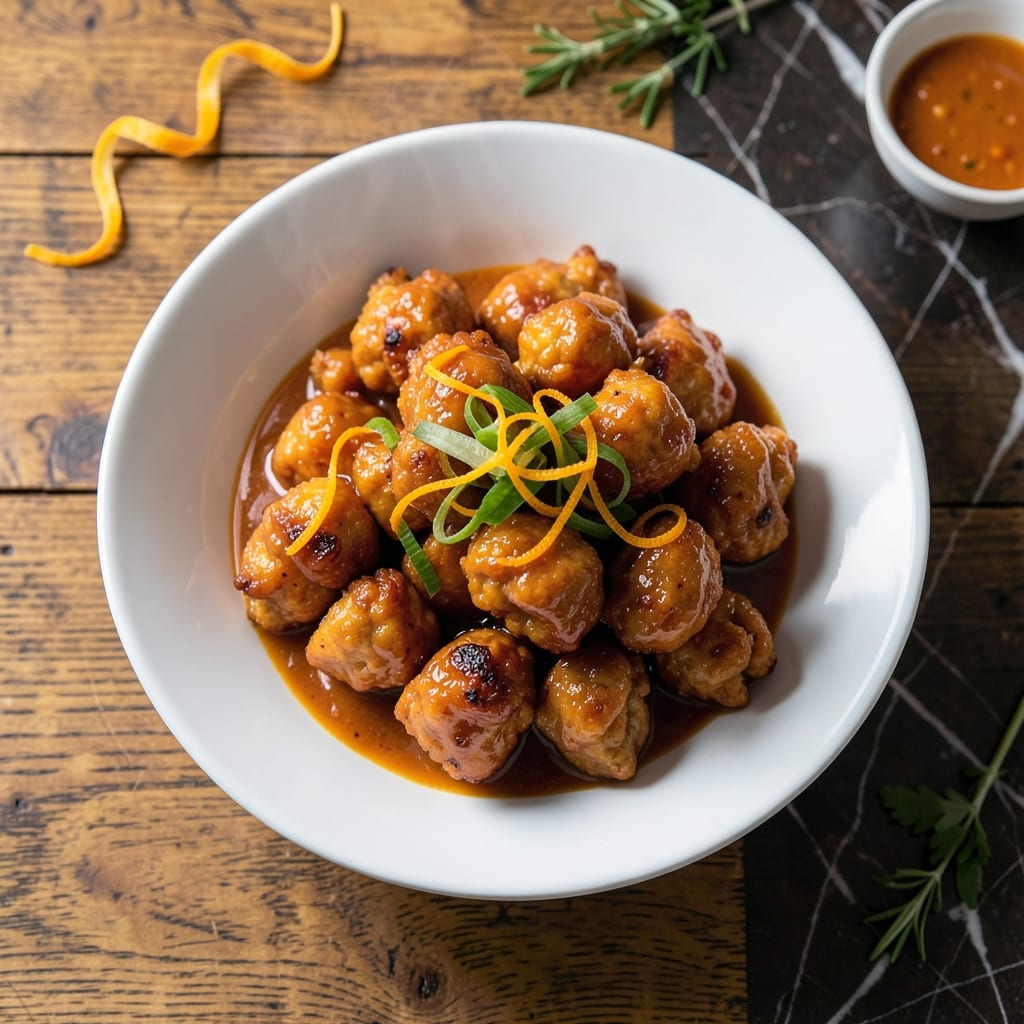
This professional adaptation delivers the signature crispy texture and vibrant citrus flavor of Jet Tila’s renowned dish. The secret lies in a precise frying technique that ensures each piece achieves a golden, shatteringly crispy exterior.
I’ve streamlined the process without compromising authenticity, using simple ingredients to create a tangy-sweet glaze that perfectly balances the dish. The sauce clings beautifully to each bite, offering that restaurant-quality experience at home.
The method combines traditional wok-frying principles with accessible techniques. Temperature control is key—maintaining oil at 350°F guarantees even cooking and that essential crunch. Each element builds toward a final plate that looks as impressive as it tastes.
What emerges is a dish with perfectly cooked chicken pieces, each coated in a glossy, citrus-kissed glaze. The contrast between the crispy coating and tender interior makes this a standout meal worth mastering.
Ingredients for Jet Tila Orange Chicken
Quality ingredients deliver restaurant-style crispy chicken with vibrant citrus depth at home.
| Ingredient | Amount | Notes |
|---|---|---|
| Boneless Chicken Thighs 🍗 | 1 ½ lb | Cut into 1-inch pieces |
| All-Purpose Flour 🌾 | ¾ cup | For initial dredging |
| Cornstarch 🌾 | ½ cup | For crispy coating |
| Large Eggs 🥚 | 2 whole | Beaten for batter |
| Orange Zest 🍊 | 1 tbsp | Finely grated from fresh oranges |
| Fresh Orange Juice 🍊 | ¾ cup | Newly squeezed preferred |
| Rice Vinegar 💧 | 2 tbsp | For sauce tanginess |
| Soy Sauce 🥢 | 3 tbsp | Low-sodium preferred |
| Granulated Sugar 🍚 | ⅓ cup | Balances citrus acidity |
| Garlic Cloves 🧄 | 3 cloves | Minced for sauce |
| Fresh Ginger 🌿 | 1 tbsp | Finely grated root |
| Vegetable Oil 🫒 | 3 cups | For deep frying |
| Green Onions 🧅 | 3 whole | Thinly sliced for garnish |
| Red Pepper Flakes 🌶️ | ½ tsp | Optional for heat |
| Sesame Seeds 🌰 | 1 tbsp | Toasted for garnish |
[recipe_ingredient_scaler]
The chicken is non-negotiable here—boneless thighs stay juicier than breasts through double-frying. Costco sells pre-cut thigh meat that saves prep time, but any grocery store’s fresh thighs work. For the coating, cornstarch is essential for that shatteringly crisp texture. The orange zest (from navel or Valencia oranges) provides concentrated citrus oil that jarred juice can’t match.
No fresh oranges? Bottled orange juice at full strength works in a pinch, though zest is harder to replace. Chicken breast can sub for thighs but requires careful cooking to avoid dryness. For gluten-free, swap all-purpose flour for rice flour. The soy sauce isn’t negotiable—tamari works as a 1:1 substitute. Short on rice vinegar? Apple cider vinegar at half the amount.
Fry in batches and keep warm in a 200°F oven for up to 30 minutes. Sauce holds 1 week refrigerated. Leftovers reheat best in a 350°F oven to revive crispiness—microwaving turns them soggy. Garnishes like sesame seeds and green onions add freshness just before serving.
Why You’ll Love This Recipe
- Weeknight Hero: I can coat, fry, and sauce this in the time it takes to steam rice—no fancy prep.
- Zesty Kick: That orange zest in the batter makes every bite bright, not cloyingly sweet like takeout.
- Family Approved: My kids inhale it, and the leftovers (if there are any) reheat beautifully in the toaster oven.
- Thigh Savings: Boneless thighs stay juicy and cost half what breasts do, so I make it even when money’s tight.
Step-by-Step Instructions for Orange Chicken
Master this technique for restaurant-quality crispy chicken with a vibrant citrus glaze.
Step 1: Prepare and Dredge the Chicken
Cut the 1.5 lb boneless chicken thighs into 1-inch pieces and pat them dry with paper towels. This step is crucial—excess moisture prevents the coating from adhering properly.
In a shallow dish, combine the 0.75 cup all-purpose flour and 0.5 cup cornstarch. Dredge each piece of chicken in the mixture, pressing gently to ensure full coverage. The cornstarch is what gives this its signature crispiness.
Step 2: Create the Batter and Fry to Golden Perfection
In a bowl, beat the 2 whole large eggs until smooth. Dip each dredged chicken piece into the egg, allowing any excess to drip off. Then, return the pieces to the flour-cornstarch mixture for a second coating.
Heat the 3 cups vegetable oil in a deep, heavy pot to 350°F. Fry the chicken in batches for 4-5 minutes until golden brown and cooked through. Avoid overcrowding the pot—this lowers the oil temperature and results in greasy chicken. Transfer cooked pieces to a wire rack set over a baking sheet to drain.
Step 3: Make the Orange Glaze
In a saucepan, combine the 0.75 cup fresh orange juice, 1 tbsp orange zest, 2 tbsp rice vinegar, 3 tbsp soy sauce, 0.33 cup granulated sugar, 3 cloves minced garlic, 1 tbsp grated fresh ginger, and 0.5 tsp red pepper flakes.
Bring the mixture to a boil over medium-high heat, then reduce to a simmer. Cook for 5-7 minutes until the sauce thickens slightly and becomes syrupy. Stir occasionally to prevent burning. The sauce should coat the back of a spoon when it’s ready.
Step 4: Toss and Garnish
Once all the chicken is fried, transfer it to a large bowl. Pour the orange glaze over the hot chicken and toss gently to coat every piece evenly. The heat from the chicken will help the sauce cling perfectly.
Garnish with the 3 whole thinly sliced green onions and 1 tbsp toasted sesame seeds for a pop of color and texture. Serve immediately while the chicken is still crispy. The contrast of the tangy, slightly sweet glaze with the crunchy coating is what makes this dish irresistible.
Pro Tips For Making Jet Tila Orange Chicken
- Fry in Batches: I learned this the hard way—crowding the pan drops the oil temp and gives you soggy, steamed chicken instead of that crispy crust you want. Stick to 4-5 pieces at a time for even browning.
- Double Dredge: After burning a batch that didn’t hold its coating, I now dip the chicken in egg, then flour, then back in egg and cornstarch for that extra-crispy shell that holds up to the sauce.
- Zest First: Sounds weird, but zesting the orange before juicing it saves time and maximizes flavor—those oils in the zest are what make Jet Tila’s version taste so bright.
- Rest the Chicken: Let the dredged chicken sit for 5 minutes before frying—my grandmother swore by this, and it keeps the coating from sliding off in the oil.
Essential Equipment for jet tila orange chicken
Deep Fryer Setup
For restaurant-quality results, invest in a heavy-bottomed Dutch oven like Lodge or Le Creuset. These distribute heat evenly and maintain oil temperature at 350°F without hot spots. I use my 5.5-quart Dutch oven for perfect batch frying. 🔥
Thermometer Precision
A candy/deep-fry thermometer is non-negotiable for this recipe. I recommend the OXO Good Grips model for its clear markings and durability. Clip it to the pot side and monitor constantly—temperature drops when adding chicken.
Draining Station
Set up a wire rack over a baking sheet for draining fried chicken. This prevents soggy bottoms that paper towels create. The Nordic Ware rack fits perfectly over standard sheet pans. Elevation ensures all sides stay crispy.
Saucepan Selection
Use a 2-quart saucepan with thick base for the glaze. All-Clad stainless steel provides even heating for the sugar-heavy sauce. The wider surface area helps reduce the sauce faster while preventing scorching.
Tongs for Turning
Long 12-inch stainless steel tongs keep your hands safe from hot oil. I prefer OXO’s locking tongs for secure grip on slippery chicken pieces. The scalloped edges prevent batter from sticking during frying.
Garnish Tools
A microplane is perfect for zesting oranges and grating ginger. The fine teeth extract maximum flavor from citrus peels. For garnishes, keep a small offset spatula handy to lift chicken without crushing the crispy coating. ✨
Nutrition Facts
Frequently Asked Questions
Can I use chicken breast instead of thighs?
You can, but thighs stay juicier. If using breast, reduce frying time to 3-4 minutes to prevent dryness. The cornstarch coating helps retain moisture.
How do I keep the chicken crispy after coating?
Fry in small batches to maintain oil at 350°F. Drain on a wire rack, not paper towels. Keep warm in a 200°F oven until serving.
What if my sauce is too thin?
Simmer it longer over medium-high heat. Add 1 tsp cornstarch mixed with water for faster thickening. Stir constantly to avoid burning.
Can I make this ahead of time?
Fry chicken and store uncoated in the fridge for 1 day. Reheat in a 350°F oven for 10 minutes before tossing in fresh sauce.

Trained in classic French technique but raised on slow-cooked ribs and spicy rubs, she blends culinary skill with smoke and soul.
- Hamburgers in Sauce Recipe Crock Pot: Slow-Cooked Savory Delight - October 3, 2026
- Sanjeev Kapoor Egg Biryani Recipe: Fragrant Spiced Rice With Boiled Eggs - October 3, 2026
- Recipe for French Pork Spread Gorton: Savory Gallic Flavors in a Spreadable Delight - October 3, 2026