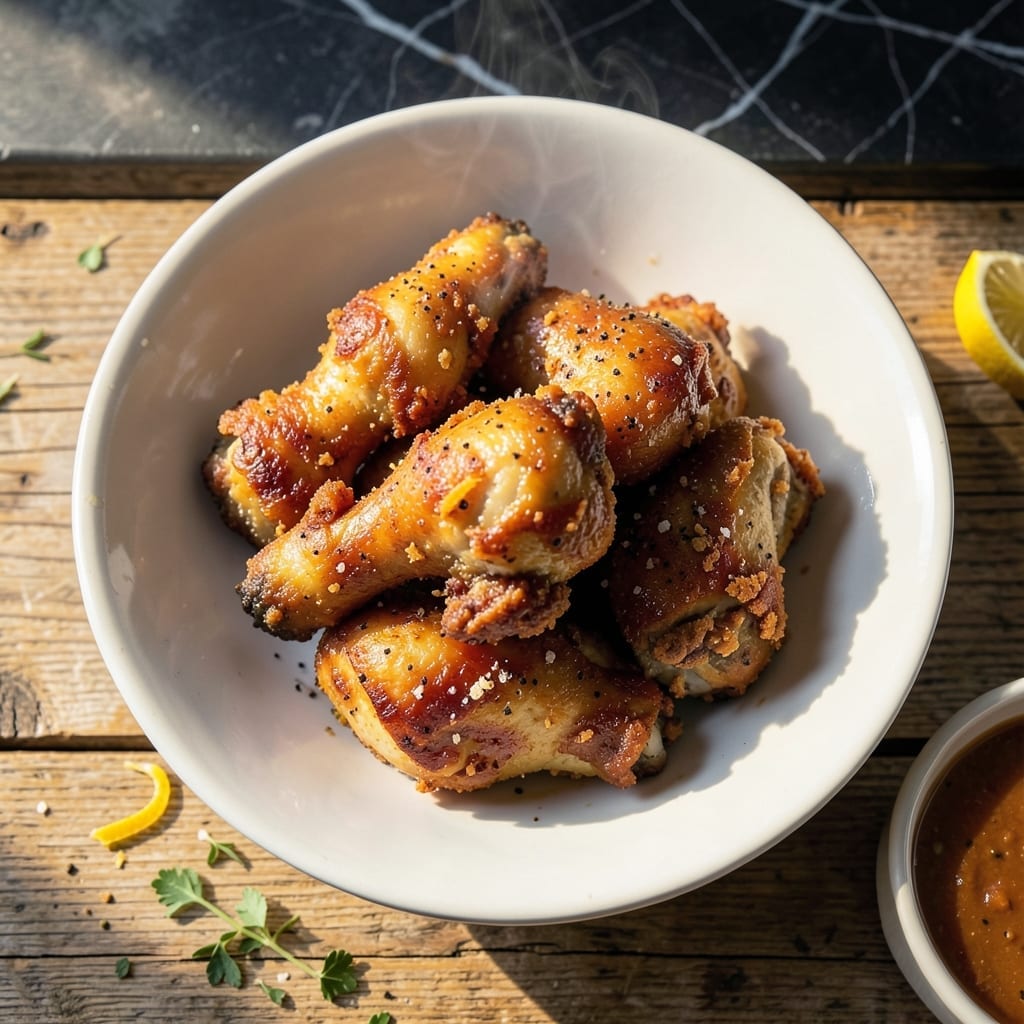
There’s a reason buttermilk-marinated chicken creates such a perfect foundation for frying. The acid tenderizes the meat while the richness ensures a juicy interior.
This method combines classic French technique with Southern tradition. The double-dredging process guarantees a crispy coating that stays put, even through the hottest oil.
What emerges is golden, crunchy fried chicken with a moist center that never disappoints. The buttermilk secret transforms ordinary ingredients into something extraordinary.
Serve hot for maximum crunch and satisfaction. Every bite delivers that signature texture and flavor combination.
Ingredients for Joanna Gaines Fried Chicken
Classic Southern ingredients meet French technique for a dish that never disappoints.
| Ingredient | Amount | Notes |
|---|---|---|
| Chicken Thighs and Drumsticks 🍗 | 3 ½ lb | Bone-in, skin-on for best texture |
| Buttermilk 🥛 | 2 cups | Full-fat for maximum tenderness |
| All-Purpose Flour 🌾 | 2 ½ cups | Divided for dredging process |
| Cornstarch 🌽 | ½ cup | For extra crispiness |
| Kosher Salt 🧂 | 2 tbsp | Diamond Crystal preferred for even seasoning |
| Freshly Ground Black Pepper 🌶️ | 2 tsp | Coarse grind for texture |
| Garlic Powder 🧄 | 1 ½ tsp | Not garlic salt |
| Onion Powder 🧅 | 1 ½ tsp | Balances the seasoning blend |
| Paprika 🌶️ | 2 tsp | Sweet or smoked variety |
| Cayenne Pepper 🔥 | ½ tsp | Adjust to heat preference |
| Large Eggs 🥚 | 2 whole | For binding the coating |
| Vegetable Oil 🫒 | 4 cups | For deep frying, high smoke point |
| Hot Sauce 🌶️ | 1 tbsp | Optional for buttermilk marinade |
[recipe_ingredient_scaler]
The chicken is paramount here. Bone-in, skin-on thighs and drumsticks yield the juiciest results—breasts tend to dry out. Source from Whole Foods or a trusted butcher for consistent quality. Buttermilk should be full-fat; reduced-fat versions lack the acidity and richness needed for proper tenderization. The flour should be all-purpose, not self-rising, to maintain the coating’s integrity.
For the double-dredging process, ensure the flour is fresh and lump-free. Cornstarch can be swapped for arrowroot powder at a 1:1 ratio. No buttermilk? Whole milk with 1 tbsp lemon juice or vinegar per cup works in a pinch. The hot sauce in the marinade is optional but recommended—Crystal or Tabasco are classic choices. For gluten-free, replace all-purpose flour with a 1:1 gluten-free blend.
Marinate the chicken for at least 4 hours, ideally overnight, for maximum tenderness. Fried chicken is best served immediately but can be kept warm in a 200°F oven for up to 30 minutes. Leftovers reheat well in a 375°F oven for 10-12 minutes to restore crispiness.
Why You’ll Love This Recipe
- No-Fuss Soak: The buttermilk does all the work—just toss the chicken in and let it sit while I prep the rest.
- Crispy Perfection: That cornstarch in the coating gives it a shatter-so-good crunch every single time.
- Feeds the Crew: One batch covers my family of five, with thighs for the adults and drumsticks for the kids.
- Leftovers? Yes, please: Honestly, it reheats in the air fryer just as crispy as day one—no waste here.
Step-by-Step Instructions for Crispy Buttermilk Fried Chicken
Master the technique behind this classic dish with precise timing and temperature control.
Step 1: Marinate Chicken in Buttermilk Mixture
In a large bowl, whisk together the 2 cups buttermilk and 1 tbsp hot sauce. I use full-fat buttermilk for the creamiest, most tender result. The acidity breaks down proteins, ensuring juicy meat.
Add the 3.5 lb chicken thighs and drumsticks to the mixture, turning to coat completely. Cover and refrigerate for at least 4 hours, or ideally overnight. This extended marinating time allows the buttermilk to penetrate deeply, creating maximum tenderness and flavor.
Step 2: Prepare the Seasoned Dredging Mixture
In a large shallow dish, combine the 2.5 cups all-purpose flour, 0.5 cup cornstarch, 2 tbsp kosher salt, 2 tsp freshly ground black pepper, 1.5 tsp garlic powder, 1.5 tsp onion powder, 2 tsp paprika, and 0.5 tsp cayenne pepper.
The cornstarch is the secret to that extra-crispy coating Joanna Gaines is known for. Whisk thoroughly to distribute all seasonings evenly. The mixture should look uniformly speckled with spices, ensuring every bite delivers balanced flavor.
Step 3: Double-Dredge for Maximum Crunch
Beat the 2 whole large eggs in a separate shallow dish. Working with one piece at a time, remove chicken from the buttermilk, letting excess drip off. Dip in the egg, then dredge in the flour mixture, pressing firmly to adhere.
Repeat the egg and flour dredging process for each piece. This double-dredge creates a thick, craggy crust that stays crispy. Place coated pieces on a wire rack and let rest for 15 minutes—this helps the coating set before frying.
Step 4: Deep-Fry to Golden Perfection
In a large heavy pot or Dutch oven, heat the 4 cups vegetable oil to 350°F. Use a deep-fry thermometer for accuracy. Fry the chicken in batches, being careful not to overcrowd the pot, for 12-15 minutes for dark meat and 10-12 minutes for drumsticks.
Turn occasionally for even browning. The chicken is done when the internal temperature reaches 165°F and the coating is deep golden brown. Drain on a wire rack set over paper towels to maintain crispiness.
Let rest for 5 minutes before serving. The coating should be shatteringly crisp while the meat remains juicy and tender throughout.
Pro Tips For Making Joanna Gaines Fried Chicken
- Brine Overnight: Soak the chicken in buttermilk with 1 tablespoon of kosher salt for at least 12 hours—I learned this the hard way after my first batch came out dry and bland.
- Double Dredge: Dip the chicken in the flour-cornstarch mix, back into buttermilk, then back into the flour again. This second coat makes that shatteringly crisp crust Joanna Gaines is known for.
- Oil Temp Matters: Keep the oil between 350°F and 365°F. After burning two batches, I finally bought a thermometer and realized my “medium-high” was actually nuclear.
- Rest Before Serving: Let the fried chicken drain on a wire rack for 5 minutes before digging in—my grandmother swore by this, and she was right. It keeps the coating crisp instead of soggy.
Make-Ahead Tips for This joanna gaines fried chicken
Overnight Marinating
For the most tender results, I always marinate my chicken overnight. The buttermilk penetrates deeply, ensuring every bite is juicy. Just whisk 2 cups buttermilk with 1 tbsp hot sauce and let the chicken soak for up to 12 hours. 💡
Prep the Dredge
You can mix your dredging ingredients the night before too. Combine 2.5 cups flour, 0.5 cup cornstarch, and all spices in an airtight container. Store at room temperature until ready to use.
Double-Dredge Early
For extra crispiness, I double-dredge the chicken in the morning and refrigerate it uncovered on a wire rack. This helps the coating dry slightly, creating a thicker crust. Don’t skip the 15-minute rest before frying.
Preheat the Oil
If frying for a crowd, preheat your oil to 350°F in advance. Use a heavy pot like Le Creuset for even heat distribution. I keep mine warm on the stove’s lowest setting until ready to fry.
Keep Warm in Oven
Finished batches stay crispy in a 200°F oven for up to 30 minutes. Place them on a wire rack to prevent sogginess. This lets you fry in batches without rushing. ✨
Reheat for Leftovers
To revive leftovers, spread pieces on a baking sheet and warm in a 375°F oven for 10-12 minutes. Avoid microwaving—it turns the coating soggy. Trust me, the oven method works every time.
Nutrition Facts
Frequently Asked Questions
Can I use boneless chicken for this recipe?
Bone-in, skin-on pieces work best for juiciness, but boneless thighs can be used. Reduce frying time to 8-10 minutes to prevent drying out.
Why is cornstarch added to the flour?
Cornstarch creates an ultra-crispy coating by absorbing moisture. It also helps the crust stay crunchy longer after frying.
How do I keep the coating from falling off?
Pat the chicken dry before marinating, and let the dredged pieces rest for 15 minutes before frying. This helps the coating adhere properly.
Can I bake instead of fry?
Yes, bake at 400°F for 25-30 minutes on a wire rack. The texture won’t be identical, but it’s a healthier alternative.

Trained in classic French technique but raised on slow-cooked ribs and spicy rubs, she blends culinary skill with smoke and soul.
- Recipe for Boneless Pork Chops in Cast Iron Skillet: Sear and Baste to Juicy Perfection - October 3, 2026
- Recipe for Boneless Cross Rib Roast: Slow-Roasted Beef with Herb Crust - October 3, 2026
- Hamburgers in Sauce Recipe Crock Pot: Slow-Cooked Savory Delight - October 3, 2026