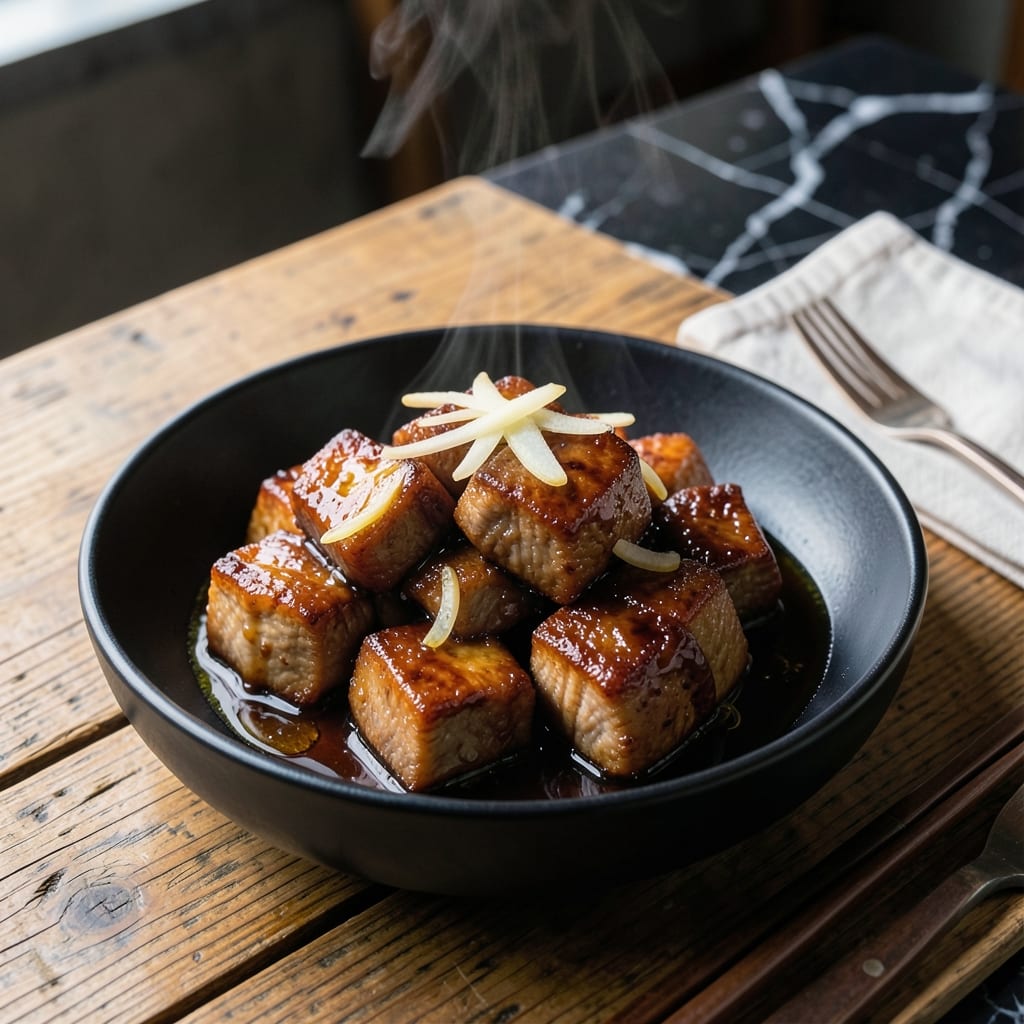
I burned more pork than I care to admit before mastering this Instant Pot kakuni. The secret is low pressure and patience—no shortcuts. This Japanese braised pork transforms tough cuts into melt-in-your-mouth perfection without babysitting the stove.
Traditional kakuni takes hours on the stovetop, but the Instant Pot cuts that to 90 minutes without sacrificing depth. The pork belly soaks up soy, mirin, and ginger, creating layers of sweet-savory flavor in each tender bite.
What comes out is fall-apart pork with a glossy glaze, rich enough for rice or noodles. The best part? Your kitchen stays clean while the pressure cooker does all the work.
Between you and me, this recipe saved my Sunday dinners. Now it’s your turn to nail it.
Ingredients for Kakuni Recipe Instant Pot
Pork belly, soy, mirin, and ginger create this rich, tender Japanese braised dish.
| Ingredient | Amount | Notes |
|---|---|---|
| Pork Belly 🥓 | 2 lb | Cubed, skin-on or skinless |
| Soy Sauce 🫒 | ½ cup | Low-sodium preferred |
| Mirin 🍶 | ½ cup | Sweet cooking rice wine |
| Sake 🍶 | ¼ cup | Dry Japanese rice wine |
| Brown Sugar 🍚 | ¼ cup | Light or dark variety |
| Fresh Ginger 🌿 | 1 whole | Peeled, sliced into rounds |
| Garlic Cloves 🧄 | 6 cloves | Peeled, smashed |
| Green Onions 🧅 | 4 whole | White and green parts separated |
| Water 💧 | 1 cup | For pressure cooking |
| Dashi Stock 🍲 | ½ cup | Or substitute chicken stock |
| Neutral Oil 🫒 | 1 tbsp | For searing pork |
| Sesame Seeds 🌰 | 1 tbsp | Toasted, for garnish |
| Cooked Rice 🍚 | 4 cups | For serving |
[recipe_ingredient_scaler]
The pork belly is non-negotiable here. Look for skin-on cuts at an Asian market—it renders into the sauce beautifully. Most grocery stores carry it frozen (check the international aisle). If you can only find skinless, that works too (just skip the initial searing). I grab mine from H Mart when I’m stocking up on other Japanese staples.
No mirin? 1 tbsp sugar plus 1 tbsp water per tbsp of mirin gets you close. Sake can be swapped for dry white wine in a pinch. If you’re skipping the dashi, chicken or vegetable stock works—just watch the salt since soy sauce already adds plenty. The brown sugar can be light or dark, but don’t use white (it lacks the molasses depth).
This keeps beautifully for 4-5 days in the fridge—the flavors actually deepen. Freeze for up to 3 months if you’re batch cooking (portion before freezing for easy meals). The rice soaks up the sauce best when served fresh, but leftovers reheat like a dream.
Why You’ll Love This Recipe
- Set and Forget: The Instant Pot does all the work—just brown the pork belly, add soy sauce, mirin, and sake, then walk away.
- Meal Prep Hero: I make a big batch on Sunday and it reheats beautifully for lunches all week.
- Budget Stretch: Pork belly is affordable, and this recipe turns it into something restaurant-worthy.
Step-by-Step Instructions for Instant Pot Kakuni
This foolproof method delivers tender pork with a rich, glossy sauce in just over an hour.
Step 1: Sear the Pork Belly for Deep Flavor
Set your Instant Pot to the sauté function and add the 1 tbsp neutral oil. When the oil shimmers, add the cubed 2 lb pork belly in a single layer, working in batches if needed. Let it sear undisturbed for 3-4 minutes until golden brown on all sides.
You’ll hear a satisfying sizzle when it’s ready to flip. This step builds a flavor foundation and prevents the pork from sticking during pressure cooking. Don’t rush—proper browning makes all the difference in the final dish.
Step 2: Build the Braising Liquid with Aromatics
After searing, add the sliced 1 whole fresh ginger, 6 cloves garlic cloves, and the white parts of the 4 whole green onions to the pot. Stir for 30 seconds until fragrant, being careful not to burn the garlic.
Pour in the 0.5 cup soy sauce, 0.5 cup mirin, 0.25 cup sake, 0.25 cup brown sugar, 1 cup water, and 0.5 cup dashi stock. Stir to dissolve the brown sugar, scraping up any browned bits from the bottom of the pot. These deglazed bits will deepen the flavor of your braising liquid.
Step 3: Pressure Cook to Tender Perfection
Secure the Instant Pot lid, set the valve to sealing, and cook on high pressure for 35 minutes. The pork should become fork-tender, nearly falling apart when pierced. After cooking, allow for a natural pressure release for 10 minutes, then quick-release any remaining pressure.
This timing ensures the pork belly absorbs all the flavors of the braising liquid while becoming meltingly tender. If you find the pork isn’t tender enough after the natural release, you can pressure cook for an additional 5-10 minutes.
Step 4: Reduce the Sauce and Finish
Carefully remove the pork belly to a plate. Set the Instant Pot to sauté mode again and simmer the braising liquid for 8-10 minutes until it reduces to a glossy, syrupy consistency that coats the back of a spoon.
Return the pork to the pot and toss gently to coat in the thickened sauce. The sauce should cling beautifully to each piece of pork. This reduction step intensifies the flavors and creates that signature kakuni glaze.
Step 5: Serve Over Rice with Garnishes
Spoon the pork and sauce over 4 cups cooked rice in serving bowls. Garnish with the green parts of the 4 whole green onions, thinly sliced, and the 1 tbsp sesame seeds. The contrast of the tender pork, rich sauce, and fresh green onion is irresistible.
Each serving should have a generous amount of sauce to soak into the rice. This dish tastes even better the next day as the flavors continue to meld.
Pro Tips For Making Kakuni Recipe Instant Pot
- Sear the Belly: I learned this the hard way—skipping the sear leaves your kakuni lacking depth. Give those pork belly cubes a good 2-3 minutes per side in the Instant Pot on sauté mode before pressure cooking.
- Balance the Sauce: Sounds weird, but it works: Use equal parts soy sauce, mirin, and sake (about 1/3 cup each for 1 lb pork) to avoid an overpowering flavor. Too much soy sauce makes it salty; too much mirin makes it cloying.
- Skip the Overfill: After burning three batches, I finally figured out that the Instant Pot should never be more than 2/3 full—especially with fatty pork belly. Leave room for the liquid to circulate and prevent a greasy mess.
- Finish Uncovered: Once pressure cooking is done, reduce the sauce uncovered for 5-10 minutes. This thickens the glaze and lets the pork belly soak up that sticky, caramelized goodness.
Best Sauces and Condiments for kakuni recipe instant pot
Classic Kakuni Glaze
The reduced braising liquid itself is the star—thick, glossy, and packed with umami. I always let it simmer until it coats the back of a spoon, about 8-10 minutes. This sauce is perfect for drizzling over rice or noodles. 🔥
Spicy Miso Boost
Mix 2 tbsp white miso paste with 1 tbsp sriracha and stir into the finished sauce. This adds a funky, spicy depth that cuts through the richness of the pork belly. I love how it wakes up the dish.
Citrus Ponzu Drizzle
A bright contrast comes from ¼ cup ponzu sauce whisked with 1 tsp grated yuzu zest. Drizzle lightly over each serving just before eating. The acidity balances the fatty pork beautifully.
Creamy Sesame Topping
Combine 2 tbsp tahini with 1 tbsp soy sauce and 1 tsp honey. Thin with a splash of water and drizzle over the top. This adds a nutty, creamy layer that’s unexpected but delicious.
I discovered this trick while testing with home cooks—everyone loved the extra depth. ✨
Pickled Ginger Garnish
Serve with 2 tbsp pickled ginger on the side for a refreshing crunch. The tangy, slightly sweet bite cleanses your palate between each rich, saucy bite of pork.
Nutrition Facts
Frequently Asked Questions
Can I use regular pork instead of pork belly?
You can, but the texture won’t be the same. Pork belly’s high fat content melts during cooking, creating that signature tender result. Lean cuts like pork shoulder may dry out with the same 35 minutes cook time.
Why did my sauce turn out watery?
This usually means the braising liquid wasn’t reduced enough. After pressure cooking, simmer uncovered for the full 8-10 minutes until it thickens to a syrupy consistency. Patience is key here!
How do I store leftovers?
Keep in an airtight container in the fridge for up to 5 days. The flavors deepen wonderfully, making leftovers a treat. Reheat gently on the stovetop with a splash of water.

Trained in classic French technique but raised on slow-cooked ribs and spicy rubs, she blends culinary skill with smoke and soul.
- Recipe for Boneless Pork Chops in Cast Iron Skillet: Sear and Baste to Juicy Perfection - October 3, 2026
- Recipe for Boneless Cross Rib Roast: Slow-Roasted Beef with Herb Crust - October 3, 2026
- Hamburgers in Sauce Recipe Crock Pot: Slow-Cooked Savory Delight - October 3, 2026