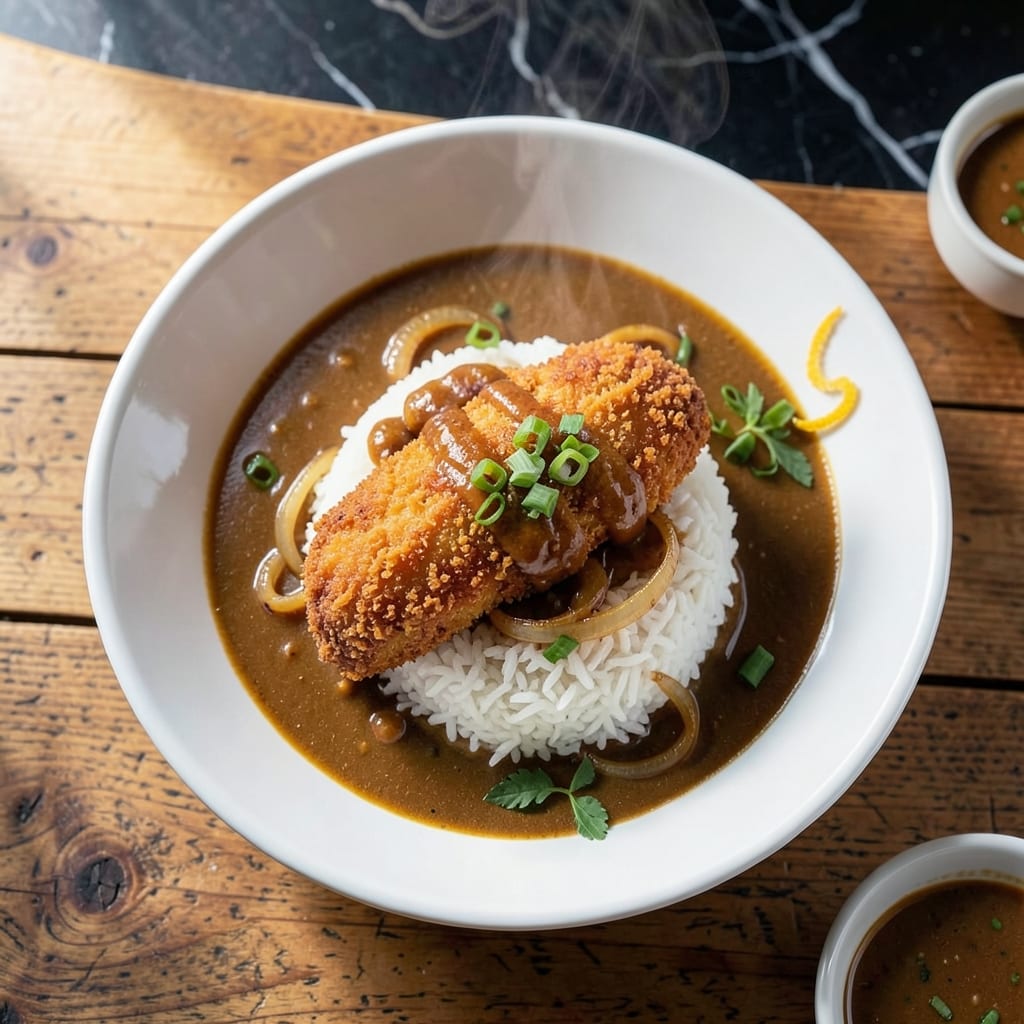
Achieving that signature Wagamama crispy chicken katsu at home requires precise breading and frying technique. I developed this method after years of perfecting breaded cutlets in professional kitchens.
The secret lies in a three-step breading process using panko for maximum crunch. The coconut-infused curry sauce, simmered with aromatic spices, complements the golden cutlet perfectly.
You’ll get a dish with shatteringly crispy chicken and a velvety, fragrant sauce that rivals the restaurant version. The contrast between textures makes every bite memorable.
Serve with steamed rice and pickled vegetables for the full experience. This delivers authentic flavor and presentation.
Ingredients for Katsu Chicken Curry Recipe Wagamama
Professional-grade ingredients for restaurant-quality crispy chicken and aromatic coconut curry sauce at home.
| Ingredient | Amount | Notes |
|---|---|---|
| Boneless Chicken Breasts 🍗 | 1 ½ lb | Pounded to 1/2-inch thickness |
| All-Purpose Flour 🌾 | ½ cup | For initial dredging |
| Large Eggs 🥚 | 2 whole | Beaten for egg wash |
| Panko Breadcrumbs 🍞 | 2 cups | Japanese-style for maximum crunch |
| Vegetable Oil 🫒 | 3 cups | For deep frying (peanut oil works too) |
| Onion 🧅 | 1 whole | Finely diced for sauce |
| Garlic Cloves 🧄 | 3 cloves | Minced for aromatic base |
| Fresh Ginger Root 🌿 | 1 tbsp | Grated for depth of flavor |
| Curry Powder 🌶️ | 2 tbsp | Mild or hot variety |
| Ground Turmeric 🌿 | 1 tsp | For vibrant color |
| Ground Cumin 🌿 | 1 tsp | Toasted for warmth |
| Coconut Milk 🥥 | 1 can | Full-fat for creaminess |
| Chicken Stock 🥣 | 1 ½ cups | Low-sodium preferred |
| Soy Sauce 🫒 | 2 tbsp | For umami depth |
| Honey 🍯 | 1 tbsp | Balances the spices |
[recipe_ingredient_scaler]
The chicken quality is paramount. Organic, free-range breasts from Whole Foods or Trader Joe’s provide optimal texture for pounded cutlets. Panko breadcrumbs must be authentic Japanese-style—Kikkoman brand is widely available in the Asian aisle. The coconut milk should be full-fat; Thai Kitchen or Chaokoh brands deliver the required richness without watery separation.
For gluten-free adaptations, swap all-purpose flour for rice flour and verify panko is wheat-free. No coconut milk? Heavy cream at half the volume (though texture will differ). The curry powder can be Madras or Japanese-style—S&B Golden Curry blocks also work beautifully here. Fresh ginger is non-negotiable; the bottled version lacks the necessary punch for this professional-level dish.
The breaded cutlets hold in the fridge for 24 hours before frying. Completed curry sauce keeps for 3 days refrigerated or 3 months frozen. Always bring coconut milk to room temperature before using to prevent oil separation during cooking.
Why You’ll Love This Recipe
- No Fuss Breading: I love how the panko sticks to the chicken in seconds—just flour, egg, crumbs, done. No fancy techniques, just crispy results every time.
- That Crunch though: The panko gives it this insane crunch that stays put even under the curry sauce. Honestly, it’s the little things that make this dish.
- Crowd Pleaser: From picky kids to my foodie friends, everyone clears their plate. Even my nephew who “hates chicken” asks for seconds.
- Leftovers? Yes Please: The flavors meld overnight, making tomorrow’s lunch taste even better. I’ll be real: I sometimes make extra just for this.
Step-by-Step Instructions for Katsu Chicken Curry
Master the technique for creating a perfectly crispy coating and rich, aromatic curry sauce.
Step 1: Prepare and Bread the Chicken Cutlets
Begin by pounding the 1.5 lb Boneless Chicken Breasts to an even ½-inch thickness between two sheets of plastic wrap. This ensures uniform cooking and prevents dry spots. Season both sides lightly with salt and pepper.
Set up a breading station with three shallow dishes. Place the 0.5 cup All-Purpose Flour in the first, beat the 2 whole Large Eggs in the second, and put the 2 cups Panko Breadcrumbs in the third. Dredge each breast in flour, shaking off excess, then dip in egg, and finally press into the panko until fully coated. The panko should adhere in an even, textured layer for maximum crunch.
Step 2: Fry the Chicken to Golden Perfection
Heat the 3 cups Vegetable Oil in a deep, heavy-bottomed pot to 350°F. Use a thermometer for accuracy—oil that’s too cool will make the chicken greasy, while oil that’s too hot may burn the coating before the meat cooks through.
Fry the breaded chicken in batches for 4-5 minutes per side until the coating is deep golden brown and the internal temperature reaches 165°F. Avoid overcrowding the pot, as this lowers the oil temperature and compromises crispiness. Drain on a wire rack to preserve the crunch.
Step 3: Build the Curry Sauce Base
In a separate pot, sauté the finely diced 1 whole Onion over medium heat until soft and translucent, about 5-6 minutes. Add the minced 3 cloves Garlic Cloves and grated 1 tbsp Fresh Ginger Root, cooking for 1 minute until fragrant. Stir in the 2 tbsp Curry Powder, 1 tsp Ground Turmeric, and 1 tsp Ground Cumin, toasting for 30 seconds to deepen their flavors.
This aromatic foundation is critical for the sauce’s complexity. The spices should be bloomed but not burnt—watch for the moment the mixture becomes deeply fragrant and the curry powder darkens slightly.
Step 4: Simmer the Sauce to Creamy Consistency
Pour in the 1.5 cups Chicken Stock, scraping up any browned bits from the bottom of the pot. Add the 1 can Coconut Milk, 2 tbsp Soy Sauce, and 1 tbsp Honey, stirring to combine. Bring to a gentle simmer and cook for 10-12 minutes until the sauce thickens enough to coat the back of a spoon.
Taste and adjust seasoning as needed. The sauce should balance rich coconut with warm spices and a subtle sweetness. If it’s too thick, thin with a splash of water; if too thin, simmer a few minutes longer.
Step 5: Slice and Serve with Sauce
Slice the fried chicken cutlets into ½-inch thick strips. Arrange over steamed rice and ladle the hot curry sauce generously over the top. The contrast of the crispy panko coating with the velvety sauce is what makes this dish exceptional.
Serve immediately while the chicken is still crisp and the sauce is hot. The panko will soften slightly from the sauce, but the initial crunch should remain prominent in every bite.
Pro Tips For Making Katsu Chicken Curry Recipe Wagamama
- Pound the Chicken: I learned this the hard way—pound the chicken breasts to an even 1/2-inch thickness so they cook through at the same rate without drying out.
- Chill the Coated Cutlets: After breading, pop them in the fridge for 10 minutes to set the crust; it keeps the panko from falling off in the oil.
- Double Fry for Crisp: Fry once at 325°F for 3-4 minutes, rest, then fry again at 350°F for 2 minutes—this builds that signature Wagamama crunch.
- Use Fresh Panko: Skip the stale breadcrumbs; fresh panko absorbs less oil and gives that light, airy texture the dish needs.
Regional Styles of This Dish
Japanese Original
In Japan, katsu curry is called katsu karē and uses tonkatsu (pork cutlets) more often than chicken. The curry sauce is typically thicker and less coconut-forward, with a deeper, almost gravy-like consistency. I love how the Japanese version emphasizes the panko crunch even more.
British Pub Style
British pubs serve katsu with a milder, slightly sweeter curry sauce that often includes apple or raisins for natural sweetness. The chicken is sometimes coated in regular breadcrumbs instead of panko. This version feels more approachable for those new to the dish. 💛
Thai Green Curry
Thai adaptations use green curry paste (about 2 tbsp) instead of powder, with added Thai basil and kaffir lime leaves. The coconut milk base remains, but the flavor profile shifts to bright, herbal notes. This is my go-to when I want something lighter.
Indian Spiced
Indian-style versions amp up the heat with fresh green chilies and garam masala. The sauce often includes tomato purée for tanginess. I’ve seen this served with naan instead of rice for a heartier meal. The spices create a bold, complex flavor.
American Fusion
In the US, some restaurants add peanut butter or sriracha to the sauce for a Southeast Asian twist. The chicken might be brined in buttermilk before breading for extra juiciness. This fusion style is popular in food trucks across Atlanta. 🔥
Wagamama Signature
Wagamama’s version stands out with its velvety coconut sauce and perfectly crisp panko coating. They often serve it with a side of pickled red cabbage for acidity. The balance of textures and flavors is what keeps me coming back.
Nutrition Facts
Frequently Asked Questions
How do I keep the chicken crispy while serving?
Serve the katsu immediately after frying on a wire rack, not a plate. This prevents steam from softening the panko coating. Pour the sauce over just before eating to preserve the crunch.
Can I use regular breadcrumbs instead of panko?
Panko is essential for the signature texture, but in a pinch, toast regular breadcrumbs with 1 tsp oil in a pan for 3 minutes to add crispness. The result won’t be identical but will be closer.
Why is my sauce too thin?
Simmer uncovered for 5 more minutes to reduce. If still thin, mix 1 tbsp cornstarch with water and stir in. The sauce should coat the back of a spoon when done.
What sides pair well with this dish?
Steamed jasmine rice is classic. Add pickled vegetables or a simple cucumber salad for freshness. Wagamama often serves it with shredded cabbage for crunch.

Trained in classic French technique but raised on slow-cooked ribs and spicy rubs, she blends culinary skill with smoke and soul.
- Recipe for Boneless Pork Chops in Cast Iron Skillet: Sear and Baste to Juicy Perfection - October 3, 2026
- Recipe for Boneless Cross Rib Roast: Slow-Roasted Beef with Herb Crust - October 3, 2026
- Hamburgers in Sauce Recipe Crock Pot: Slow-Cooked Savory Delight - October 3, 2026