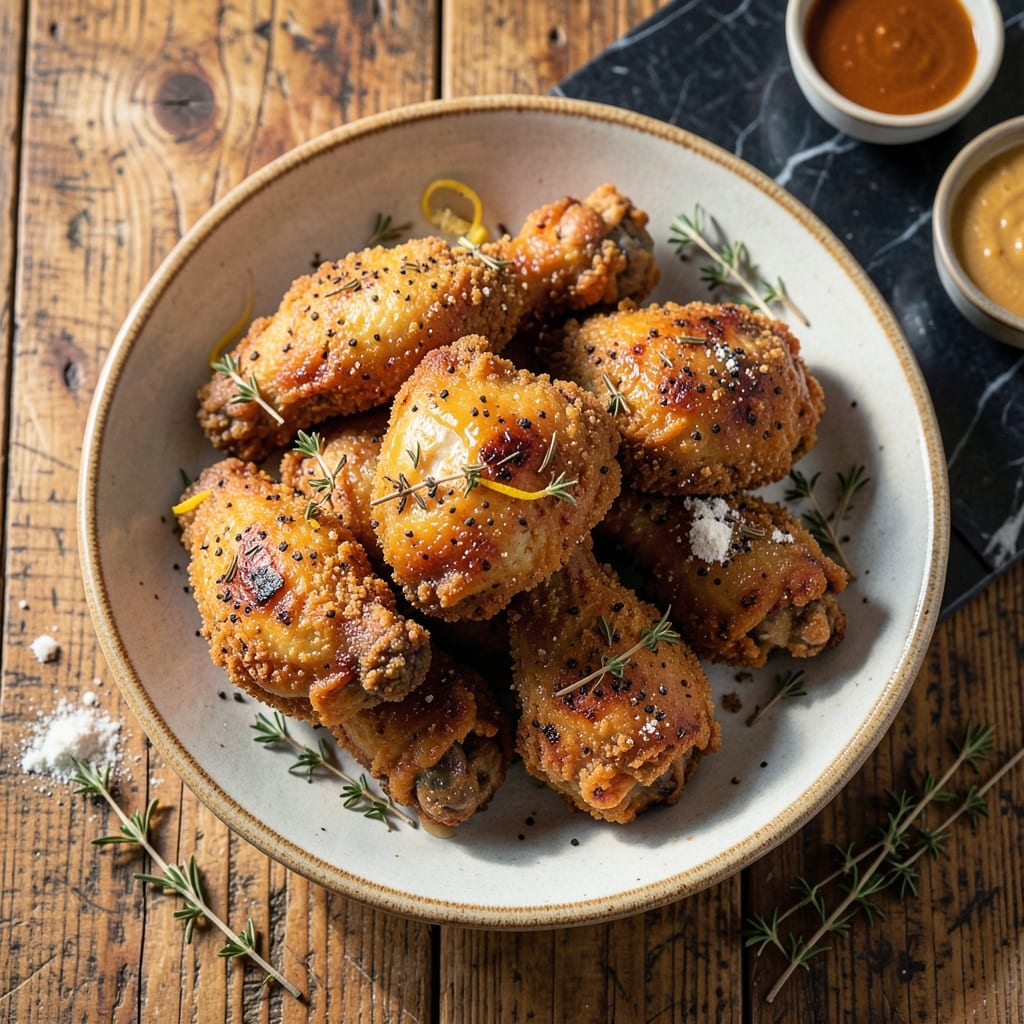
After years of testing, I’ve recreated the updated version of the Colonel’s legendary fried chicken at home. This recipe captures the same crispy, flavorful magic with a few modern adjustments.
The secret lies in the perfect blend of eleven herbs and spices, a buttermilk marinade for tenderness, and a double-frying method for that signature crunch. Every bite delivers nostalgia with a slight twist.
What you’ll get is golden, shatteringly crisp chicken with juicy meat inside, just like the original—but tailored for today’s tastes. No deep fryer? No problem. A Dutch oven works just as well.
Serve hot for the best texture. The result is worth the effort.
Ingredients for Kentucky Fried Chicken Recipe Changed
Eleven herbs and spices plus buttermilk create that legendary crisp, juicy chicken everyone craves.
| Ingredient | Amount | Notes |
|---|---|---|
| Chicken Thighs and Drumsticks 🍗 | 3 ½ lb | Bone-in, skin-on for crispiness |
| Buttermilk 🥛 | 2 cups | Full-fat for best tenderness |
| All-Purpose Flour 🌾 | 2 cups | Plus extra for dredging |
| Fine Sea Salt 🧂 | 1 tbsp | Diamond Crystal preferred |
| Freshly Ground Black Pepper 🌶️ | 1 tsp | Coarse grind for texture |
| Dried Thyme 🌿 | 1 tsp | Crushed between fingers |
| Dried Basil 🍃 | 1 tsp | Rubbed to release oils |
| Dried Oregano 🌿 | 1 tsp | Mediterranean variety ideal |
| Celery Salt 🌿 | 1 tsp | Essential for authentic flavor |
| Dried Mustard 🌶️ | 1 tsp | Powdered, not prepared |
| Ground Ginger 🌿 | ½ tsp | Freshly ground if possible |
| Paprika 🌶️ | 2 tsp | Sweet or smoked variety |
| White Pepper 🌶️ | ½ tsp | Subtle heat and aroma |
| MSG 🧂 | ½ tsp | Accentuate flavor (optional) |
| Vegetable Shortening 🫒 | 4 cups | For frying, Crisco recommended |
[recipe_ingredient_scaler]
The chicken is non-negotiable—bone-in, skin-on thighs and drumsticks deliver the juiciest meat and crispiest skin. Source from Whole Foods or a trusted butcher for consistent quality. Buttermilk matters too; full-fat is essential (low-fat won’t tenderize as effectively). For the flour, all-purpose works, but White Lily (a Southern staple) gives that authentic, ultra-crisp coating. The herbs and spices should be fresh—check the expiration dates on those dusty jars.
No buttermilk? Mix 2 cups milk with 2 tbsp vinegar or lemon juice and let sit for 10 minutes. Missing a spice? Penzeys offers individual herbs in small quantities—perfect for restocking. Celery salt is key for that signature flavor; if you can’t find it, mix equal parts salt and celery seed. The MSG is optional but highly recommended for depth. Swap vegetable shortening for peanut or canola oil if preferred.
Marinate the chicken overnight for maximum tenderness—though 4 hours minimum works in a pinch. Store dry spices in airtight containers away from light; they’ll keep for 6-12 months. Fried chicken is best eaten fresh but reheats decently in a 375°F oven for 10-15 minutes (don’t microwave—it’ll get soggy).
Why You’ll Love This Recipe
- One Bowl Wonder: I just toss the chicken in buttermilk, coat it in flour, and fry—no fancy prep or extra dishes.
- Crispy Perfection: That buttermilk soak keeps the meat juicy while the flour crust gets golden and crunchy.
- Feeds the Crew: I make a big batch for Sunday dinner, and it’s just as good cold in lunches the next day.
Step-by-Step Instructions for Kentucky Fried Chicken
Master the technique behind this iconic dish with precise steps and professional results.
Step 1: Marinate the Chicken in Buttermilk
Place the 3.5 lb chicken thighs and drumsticks in a large bowl and pour over the 2 cups buttermilk. Ensure every piece is fully submerged—this acidic bath tenderizes the meat and helps the coating adhere. I press down gently to eliminate air pockets.
Cover and refrigerate for at least 4 hours, though overnight yields optimal tenderness. The buttermilk will thicken slightly as it works, and the chicken will take on a pale, moist appearance. Don’t rush this; the lactic acid needs time to break down proteins for maximum juiciness.
Step 2: Prepare the Seasoned Flour Dredge
In a large, shallow dish, whisk together the 2 cups all-purpose flour, 1 tbsp fine sea salt, 1 tsp freshly ground black pepper, 1 tsp dried thyme, 1 tsp dried basil, 1 tsp dried oregano, 1 tsp celery salt, 1 tsp dried mustard, 0.5 tsp ground ginger, 2 tsp paprika, 0.5 tsp white pepper, and 0.5 tsp MSG.
The spices should be evenly distributed with no clumps. crush the dried herbs between your fingers before adding to release their essential oils. This blend replicates the Colonel’s signature depth—savory, slightly sweet, with a hint of earthy warmth from the ginger and mustard.
Step 3: Dredge and Rest the Chicken
Remove the chicken from the buttermilk, allowing excess to drip off for 10 seconds per piece. Dredge each piece thoroughly in the seasoned flour, pressing firmly to create a thick, even crust. Shake off any loose flour—excess will burn in the hot oil.
Place the dredged chicken on a wire rack set over a baking sheet. This allows air circulation, preventing the coating from becoming soggy. Let it rest for 15-20 minutes at room temperature. You’ll notice the coating sets and adheres tightly to the meat during this time, which prevents it from separating during frying.
Step 4: Fry to Golden Perfection
In a deep, heavy pot or Dutch oven, melt the 4 cups vegetable shortening over medium-high heat until it reaches 350°F. Use a deep-fry thermometer for accuracy—oil temperature is critical. If it’s too cool, the chicken will absorb grease; if too hot, the outside will burn before the inside cooks.
Fry the chicken in batches to avoid crowding, which lowers the oil temperature. Submerge each piece completely and fry for 12-15 minutes, turning occasionally, until the coating is deep golden brown and the internal temperature reaches 165°F. The crust should be audibly crisp when tapped with tongs.
Step 5: Drain and Rest Before Serving
Transfer the fried chicken to a clean wire rack or paper towels to drain. Don’t stack the pieces—this traps steam and makes the coating soggy. The oil will continue to cook the chicken slightly, so the internal temperature may rise another 5°F out of the fryer.
Let the chicken rest for 5-10 minutes before serving. This allows the juices to redistribute, ensuring the meat stays moist and the crust remains shatteringly crisp. Serve immediately while hot for the full experience—the contrast of juicy interior and crunchy exterior is what defines this dish.
Pro Tips For Making Kentucky Fried Chicken Recipe Changed
- Double-Dredge the Chicken: Dip each piece in buttermilk, then flour, then back in buttermilk and flour again—I learned this the hard way, single-dredging just doesn’t give that thick, shatteringly crisp crust.
- Use Thighs and Drumsticks: Skip the breasts; dark meat stays juicier and handles the high heat better, and the skin renders down just right for that classic texture.
- Rest Between Dredges: Let the floured chicken sit for 5-10 minutes before frying—this helps the coating adhere and prevents it from sliding off in the oil.
- Heat the Oil Properly: Use a thermometer to keep the oil at 350°F; after burning three batches, I finally figured out that guessing the temperature just doesn’t work.
Make-Ahead Tips for Leftovers
Overnight Marinade Prep
I always mix the buttermilk marinade the night before and let the 3.5 lb chicken soak overnight. This gives the lactic acid maximum time to tenderize the meat. Cover tightly and refrigerate—your future self will thank you for the extra tenderness. 💡
Spice Blend Prep
Measure out all 11 spices and store them in a small airtight container. This keeps the blend fresh and ready to use. I label mine with the date—spices stay potent for 3-4 months in a cool, dark place.
Dredging Station Setup
Set up your dredging station the morning of cooking. Place the seasoned flour in a shallow dish and have a wire rack ready. This makes the process smooth when it’s time to cook. I use a baking sheet lined with parchment under the rack for easy cleanup.
Double-Fry Method
For extra crispiness, you can par-fry the chicken at 325°F for 8-10 minutes, rest for 30 minutes, then finish at 350°F. This method ensures the coating stays crunchy even if you need to hold it before serving.
Holding for Serving
If you need to keep the chicken warm before serving, place it on a wire rack in a 200°F oven. This maintains the crispiness without drying it out. Avoid stacking—give each piece space to preserve the crust. ❄️
Make-Ahead Freezing
Fried chicken can be frozen after cooling completely. Place pieces in a single layer on a tray, freeze, then transfer to a freezer bag. Reheat from frozen in a 375°F oven for 20-25 minutes to restore crispness.
Nutrition Facts
Frequently Asked Questions
Why use buttermilk instead of regular milk?
Buttermilk’s acidity tenderizes the meat and helps the coating cling better. Regular milk lacks the tang and protein-breaking power for juicy, crisp results.
Can I bake instead of fry?
Yes, but texture differs. Bake at 400°F for 35-40 minutes on a wire rack for crispiness. Frying still gives the best crunch though.
How do I know when the oil is ready?
Use a thermometer for 350°F. Without one, drop a pinch of flour in—it should sizzle immediately and float to the top.
Can I reuse the frying oil?
Yes, strain and store it in a cool, dark place. Reuse within 1-2 weeks, but avoid if it smells off or smokes excessively.

Trained in classic French technique but raised on slow-cooked ribs and spicy rubs, she blends culinary skill with smoke and soul.
- Recipe for Boneless Pork Chops in Cast Iron Skillet: Sear and Baste to Juicy Perfection - October 3, 2026
- Recipe for Boneless Cross Rib Roast: Slow-Roasted Beef with Herb Crust - October 3, 2026
- Hamburgers in Sauce Recipe Crock Pot: Slow-Cooked Savory Delight - October 3, 2026