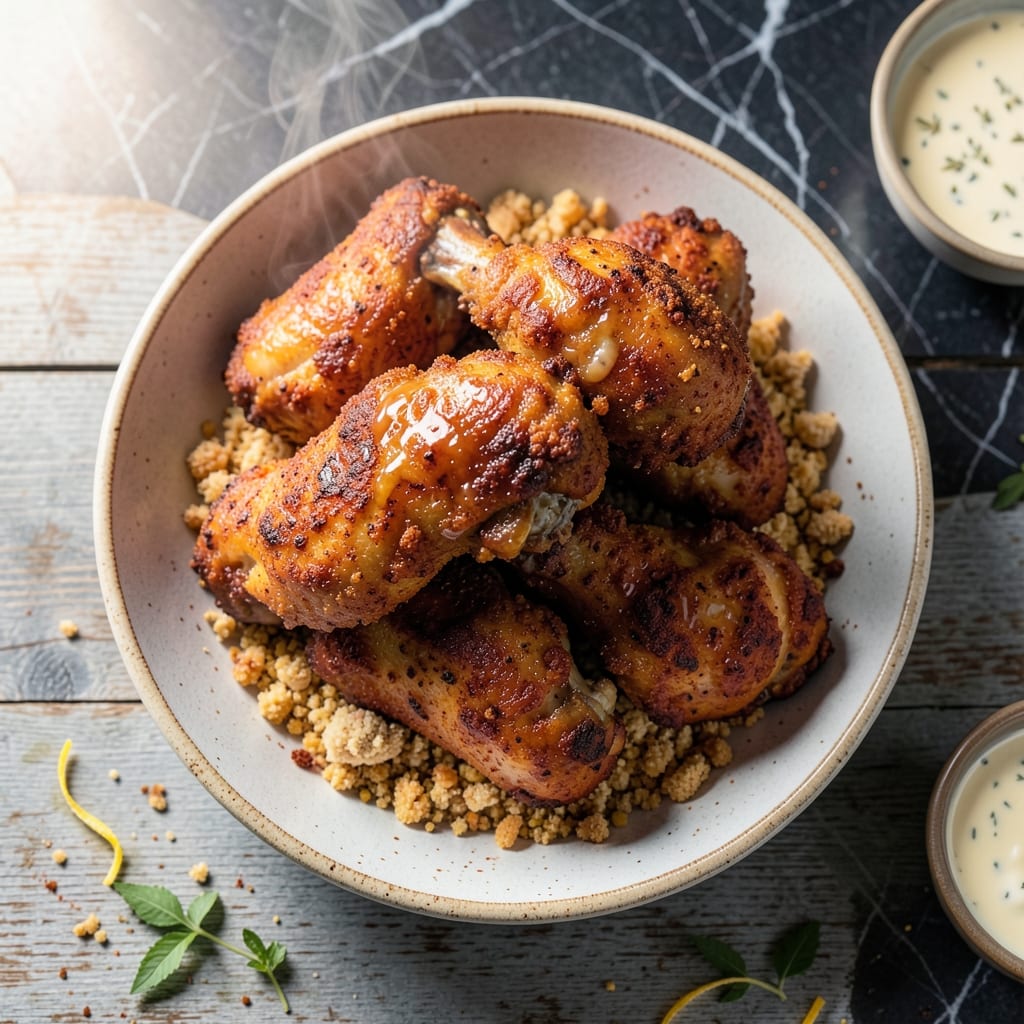
There’s a reason this fried chicken stands out—it delivers crispy, golden perfection with a bold, spicy kick that lingers just enough.
I developed this method to balance heat and crunch without overwhelming the chicken’s natural flavor. The secret lies in a well-seasoned coating and precise frying temperature to lock in moisture while achieving that signature crispy exterior.
Each bite offers tender meat encased in a shatteringly crispy shell, with a spice blend that builds warmth without overpowering. It’s the kind of dish that turns a simple meal into a memorable experience.
Perfect for gatherings or a flavorful weeknight dinner, this recipe ensures every piece is cooked to juicy, crispy perfection.
Ingredients for Kickin Fried Chicken Recipe Today Show
Crispy, spicy, and packed with bold flavors. Gather these for unforgettable fried chicken.
| Ingredient | Amount | Notes |
|---|---|---|
| Chicken Thighs 🍗 | 2 ½ lb | Boneless, skin-on, cut into strips |
| Buttermilk 🥛 | 2 cups | Full-fat for maximum tenderness |
| All-Purpose Flour 🌾 | 2 cups | Sifted for even coating |
| Cornstarch 🌽 | ½ cup | For extra crispiness |
| Cayenne Pepper 🔥 | 1 ½ tbsp | Adjust for heat preference |
| Smoked Paprika 🌶️ | 1 tbsp | Adds depth and color |
| Garlic Powder 🧄 | 1 tbsp | Freshly powdered preferred |
| Onion Powder 🧅 | 1 tbsp | For savory base flavor |
| Salt 🧂 | 1 ½ tbsp | Diamond Crystal kosher salt |
| Black Pepper 🌶️ | 1 tbsp | Freshly ground for best flavor |
| Peanut Oil 🫒 | 4 cups | For frying, high smoke point |
| Hot Sauce 🔥 | 2 tbsp | Such as Crystal or Tabasco |
| Dried Thyme 🍃 | 1 tsp | Crushed between fingers |
| Dried Oregano 🌿 | 1 tsp | Mediterranean variety preferred |
[recipe_ingredient_scaler]
The chicken is the foundation—thighs stay juicier than breasts during frying. Costco or Sam’s Club offer great bulk options for skin-on, bone-in if you prefer. Buttermilk quality matters; organic full-fat from Whole Foods or a local dairy gives the best marinade. For the flour, King Arthur all-purpose is my go-to for consistent results. Don’t skip the cornstarch—it’s what gives that shatteringly crispy texture.
Need to dial back the heat? Reduce the cayenne to 1 tablespoon and skip the hot sauce. For a gluten-free version, swap all-purpose flour for rice flour. No buttermilk? Whole milk plus 1 tablespoon lemon juice per cup works in a pinch. Peanut oil can be replaced with vegetable or canola oil, but avoid olive oil—its smoke point is too low for proper frying.
Marinate the chicken in buttermilk for at least 4 hours, ideally overnight. Fried chicken is best eaten fresh but reheats well in a 375°F oven for 10-15 minutes. Leftovers keep in the fridge for 3-4 days—though they’re rarely around that long.
Why You’ll Love This Recipe
- One Bowl Wonder: I just toss everything in one bowl—flour, cornstarch, cayenne—then coat the thighs and fry. No fancy prep, no mess.
- That Cayenne Kick: The buttermilk soak keeps the chicken juicy while the cayenne gives it a spicy crunch that’s honestly addictive.
- Crowd Pleaser: I’ve served this at picnics, game nights, and random weeknights—always disappears first.
- Budget Friendly: Chicken thighs are cheap, the coating is pantry staples, and leftovers taste even better the next day.
Step-by-Step Instructions for Kickin Fried Chicken
This method ensures maximum crispiness with a spicy kick that builds in layers of flavor.
Step 1: Marinate the Chicken in Spiced Buttermilk
In a large bowl, whisk together the 2 cups Buttermilk with 2 tbsp Hot Sauce, 1.5 tbsp Cayenne Pepper, 1 tsp Dried Thyme, and 1 tsp Dried Oregano until fully combined. Add the 2.5 lb Chicken Thighs and submerge completely in the mixture.
Cover and refrigerate for at least 4 hours, or overnight for the best flavor penetration. The buttermilk tenderizes the meat while the spices infuse it with heat and complexity. Stir the mixture once halfway through marination to ensure even coating.
Step 2: Prepare the Crispy Coating Mixture
In a large shallow dish, combine the 2 cups All-Purpose Flour, 0.5 cup Cornstarch, 1 tbsp Smoked Paprika, 1 tbsp Garlic Powder, 1 tbsp Onion Powder, 1.5 tbsp Salt, and 1 tbsp Black Pepper. Whisk thoroughly until no streaks remain.
The cornstarch is the secret to extra crispiness—it creates micro-bubbles during frying that result in a shatteringly crisp crust. I sift the flour first to prevent lumps in the coating, which ensures an even, professional finish on each piece.
Step 3: Dredge and Rest for Maximum Adhesion
Remove the chicken from the buttermilk mixture, allowing excess to drip off for 10 seconds. Immediately dredge each piece in the flour mixture, pressing firmly to adhere. Shake off any excess, then place on a wire rack set over a baking sheet.
Let the dredged chicken rest for 15 minutes at room temperature. This critical step allows the coating to hydrate and bond to the meat, preventing it from falling off during frying. The pieces should look uniformly coated with no wet spots when ready.
Step 4: Fry to Golden Perfection
Heat the 4 cups Peanut Oil in a deep, heavy-bottomed pot to 350°F. Use a deep-fry thermometer for accuracy—this temperature ensures the chicken cooks through without burning the coating. Carefully lower 3-4 pieces into the oil at a time to avoid crowding.
Fry for 12-15 minutes, turning occasionally, until the chicken reaches an internal temperature of 165°F and the crust is a deep, golden brown. The oil should bubble steadily but not violently around the pieces. Drain on the wire rack to maintain crispness.
Step 5: Rest and Serve Immediately
Transfer the fried chicken to a clean wire rack and let it rest for 5 minutes. This allows the juices to redistribute and the crust to set completely. The internal temperature will rise slightly during this time due to carryover cooking.
Serve immediately while hot and crispy. The exterior should audibly crunch when bitten, revealing juicy, tender meat inside with a lingering spicy warmth. Any leftovers should be reheated in a 375°F oven for 10 minutes to restore crispness.
Pro Tips For Making Kickin Fried Chicken Recipe Today Show
- Double Dredge: Dip the chicken in buttermilk, then flour, then buttermilk again, then flour again—I learned this the hard way, but the extra layer makes that crust actually stay put.
- Rest the Chicken: After dredging, let the coated thighs sit for 10 minutes before frying. My grandmother swore by this, and she was right: it keeps the coating from sliding off.
- Skip the Crowding: Fry in batches with at least an inch between pieces—after burning three batches, I finally figured out that overcrowding drops the oil temp and makes greasy chicken.
- Heat the Oil First: Get the oil to 350°F before adding chicken, and keep it there. Sounds obvious, but I used to rush this part and wondered why my crust never got that golden crunch.
Make-Ahead Tips for This Dish
Marinade Prep
Whisk together the Buttermilk, Hot Sauce, Cayenne Pepper, Dried Thyme, and Dried Oregano the night before. This lets the spices bloom in the buttermilk overnight, infusing maximum flavor into the chicken. I always prep this first thing—it’s the easiest way to ensure deep, complex heat. 💡
Dredging Station
Combine the All-Purpose Flour, Cornstarch, and all the dry spices in a shallow dish up to 24 hours ahead. Store covered at room temperature. The cornstarch will absorb ambient moisture, so keep it sealed tight to maintain crispiness potential.
Chicken Prep
Cut the Chicken Thighs into strips and submerge them in the marinade. Refrigerate for at least 4 hours, stirring once halfway. For best results, let it marinate overnight—the longer it sits, the more tender and flavorful the meat becomes.
Day-Of Frying
Dredge the chicken 15 minutes before frying to let the coating set. This step is non-negotiable for that shatteringly crisp crust. I use a wire rack over a baking sheet to keep the pieces elevated and evenly coated.
Oil Management
Heat the Peanut Oil to 350°F just before frying. If prepping ahead, store the oil in the pot at room temperature—it reheats quickly. Avoid overheating, as this can break down the oil and affect flavor. 🔥
Reheating Leftovers
Store cooked chicken on a wire rack in the fridge for up to 3 days. Reheat in a 375°F oven for 10-15 minutes to revive the crispness. Microwaving works in a pinch, but the oven is the only way to restore that perfect crunch.
Nutrition Facts
Frequently Asked Questions
Can I use chicken breasts instead of thighs?
Yes, but thighs stay juicier. If using breasts, reduce cooking time to 10-12 minutes to prevent dryness. The spice kick works well with either cut.
How do I adjust the spice level?
For milder heat, reduce cayenne to 1 tablespoon and skip the hot sauce. For extra kick, add 1 teaspoon of crushed red pepper to the coating.
What oil works if I don’t have peanut oil?
Vegetable or canola oil are great substitutes with similar smoke points. Avoid olive oil—its low smoke point can burn the coating.
Can I bake instead of fry?
Yes, bake at 400°F for 20-25 minutes on a wire rack. It won’t be as crispy, but still flavorful. Turn halfway for even browning.

Trained in classic French technique but raised on slow-cooked ribs and spicy rubs, she blends culinary skill with smoke and soul.
- Recipe for Boneless Pork Chops in Cast Iron Skillet: Sear and Baste to Juicy Perfection - October 3, 2026
- Recipe for Boneless Cross Rib Roast: Slow-Roasted Beef with Herb Crust - October 3, 2026
- Hamburgers in Sauce Recipe Crock Pot: Slow-Cooked Savory Delight - October 3, 2026