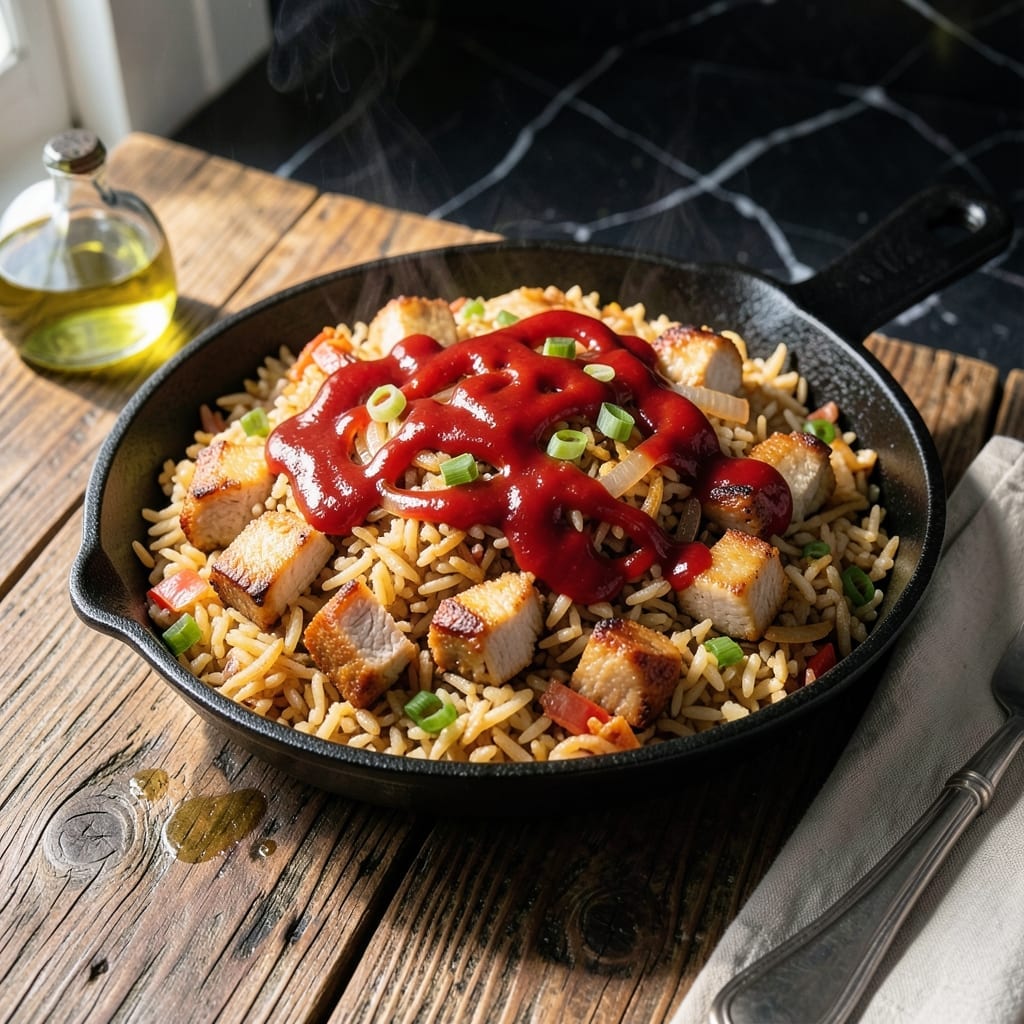
This dish brings the bold flavors of Korean cuisine to your kitchen with minimal effort. The combination of fermented kimchi and savory pork creates a balance that’s both comforting and complex.
I’ve refined this recipe over years of cooking, ensuring the rice stays fluffy while the pork achieves that ideal caramelized edge. A touch of sesame oil at the end ties everything together beautifully.
The beauty lies in its simplicity—just a few ingredients transform into a satisfying meal. The kimchi’s tang cuts through the richness of the pork, making each bite perfectly balanced.
Ready in under 30 minutes, this is a foolproof weeknight dinner that never fails to impress. Serve it with a fried egg on top for extra indulgence.
Ingredients for Kimchi Fried Rice Recipe with Pork
Day-old rice, fermented kimchi, and tender pork make this dish sing with Korean flavors.
| Ingredient | Amount | Notes |
|---|---|---|
| Cooked White Rice 🍚 | 4 cups | Day-old, cold preferred |
| Kimchi 🥬 | 1 ½ cups | Fermented, chopped with juice |
| Pork Belly 🥓 | ½ lb | Thinly sliced, or pork shoulder |
| Onion 🧅 | ½ whole | Yellow or white, diced |
| Garlic Cloves 🧄 | 3 cloves | Minced finely |
| Gochujang 🌶️ | 1 tbsp | Korean red pepper paste |
| Soy Sauce 🥢 | 2 tbsp | Low-sodium preferred |
| Sesame Oil 🫒 | 1 tbsp | Toasted for finishing |
| Green Onions 🧅 | 3 whole | Thinly sliced for garnish |
| Vegetable Oil 🫒 | 2 tbsp | For high-heat cooking |
| Large Eggs 🥚 | 4 whole | Optional for topping |
| Sesame Seeds 🌰 | 1 tsp | Toasted for garnish |
| Sugar 🍚 | 1 tsp | Balances kimchi acidity |
[recipe_ingredient_scaler]
The kimchi is non-negotiable here. Look for napa cabbage kimchi with vibrant red color and plenty of juice—it’s the backbone of flavor. H Mart or Korean markets have the best selection, but most Whole Foods carry solid options. The pork belly gives that rich, caramelized edge, but pork shoulder works if that’s what’s available. Always use day-old rice (fresh gets mushy).
No pork? Chicken thighs or tofu are great swaps. Out of gochujang? Sriracha plus a pinch of sugar gets you close. Fresh kimchi is ideal, but jarred works in a pinch—just drain some juice if it’s watery. Want extra veg? Toss in diced carrots or zucchini. The sesame oil at the end is key (don’t skip it).
Leftovers keep 3-4 days in the fridge. Reheat in a skillet with a splash of water to revive. Freeze without the egg for up to 3 months. For best texture, cook eggs fresh when serving.
Why You’ll Love This Recipe
- One Pan Wonder: I toss everything in my cast iron and it’s done in 15 minutes flat, no extra pots to wash.
- Umami Bomb: The pork belly soaks up the kimchi’s spicy tang, and the garlic just makes it ridiculous.
- Weeknight MVP: I’ve served it for lazy dinners, packed it for lunch, and even snuck it into breakfast.
- Stretch a Dollar: A little pork belly goes a long way, and leftover rice gets a serious upgrade.
Step-by-Step Instructions for Kimchi Fried Rice With Pork
Here’s the method. Straightforward, tested, works every time.
Step 1: Prepare and Cook the Pork Belly
Heat 2 tablespoons vegetable oil in a large skillet or wok over medium-high heat. Add the 0.5 lb pork belly and cook for 5-6 minutes until golden brown and crispy, stirring occasionally. The fat will render out, creating a flavorful base for the dish.
Once crispy, push the pork belly to one side of the pan. Add the 0.5 whole onion and cook for 2-3 minutes until softened and translucent. Then add the 3 cloves garlic cloves and cook for 30 seconds until fragrant. This builds the aromatic foundation of your creation.
Step 2: Incorporate Kimchi and Seasonings
Add the 1.5 cups kimchi (including its juices) to the skillet. Stir well to combine with the pork belly, onion, and garlic. Cook for 3-4 minutes until the kimchi is heated through and starts to sizzle.
Next, stir in the 1 tbsp gochujang, 2 tbsp soy sauce, and 1 tsp sugar. Mix thoroughly to coat all the ingredients evenly. The gochujang will deepen the spicy, umami flavors, while the sugar balances the acidity of the kimchi.
Step 3: Add Rice and Finish Cooking
Add the 4 cups cooked white rice to the skillet, breaking up any clumps with your spatula. Stir-fry for 5-6 minutes until the rice is heated through and begins to crisp slightly. Press the rice against the pan occasionally to encourage browning.
Drizzle the 1 tbsp sesame oil over the rice and mix well. The sesame oil adds a nutty aroma and ties all the flavors together. Taste and adjust seasoning if needed—this is your chance to fine-tune the balance of spicy, salty, and sweet.
Step 4: Garnish and Serve
Remove the skillet from heat. Thinly slice the 3 whole green onions and sprinkle them over the top. Add the 1 tsp sesame seeds for a nutty crunch and visual appeal. These garnishes add freshness and texture contrast.
For an optional but highly recommended touch, fry the 4 whole large eggs in a separate pan to your preferred doneness. Place one egg on top of each serving. The runny yolk will enrich the dish when mixed in. Serve immediately while hot, with extra kimchi on the side if desired.
Pro Tips For Making Kimchi Fried Rice Recipe With Pork
- Use Day-Old Rice: Fresh rice turns mushy—I learned this the hard way. Day-old, cold rice from the fridge holds its shape and fries up with that perfect chewy texture.
- Sear Pork First: Render the pork belly in the pan first until crispy, then set it aside. Sounds like an extra step, but it actually changes the outcome by adding deep flavor to the oil.
- Drain the Kimchi: Squeeze excess liquid from the kimchi before adding it to the pan—otherwise, your fried rice will steam instead of sizzle.
- High Heat Only: Crank the heat to medium-high and keep it there. After burning three batches, I finally figured out that timid heat just makes soggy, sad kimchi fried rice.
Creative Variations of kimchi fried rice recipe with pork
Vegetarian Swap
Replace the pork belly with extra-firm tofu pressed and cubed. I pan-fry it first in 1 tbsp vegetable oil until golden for that meaty texture. The key is getting it crispy—this mirrors the pork’s caramelization beautifully. 🌱
Seafood Twist
Use ½ lb shrimp or scallops instead of pork for a coastal Korean flavor. Sear them quickly in the same pan before adding kimchi—they’ll finish cooking as the rice heats through. I learned this trick from a chef friend in Charleston.
Spice Level Boost
Add 1 tbsp gochugaru (Korean chili flakes) with the kimchi for extra heat without overpowering. For those who love fire, a drizzle of Sriracha at the end works too. I always keep Sunchang gochugaru in my pantry for this.
Cheese Lovers’ Version
Stir in ½ cup shredded mozzarella right at the end for a gooey, melty surprise. This Korean-Italian fusion became a hit at my Atlanta pop-ups. The cheese tames the kimchi’s tang while adding richness.
Breakfast Style
Skip the pork entirely and use crumbled bacon or diced ham for a morning twist. Top with a fried egg and extra green onions. This is my go-to Sunday brunch after a long week at the restaurant. 🍳
Extra Veggie Load
Toss in 1 cup diced zucchini or carrots with the onions. They soften quickly and add color. I often use leftover veggies from my farm’s harvest—waste not, want not!
Nutrition Facts
Frequently Asked Questions
Can I use fresh rice instead of day-old?
Day-old rice works best because it’s drier and fries up fluffier. Fresh rice tends to turn mushy. If using fresh, spread it on a tray and refrigerate for 30 minutes first.
What cut of pork works best?
Pork belly gives the richest flavor, but pork shoulder or ground pork work well too. For leaner options, try pork tenderloin sliced thin.
How do I make it less spicy?
Rinse the kimchi briefly to remove some heat, or reduce the gochujang to ½ tablespoon. The sugar helps balance spice too.
Can I add other vegetables?
Try diced carrots, zucchini, or bell peppers. Add them with the onions so they soften properly.

Trained in classic French technique but raised on slow-cooked ribs and spicy rubs, she blends culinary skill with smoke and soul.
- Recipe for Boneless Pork Chops in Cast Iron Skillet: Sear and Baste to Juicy Perfection - October 3, 2026
- Recipe for Boneless Cross Rib Roast: Slow-Roasted Beef with Herb Crust - October 3, 2026
- Hamburgers in Sauce Recipe Crock Pot: Slow-Cooked Savory Delight - October 3, 2026