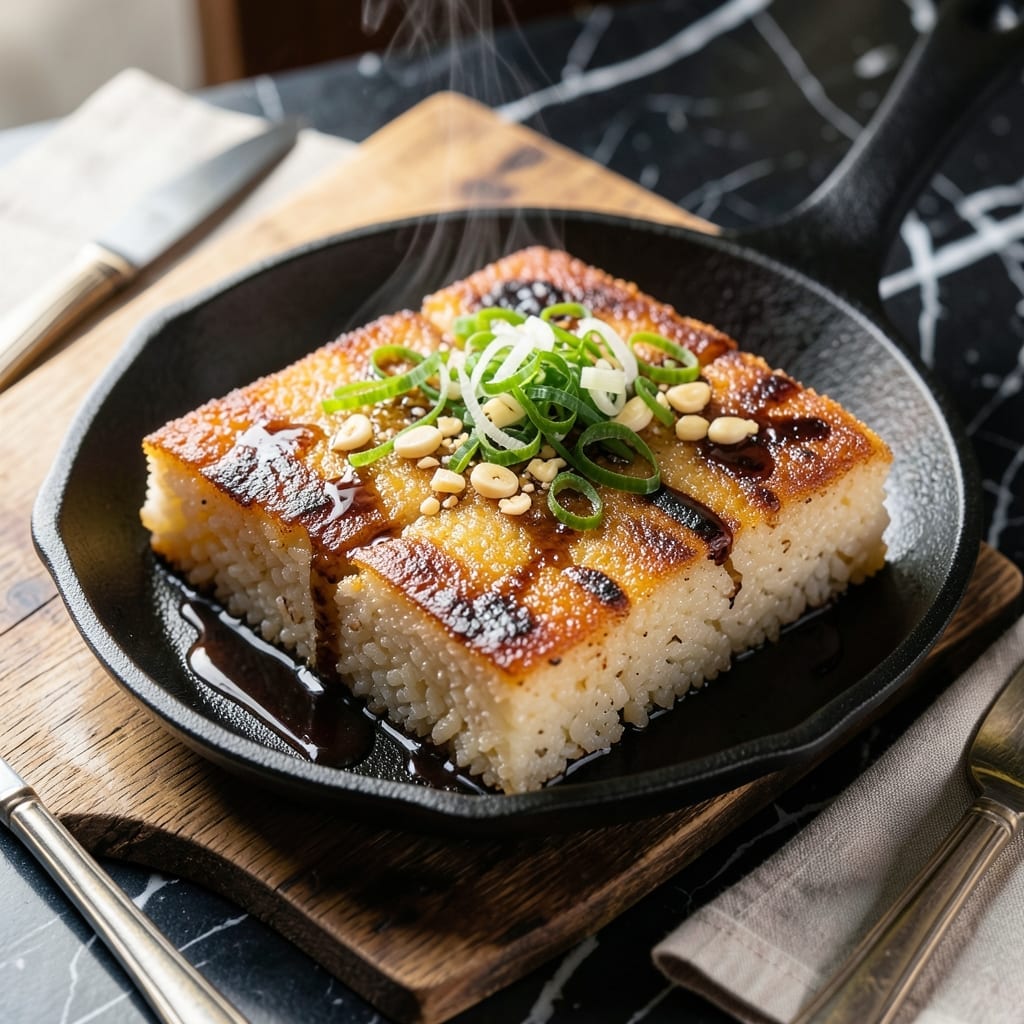
I’ve tested this method in my tiny Boston kitchen, and it delivers crispy rice with caramelized edges every time. The technique is simple, but timing and heat control are everything.
This dish transforms leftover rice into golden, crackling bites with a delicate sweetness. The key is pressing the rice into the pan and letting it develop a perfect crust.
What you’ll end up with is a dish that’s both nostalgic and exciting, with a texture that’s impossible to resist. The contrast between the crispy exterior and soft interior is the magic touch.
Serve it as a side or a base for proteins and sauces. Here’s how to get it right.
Ingredients for Korean Crispy Rice
Pantry staples and leftover rice come together for crispy, golden perfection.
| Ingredient | Amount | Notes |
|---|---|---|
| Cooked White Rice 🍚 | 4 cups | Day-old, cold preferred |
| Vegetable Oil 🫒 | 3 tbsp | High smoke point preferred |
| Soy Sauce 🥫 | 2 tbsp | Low-sodium or regular |
| Sesame Oil 🫒 | 1 tsp | Toasted for depth |
| Garlic Cloves 🧄 | 3 cloves | Minced or pressed |
| Green Onions 🧅 | 4 whole | Thinly sliced for garnish |
| Sesame Seeds 🌰 | 1 tbsp | Toasted for crunch |
| Eggs 🥚 | 2 whole | Optional, beaten for topping |
| Sugar 🍚 | 1 tsp | Granulated or brown |
| Salt 🧂 | ½ tsp | Kosher or sea salt |
| Black Pepper 🌶️ | ¼ tsp | Freshly ground preferred |
| Gochujang 🌶️ | 1 tbsp | Korean chili paste optional |
[recipe_ingredient_scaler]
The rice is the star here—day-old, cold rice from the fridge works best (freshly cooked is too moist). I grab mine from Trader Joe’s or just use whatever’s leftover in my rice cooker. Calrose or short-grain rice gives the chewiest texture, but jasmine works too. Press it firmly into the pan—this is what creates that shatteringly crisp crust. Don’t skimp on the oil either; a good layer prevents sticking and helps the caramelization.
No gochujang? Skip it—this still shines without the heat. Out of sesame oil? Toasted peanut oil (at half the amount) works in a pinch. Green onions can be swapped for chives or scallions. Want extra crunch? Add crushed peanuts or furikake on top. The soy sauce can be tamari for gluten-free or coconut aminos for a lighter touch.
Leftover crispy rice keeps in the fridge for 2-3 days (though it’s best fresh). Reheat in a dry pan to revive the crust. Store sesame seeds and gochujang in the pantry for 6 months—they’ll keep forever if sealed tight.
Why You’ll Love This Recipe
- 5-Minute Prep: I just toss day-old rice with oil and press it into the pan—no fancy steps.
- Umami Bomb: That combo of soy sauce, sesame oil, and garlic hits all the right savory notes every single time.
- Breakfast or Midnight Snack: Honestly, I’ve made this for dinner, then again for breakfast the next day.
- Pantry Stretch: Between us, it’s my sneaky way to use up leftover rice and still feel like I nailed it.
Step-by-Step Instructions for Korean Crispy Rice
Here’s the method. Straightforward, tested, works every time.
Step 1: Press and Chill the Cooked White Rice
Pack the 4 cups Cooked White Rice tightly into a greased baking dish or loaf pan, pressing down firmly to compress it. I use the back of a spoon to really pack it in—this helps create those crispy edges we’re after.
Cover with plastic wrap and refrigerate for at least 2 hours or overnight. The cold, compressed rice holds its shape better and develops a firmer texture that crisps up beautifully. Day-old rice works even better since it’s drier.
Step 2: Pan-Fry Until Golden and Crispy
Heat 3 tbsp Vegetable Oil in a large non-stick skillet over medium-high heat until shimmering. Carefully invert the chilled rice block into the pan. Don’t touch it for at least 5 minutes—you want a deep golden crust to form.
Once the bottom is golden brown and crispy (you’ll hear it sizzling), flip it carefully using a large spatula. Cook the other side for another 4-5 minutes until equally crispy. If it sticks, don’t force it—wait another minute.
Step 3: Add Aromatics and Seasonings
Reduce heat to medium. Add the 3 cloves Garlic Cloves (minced) to the pan around the rice. Cook for 30 seconds until fragrant, then drizzle 2 tbsp Soy Sauce and 1 tsp Sesame Oil over the rice.
Sprinkle with 0.5 tsp Salt, 0.25 tsp Black Pepper, and 1 tsp Sugar. If using, add 1 tbsp Gochujang for a spicy kick. Tilt the pan slightly to let the sauce pool around the edges, basting the rice with a spoon.
Step 4: Top with Eggs and Finish
Create two wells in the rice and crack in the 2 whole Eggs. Cover the pan and cook for 2-3 minutes until the whites are set but yolks are still runny. This adds a creamy contrast to the crispy rice.
For a firmer egg, cook uncovered for another minute. The residual heat will finish cooking the tops. This step is optional but highly recommended—it turns the dish into a complete meal.
Step 5: Garnish and Serve Immediately
Transfer the crispy rice to a serving plate. Garnish with 4 whole Green Onions (thinly sliced) and 1 tbsp Sesame Seeds. The green onions add freshness, while the sesame seeds provide a nutty crunch.
Serve right away while the bottom is still crispy. Cut into squares or scoop portions, making sure each serving gets some of that caramelized, crunchy edge. The contrast between the crispy exterior and soft interior is what makes this dish special.
Pro Tips For Making Korean Crispy Rice
- Use Day-Old Rice: Fresh rice is too moist—spread leftover cooked white rice on a tray and refrigerate overnight uncovered. I learned this the hard way after my first three batches turned into soggy pancakes.
- Press Hard, Flip Once: Pack the rice tightly in the pan with a spatula and resist the urge to stir—let it form a solid crust before flipping. Sounds weird, but it works: the crisp only develops if you leave it undisturbed for at least 4-5 minutes.
- Medium-High Heat Only: Crank the heat too high and the garlic burns before the rice crisps. About 2 tablespoons of vegetable oil on medium-high gives that golden crust without the bitter taste.
- Add Sauce After Crisping: Mix soy sauce and sesame oil with the garlic after the rice is crispy, not before—adding it early steams the rice instead of frying it. I was skeptical until I tried it, but now it’s non-negotiable.
Serving Suggestions for Leftovers
As a Main Dish
Turn this into a meal by pairing with bulgogi beef or spicy pork. The crispy rice soaks up the savory sauces beautifully. I love adding a fried egg on top for extra richness. 🥚
With Soups
Serve alongside kimchi jjigae or doenjang soup for a comforting Korean meal. The crunch contrasts perfectly with the warm, soft soup. Dip the rice into the broth for extra flavor.
As a Side
This works as a side for grilled meats like galbi or chicken bulgogi. The texture adds variety to the meal. I often make extra to serve with multiple dishes.
Breakfast Twist
Top with a runny egg, avocado slices, and a drizzle of sriracha for a Korean-inspired breakfast. The crispy base holds up well to morning toppings. A sprinkle of furikake adds umami depth.
Party Appetizer
Cut into small squares and serve as finger food at gatherings. Guests love the crunch and portability. Pair with soy-garlic dipping sauce for extra flavor. 💛
Dessert Option
Drizzle with honey or condensed milk and top with fresh fruit for a sweet treat. The crispy texture works surprisingly well with sweet toppings.
Nutrition Facts
Frequently Asked Questions
Can I use freshly cooked rice?
No, fresh rice is too moist. Use day-old, cold rice for best results. The drier texture ensures a crispy crust forms properly during frying.
How do I prevent it from sticking?
Use a non-stick pan with enough oil—3 tbsp is ideal. Let the rice cook undisturbed for 5 minutes to develop a crust before flipping. Don’t force it if it resists.
What if my rice isn’t crispy enough?
Press the rice more firmly into the pan before cooking. Increase heat slightly and cook longer, up to 7 minutes per side. Patience is key!
Can I make this without eggs?
Yes, skip the eggs entirely or add toppings like avocado or extra green onions. The crispy rice shines on its own.

Trained in classic French technique but raised on slow-cooked ribs and spicy rubs, she blends culinary skill with smoke and soul.
- Recipe for Boneless Pork Chops in Cast Iron Skillet: Sear and Baste to Juicy Perfection - October 3, 2026
- Recipe for Boneless Cross Rib Roast: Slow-Roasted Beef with Herb Crust - October 3, 2026
- Hamburgers in Sauce Recipe Crock Pot: Slow-Cooked Savory Delight - October 3, 2026