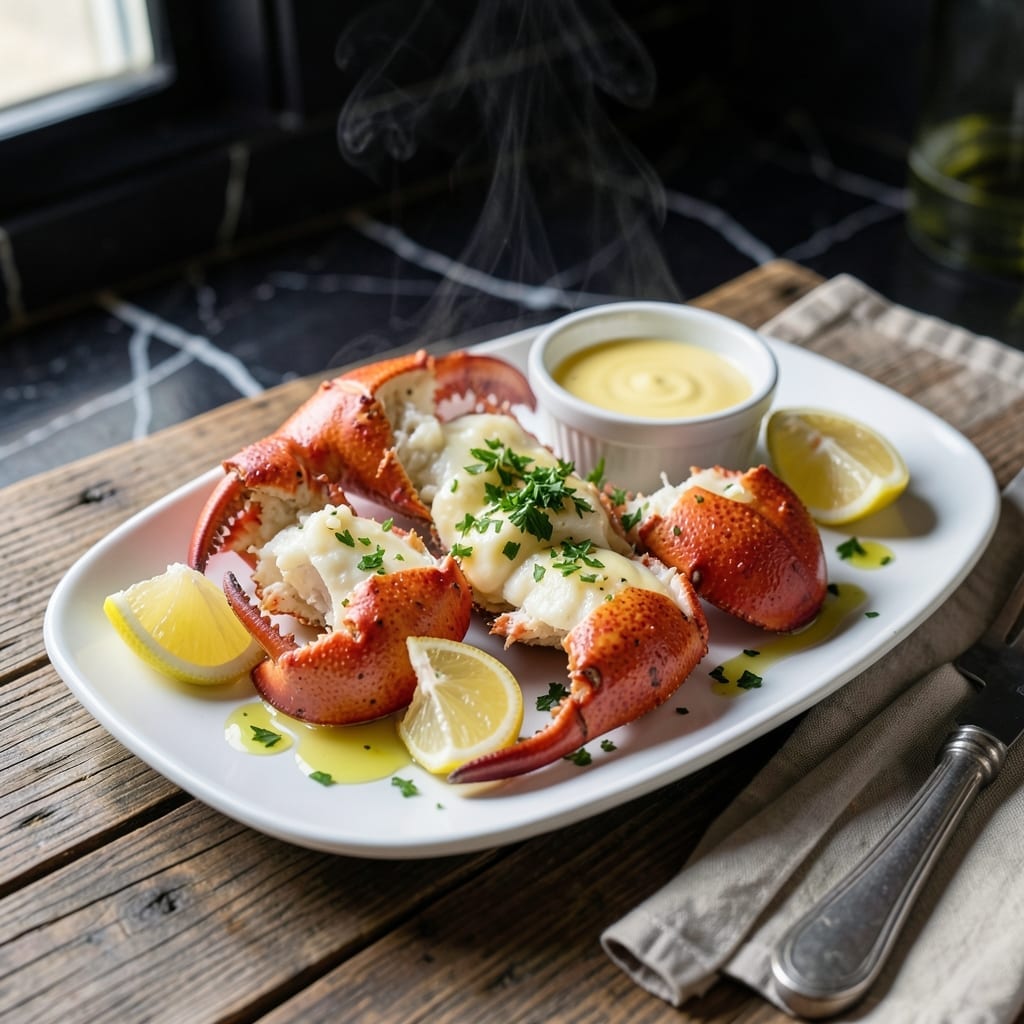
Frozen lobster claws can deliver the same buttery sweetness as fresh when prepared with care. I’ve tested this method repeatedly to ensure it works in any home kitchen, even one as small as my Boston triple-decker.
The key is slow thawing in the fridge overnight to preserve texture and flavor. This prevents the meat from turning rubbery or losing its natural sweetness during cooking.
Once thawed, a quick steam or boil brings out the best in these claws. The result is tender, succulent lobster that tastes like it came straight from the coast.
Serve with melted butter and lemon for a meal that feels indulgent without the fuss. This approach makes frozen claws just as impressive as fresh.
Ingredients for Frozen Lobster Claw
Simple ingredients transform frozen claws into a coastal feast at home.
| Ingredient | Amount | Notes |
|---|---|---|
| Frozen Lobster Claws 🦞 | 2 lb | Thawed overnight in fridge |
| Unsalted Butter 🧈 | 1 cup | Melted for dipping |
| Fresh Lemon 🍋 | 2 whole | Cut into wedges for serving |
| Sea Salt 🧂 | 1 tbsp | For seasoning cooking water |
| Fresh Parsley 🌿 | ¼ cup | Chopped, for garnish |
| Garlic Cloves 🧄 | 2 cloves | Minced, optional for butter |
| Water 💧 | 2 cups | For steaming or boiling |
| Old Bay Seasoning 🌶️ | 1 tsp | For cooking water flavor |
| Black Pepper 🌶️ | ½ tsp | Freshly ground preferred |
| Lemon Juice 🍋 | 2 tbsp | Freshly squeezed for butter |
[recipe_ingredient_scaler]
The lobster claws are the star—sourced from seafood markets or the frozen section at Whole Foods. Look for claws labeled ‘wild-caught’ for the best flavor. Thawing is critical: overnight in the fridge is ideal (never at room temperature). The butter should be high-quality European-style for richer taste, like Plugrá or Kerrygold. Freshness matters most with the lemon and parsley.
No Old Bay? Cajun seasoning or a pinch of paprika plus celery salt works. Out of fresh parsley? Chives or cilantro can substitute. For the butter dip, ghee or clarified butter adds a nutty depth. If you only have salted butter, reduce the added sea salt. The garlic in the butter is optional but highly recommended—don’t skip it if you love bold flavors.
Cooked claws keep 1-2 days in the fridge (store in shell). The melted butter can be reheated gently—3 days max. For best results, cook claws the same day they’re thawed. Freezing cooked meat? Not ideal—it toughens the texture.
Why You’ll Love This Recipe
- Minimal Effort: I just thaw, butter, and bake—no complicated steps or fancy tools needed.
- Buttery Lemon Bliss: That rich lobster soaks up the melted butter and lemon like a dream, every single time.
- Date Night Ready: I’ve served this for anniversaries and casual Fridays, and it always feels special.
- Smart Splurge: Frozen claws mean restaurant-quality taste without the restaurant price tag.
Step-by-Step Instructions for Frozen Lobster Claws
This method ensures tender, flavorful meat with minimal effort and maximum impact.
Step 1: Thaw the Lobster Claws Properly
Remove the 2 lb Frozen Lobster Claws from the freezer and transfer them to the refrigerator at least 12 hours before cooking. Place them in a shallow dish to catch any liquid as they thaw. This slow thawing preserves texture and prevents the meat from becoming mushy.
Never thaw at room temperature or under hot water—this promotes uneven cooking and can compromise food safety. The claws are ready when completely soft and pliable with no ice crystals remaining.
Step 2: Prepare the Seasoned Cooking Liquid
In a large pot, combine the 2 cups Water, 1 tbsp Sea Salt, 1 tsp Old Bay Seasoning, and 0.5 tsp Black Pepper. Bring to a rolling boil over high heat. The salt and spices infuse the water, ensuring the lobster meat absorbs maximum flavor as it cooks.
While waiting for the water to boil, fill a large bowl with ice and water for shocking the claws later. This stops the cooking process immediately, keeping the meat tender. Check that your pot is large enough to accommodate all claws without overcrowding.
Step 3: Steam the Claws to Perfection
Once boiling, carefully add the thawed claws to the pot using tongs. Cover with a tight-fitting lid and reduce heat to medium. Steam the claws for 8-10 minutes for 1 lb portions, so 16-20 minutes total for 2 lb. The shells will turn bright red, and the meat will become opaque and firm.
Avoid overcooking—lobster meat turns rubbery quickly. Test one claw by pulling it from the pot after 16 minutes; the meat should come out of the shell easily with a slight resistance. If unsure, cut into the thickest part: it should be white with no translucency.
Step 4: Shock and Extract the Meat
Using tongs, transfer the cooked claws directly to the ice bath for 5 minutes. This halts the cooking and makes the shells easier to handle. Drain the claws on a clean kitchen towel and let them cool slightly before cracking them open.
To remove the meat, use a lobster cracker or the back of a chef’s knife to gently crack the shells. Extract the meat in whole pieces, keeping them intact for presentation. Discard the shells or save for stock.
Step 5: Serve with Compound Butter and Garnishes
Melt the 1 cup Unsalted Butter in a small saucepan over low heat. Stir in the 2 tbsp Lemon Juice and, if using, the minced 2 cloves Garlic Cloves. Pour the melted butter into small ramekins for dipping.
Arrange the lobster meat on a serving platter and garnish with the chopped 0.25 cup Fresh Parsley and wedges from the 2 whole Fresh Lemon. Serve immediately with the warm butter for dipping, crusty bread, and additional lemon wedges on the side.
Pro Tips For Making Frozen Lobster Claw
- Thaw Slowly: Move the frozen claws to the fridge 12-18 hours before cooking—I learned this the hard way after ruining a batch with a quick microwave thaw that left the meat rubbery.
- Boil First, Shell Later: Plunge the claws straight into boiling water for 8-10 minutes (depending on size) before cracking them open; it’s easier and the meat stays intact.
- Skip the Cold Butter: Use room-temperature butter for dipping—cold butter won’t melt evenly over the warm lobster, and you’ll end up with a greasy pool instead of a silky sauce.
- Squeeze Lemon Last: Add the lemon juice just before serving, not during cooking; the acid can toughen the meat if it sits too long in the heat.
Essential Equipment for Perfect Results
Large Stockpot
I always use my 8-quart stainless steel stockpot from Cuisinart for this. It’s big enough to hold 2 lb of claws without crowding, which is essential for even cooking. A tight-fitting lid is non-negotiable for steaming.
Lobster Cracker
This tool is a game-changer. I picked up a sturdy lobster cracker at my local Boston seafood market for $15. It makes extracting the meat so much easier than struggling with a knife. Just place the claw in the cracker’s groove and squeeze.
Tongs
Use 12-inch stainless steel tongs to safely lower claws into boiling water and transfer them to the ice bath. I prefer the OXO brand with silicone tips to avoid scratching my pots. They give me better control when handling the hot claws.
Ice Bath Setup
A large mixing bowl filled with ice and water is perfect for shocking the claws. I use my 5-quart stainless steel mixing bowl—it’s deep enough to fully submerge all the claws at once. This stops the cooking immediately, keeping the meat tender. 💡
Compound Butter Tools
For the butter, a small saucepan over low heat works perfectly. I melt the butter slowly to avoid burning. A whisk helps emulsify the lemon juice and garlic for a smooth, restaurant-quality dip.
Serving Essentials
Small ramekins for the melted butter are a must. I use 4-ounce ceramic ramekins that I found at a local Italian deli. They’re the perfect size for individual servings and look beautiful on the table.
Nutrition Facts
Frequently Asked Questions
How long should I thaw the claws before cooking?
Thaw overnight in the fridge for at least 12 hours. This slow method preserves texture and flavor better than quick thawing. Never thaw at room temperature.
Can I boil instead of steam?
Yes, boiling works equally well. Use the same seasoned water and cook for 8-10 minutes per pound. Steaming is slightly gentler but both methods yield tender meat.
How do I know when they’re done?
The shells turn bright red and the meat becomes opaque and firm. Test by pulling a claw after 16 minutes for 2 lb—meat should come out easily with slight resistance.
What if I don’t have a lobster cracker?
Use the back of a chef’s knife or kitchen shears. Place the claw on a cutting board and gently tap to crack. Be careful to avoid flying shell fragments.

Trained in classic French technique but raised on slow-cooked ribs and spicy rubs, she blends culinary skill with smoke and soul.
- Recipe for Boneless Pork Chops in Cast Iron Skillet: Sear and Baste to Juicy Perfection - October 3, 2026
- Recipe for Boneless Cross Rib Roast: Slow-Roasted Beef with Herb Crust - October 3, 2026
- Hamburgers in Sauce Recipe Crock Pot: Slow-Cooked Savory Delight - October 3, 2026