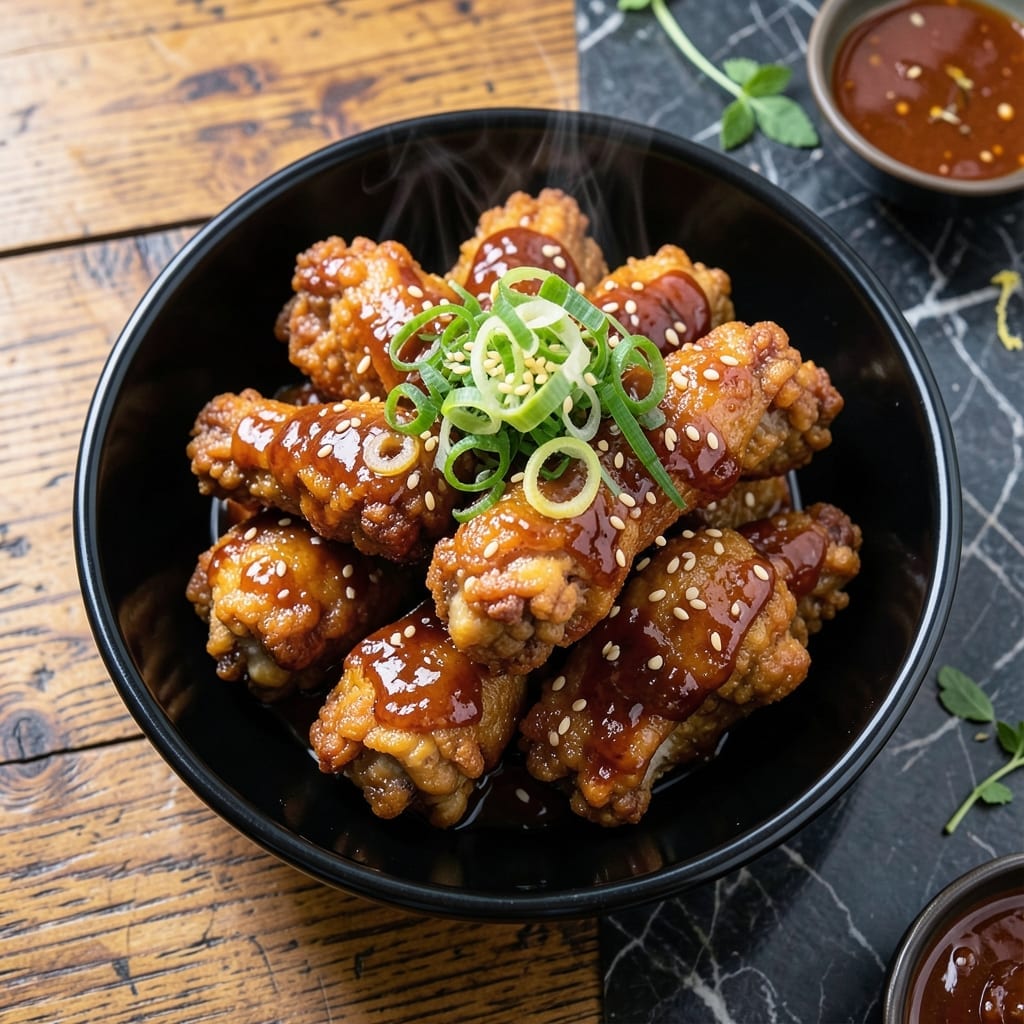
This Korean fried chicken delivers the double-fried crispiness that makes dakgangjeong legendary. My approach simplifies the traditional method without sacrificing that signature crunch.
First fry at a lower temperature renders the fat, while the second at higher heat creates a shatteringly crispy exterior. The sweet-spicy glaze clings perfectly to every ridge and crevice.
What sets this version apart is the balance—sweet with heat, crispy with tenderness. Every bite offers that addictive contrast that keeps you reaching for more.
Serve immediately for maximum crunch. The sauce can be adjusted to taste, but the frying technique is non-negotiable for authentic results.
Ingredients for Korean Fried Chicken Recipe Dakgangjeong
Double-fried perfection starts with these quality ingredients for that legendary crispy-sweet contrast.
| Ingredient | Amount | Notes |
|---|---|---|
| Chicken Thighs 🍗 | 2 lb | Boneless, skin-on, cut into bite-sized pieces |
| Potato Starch 🥔 | ¾ cup | For ultra-crispy coating |
| All-Purpose Flour 🌾 | ½ cup | Light coating base |
| Baking Powder 🧂 | 2 tsp | Enhances crispiness |
| Kosher Salt 🧂 | 1 tsp | Diamond Crystal preferred |
| Black Pepper 🌶️ | ½ tsp | Freshly ground for best flavor |
| Gochujang 🌶️ | ⅓ cup | Korean red pepper paste |
| Honey 🍯 | ¼ cup | For sweet glaze balance |
| Soy Sauce 🫒 | 3 tbsp | Low-sodium preferred |
| Rice Vinegar 🍚 | 2 tbsp | Adds tang to the sauce |
| Garlic Cloves 🧄 | 6 cloves | Minced for maximum flavor |
| Fresh Ginger 🌿 | 1 tbsp | Grated, no fibers |
| Sesame Oil 🫒 | 1 tbsp | Toasted, for finishing |
| Vegetable Oil 🫒 | 4 cups | For deep frying, high smoke point |
| Toasted Sesame Seeds 🌰 | 2 tbsp | For garnish and crunch |
| Green Onions 🧅 | 4 whole | Thinly sliced for garnish |
[recipe_ingredient_scaler]
The chicken is non-negotiable here—skin-on thighs render fat during the first fry (325°F), creating that shatteringly crisp exterior in the second (375°F). H-Mart or Korean markets carry the best gochujang (look for Sempio or CJ brands). Potato starch is the secret to that ultra-crispy crust; Bob’s Red Mill is widely available. Don’t substitute cornstarch—it won’t deliver the same texture.
No gochujang? Sriracha plus 1 tbsp miso paste gets you close but won’t be authentic. Honey can be swapped with maple syrup or agave at a 1:1 ratio. For gluten-free, use tamari instead of soy sauce and ensure your baking powder is aluminum-free. The ginger and garlic are essential—fresh only, no powders. Vegetable oil can be peanut or canola (both high smoke point).
Fry in batches to avoid crowding—this keeps the oil temp steady. The sauce can be made 2 days ahead and reheated gently. Leftovers? Re-crisp in a 400°F oven for 8-10 minutes. Consume within 24 hours for best texture, as the coating softens over time.
Why You’ll Love This Recipe
- One Bowl Mix: I just toss chicken thighs with potato starch, flour, and baking powder—no fancy prep, no mess.
- Addictive Crunch: That potato starch coating fries up so crispy it shames every other chicken I’ve made.
- Weeknight Hero: Between us, this is my go-to when I need dinner on the table before the kids start asking.
- Leftovers Vanish: Honestly, I double the batch because cold dakgangjeong disappears faster than hot.
Step-by-Step Instructions for Korean Fried Chicken Dakgangjeong
Master the double-fry technique for ultra-crispy results with a glossy sweet-spicy glaze.
Step 1: Coat the Chicken for Maximum Crispiness
Pat the 2 lb Chicken Thighs dry with paper towels to ensure the coating adheres properly. In a large bowl, combine the 0.75 cup Potato Starch, 0.5 cup All-Purpose Flour, 2 tsp Baking Powder, 1 tsp Kosher Salt, and 0.5 tsp Black Pepper. The baking powder creates micro-bubbles that enhance the crunch.
Toss the chicken pieces in the starch-flour mixture until each piece is evenly coated. Press gently to ensure full coverage. This dual-starch blend is the secret to that signature shatteringly crisp texture that distinguishes dakgangjeong from other fried chicken styles.
Step 2: First Fry for Even Cooking
Heat the 4 cups Vegetable Oil in a deep, heavy-bottomed pot to 325°F. Use a thermometer for precision—this temperature ensures the chicken cooks through without browning too quickly. Fry the coated chicken in batches to avoid crowding, which would lower the oil temperature and create a greasy result.
Fry for 6-8 minutes until the pieces are pale golden and just cooked through. The internal temperature should reach 165°F. Transfer to a wire rack set over a baking sheet to drain. This first fry develops the structure of the crust while gently cooking the meat.
Step 3: Double-Fry for Ultimate Crispness
Increase the oil temperature to 375°F. Return the chicken to the pot and fry again for 3-4 minutes until deeply golden and ultra-crispy. This second fry at higher heat creates the characteristic crunch that makes this dish so addictive.
Drain on a fresh wire rack. The chicken should have a deep amber color and an audible crunch when bitten. This double-fry method, a hallmark of Korean fried chicken, ensures a crispy exterior that lasts even after glazing.
Step 4: Prepare the Sweet-Spicy Glaze
In a saucepan, combine the 0.33 cup Gochujang, 0.25 cup Honey, 3 tbsp Soy Sauce, 2 tbsp Rice Vinegar, minced 6 cloves Garlic Cloves, and grated 1 tbsp Fresh Ginger. Simmer over medium heat for 3-4 minutes until slightly thickened and glossy.
The glaze should coat the back of a spoon but still be pourable. Taste and adjust the balance if needed—more honey for sweetness, more vinegar for tang. The aroma of garlic and ginger will be intense and inviting.
Step 5: Glaze and Garnish
Toss the hot fried chicken in the warm glaze until every piece is evenly coated and shiny. This step is best done immediately after frying so the sauce adheres perfectly to the crispy surface. The glaze will bubble slightly as it meets the hot chicken.
Drizzle with 1 tbsp Sesame Oil and sprinkle with 2 tbsp Toasted Sesame Seeds and thinly sliced 4 whole Green Onions. The sesame oil adds a nutty depth, while the seeds and green onions provide fresh contrast to the rich, sticky glaze. Serve immediately while the coating is at its crispiest.
Pro Tips For Making Korean Fried Chicken Recipe Dakgangjeong
- Double Fry for Crisp: Fry the chicken once at 325°F until cooked through, then rest 5 minutes before frying again at 375°F for that shatteringly crisp dakgangjeong crust. I learned this the hard way—single frying leaves it soggy under the sauce.
- Dry the Thighs: Pat the chicken thighs completely dry with paper towels before coating—any moisture steams the starch and ruins the crunch. Sounds tedious, but it works.
- Skip the Crowding: Fry in small batches with at least an inch between pieces, or the oil temperature drops and you’ll end up with greasy, sad chicken. After burning three batches, I finally figured out patience is non-negotiable.
- Boost with Baking Powder: Add 1 teaspoon baking powder to your potato starch and flour mix—it creates tiny air pockets for extra crunch without changing the flavor. My grandmother swore by this, and she was right.
Regional Styles of This Dish
Seoul Street Style
The original dakgangjeong from Seoul’s Gwangjang Market uses a lighter, sweeter glaze with less heat. I reduce the gochujang to ¼ cup and add 2 tbsp brown sugar for caramel notes. The chicken is often served with pickled radish on the side. 🗺️
Busan Spicy Version
Busan’s coastal influence brings extra heat to their dakgangjeong. I add 1 tbsp gochugaru (Korean chili flakes) and 1 tsp cayenne to the glaze. The sauce becomes a deep red with serious kick. Serve with cold beer to balance the fire.
Jeonju Royal Court
This historical version from Jeonju omits the spice entirely, focusing on sweetness. I use ½ cup honey and 2 tbsp corn syrup in the glaze. The chicken is often dusted with powdered sugar before serving for extra sweetness.
Modern Fusion
For my home kitchen adaptation, I sometimes add 1 tbsp sriracha and 1 tbsp lime juice to the glaze. This creates a Thai-Korean fusion that’s bright and spicy. The lime cuts through the richness beautifully.
Gluten-Free Adaptation
To make this accessible, I substitute tamari for soy sauce and use gluten-free baking powder. The potato starch coating remains unchanged. The result is just as crispy with no gluten.
I always test with King Arthur’s GF baking powder for best results.
Nutrition Facts
Frequently Asked Questions
Why use potato starch instead of flour?
Potato starch creates an ultra-crispy, shatteringly light crust. It absorbs less oil than flour, keeping the chicken less greasy. The result is a crunch that lasts even after glazing.
Can I bake instead of frying?
For a lighter version, bake at 400°F for 25-30 minutes, flipping halfway. The texture won’t be identical to frying, but it’ll still be crispy. Use a wire rack for even air circulation.
How do I make it less spicy?
Reduce the gochujang to 2 tablespoons and add 1 tablespoon honey or brown sugar. For no heat, omit gochujang entirely and use 1 tablespoon soy sauce plus 1 tablespoon ketchup for color.
Can I prepare the sauce ahead?
The glaze keeps well for up to 3 days in the fridge. Reheat gently before tossing with the chicken. Avoid boiling to prevent sugar crystallization.

Trained in classic French technique but raised on slow-cooked ribs and spicy rubs, she blends culinary skill with smoke and soul.
- Recipe for Boneless Pork Chops in Cast Iron Skillet: Sear and Baste to Juicy Perfection - October 3, 2026
- Recipe for Boneless Cross Rib Roast: Slow-Roasted Beef with Herb Crust - October 3, 2026
- Hamburgers in Sauce Recipe Crock Pot: Slow-Cooked Savory Delight - October 3, 2026