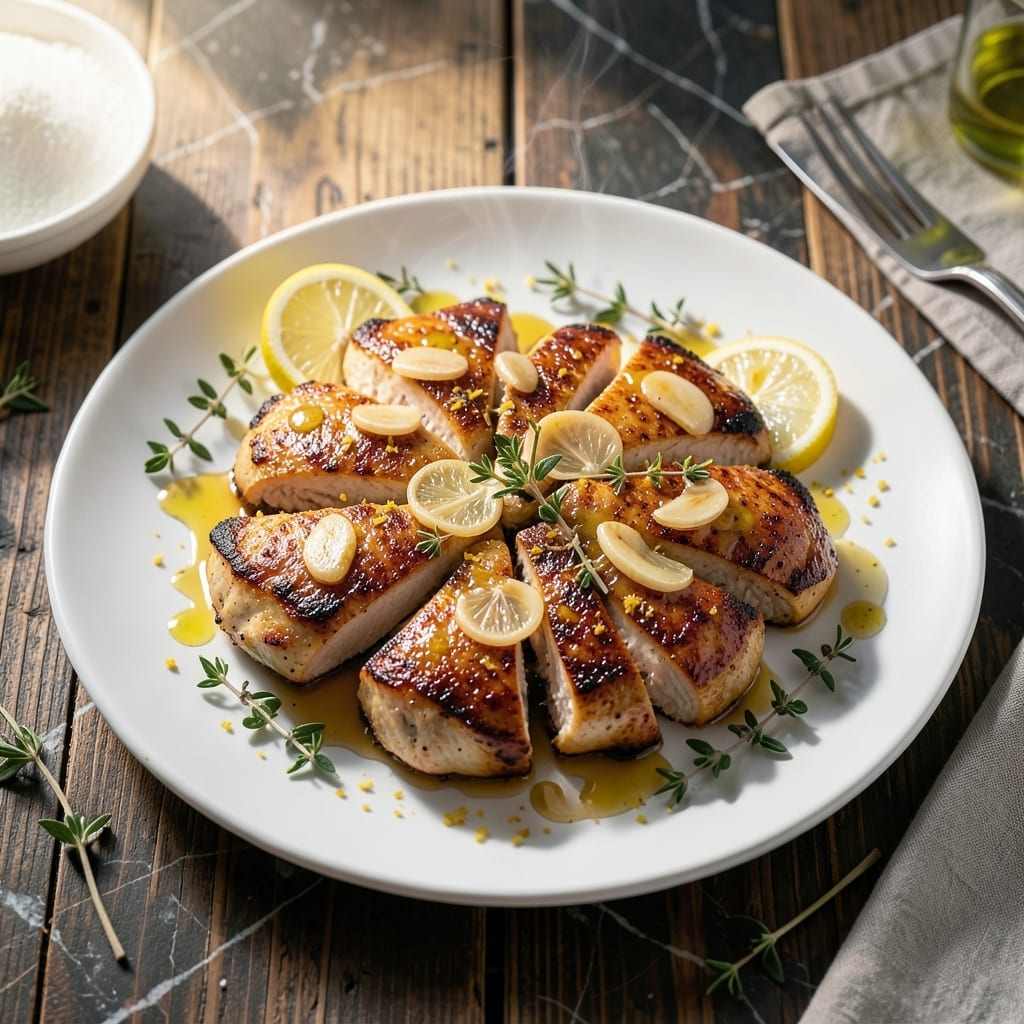
This lemon garlic chicken proves that one-pot meals can be both elegant and effortless. I developed this method after too many nights of washing multiple dishes.
Pressure cooking locks in moisture while infusing the chicken with bright citrus and aromatic garlic. The Instant Pot does all the work, transforming simple ingredients into a restaurant-worthy dish.
You’ll end up with tender chicken bathed in a velvety lemon garlic sauce that’s perfect over rice or pasta. The flavors are balanced—zesty without being sour, garlicky without overwhelming.
Ready in under 30 minutes, this is the kind of recipe that makes weeknight cooking feel like a treat rather than a chore.
Ingredients for Lemon Garlic Chicken Recipe Instant Pot
Simple, bright ingredients transform into restaurant-worthy lemon garlic chicken with minimal effort.
| Ingredient | Amount | Notes |
|---|---|---|
| Boneless Skinless Chicken Thighs 🍗 | 1 ½ lb | Trimmed of excess fat |
| Garlic Cloves 🧄 | 6 cloves | Minced for maximum flavor |
| Fresh Lemon Juice 🍋 | ½ cup | About 3-4 large lemons |
| Lemon Zest 🍋 | 1 tbsp | Finely grated from fresh lemons |
| Chicken Broth 💧 | ½ cup | Low-sodium preferred |
| Olive Oil 🫒 | 2 tbsp | Extra-virgin for best quality |
| Unsalted Butter 🧈 | 2 tbsp | For richness in sauce |
| All-Purpose Flour 🌾 | 2 tbsp | For thickening sauce |
| Dijon Mustard 🟡 | 1 tbsp | Adds depth to sauce |
| Fresh Thyme 🌿 | 1 tbsp | Chopped, stems removed |
| Kosher Salt 🧂 | 1 tsp | Adjust to taste |
| Black Pepper 🌶️ | ½ tsp | Freshly ground preferred |
| Honey 🍯 | 1 tbsp | Balances acidity in sauce |
[recipe_ingredient_scaler]
The chicken thighs are key here—bone-in works too but boneless cooks faster and more evenly. I always grab free-range thighs from Whole Foods or Costco for better flavor and texture. The lemons should be firm and heavy for maximum juice. For the garlic, fresh cloves are non-negotiable (pre-minced from a jar lacks the aromatic punch).
No fresh thyme? Dried thyme at one-third the amount works, but add it earlier in the cooking process. Short on lemon juice? Bottled juice in a pinch, though fresh is always better. The Dijon mustard can be swapped for whole-grain mustard if that’s what you have. For a dairy-free version, olive oil instead of butter keeps it just as rich.
This keeps beautifully in the fridge for 4-5 days—the flavors actually deepen overnight. Freeze portions for up to 3 months if you want to meal prep. The sauce thickens as it cools, so thin with a splash of broth when reheating.
Why You’ll Love This Recipe
- Set and Forget: I dump everything in the Instant Pot, press a button, and walk away—no babysitting required.
- Bright and Zesty: The lemon zest and juice cut through the rich chicken, with garlic adding that warm, punchy depth I crave.
- Meal Prep Magic: I make a big batch on Sunday and it tastes just as good reheated for lunch all week.
- Budget Winner: Chicken thighs stay juicy and cheap, and I already have the garlic and lemons on hand.
Step-by-Step Instructions for Lemon Garlic Chicken
This one-pot method delivers tender chicken with a bright, creamy sauce in record time.
Step 1: Sear the Chicken Thighs
Set your Instant Pot to the Sauté function and add the 2 tablespoons olive oil. Once hot, add the 1.5 lb boneless skinless chicken thighs and sear for 3-4 minutes per side until golden brown.
Season with 1 teaspoon kosher salt and ½ teaspoon black pepper during searing. The chicken should release easily from the pot when properly browned. Remove and set aside—this step builds a flavor foundation for the sauce.
Step 2: Sauté Aromatics and Build the Base
In the same pot, add the 6 cloves garlic cloves, 1 tablespoon lemon zest, and 1 tablespoon fresh thyme. Sauté for 30 seconds until fragrant, stirring constantly to prevent burning.
Add the 2 tablespoons all-purpose flour and cook for 1 minute to remove the raw flour taste. This creates a roux that will thicken the sauce beautifully. Pour in the ½ cup chicken broth and scrape up any browned bits from the bottom.
Step 3: Pressure Cook the Chicken
Return the chicken to the pot along with any accumulated juices. Add the ½ cup fresh lemon juice, 1 tablespoon Dijon mustard, and 1 tablespoon honey. Stir gently to combine, ensuring the chicken is mostly submerged in the liquid.
Secure the lid and set the Instant Pot to High Pressure for 8 minutes. The cooking time starts once pressure is reached. When done, allow a 5-minute natural release before carefully turning the valve to Venting for a quick release.
Step 4: Finish with Butter and Serve
Stir in the 2 tablespoons unsalted butter until melted and fully incorporated. This adds a rich, velvety finish to the sauce. Taste and adjust seasoning if needed—the balance of sweet, tangy, and savory should be just right.
Serve the chicken and sauce over mashed potatoes, rice, or with crusty bread. The sauce should coat the chicken thickly, with visible flecks of garlic and thyme throughout. This one-pot wonder comes together in under 30 minutes with minimal cleanup.
Pro Tips For Making Lemon Garlic Chicken Recipe Instant Pot
- Sear the Thighs: Brown the chicken thighs in the Instant Pot first using the sauté function—about 3-4 minutes per side. I learned this the hard way: skipping this step leaves the meat pale and the sauce lacking depth.
- Mince Garlic Fine: After burning three batches, I finally figured out that finely minced garlic (not just chopped) prevents bitter, burnt bits in the pressure cooker.
- Use Fresh Lemon: Bottled lemon juice works in a pinch, but fresh lemon juice and zest make a real difference in brightness. Sounds weird, but it works.
- Natural Release Only: Resist the urge to quick-release—let the pressure drop naturally for 10 minutes to keep the chicken juicy instead of tough.
Essential Equipment for Great lemon garlic chicken recipe instant pot
Instant Pot Must-Have
The 6-quart Instant Pot Duo is my workhorse—perfect size for most families and handles this recipe beautifully. I’ve had mine for years and it still works like new. The sauté function is essential for browning the chicken properly.
Wooden Spoon Essential
A good wooden spoon won’t scratch your pot’s nonstick coating. I keep one dedicated to my Instant Pot to avoid any cross-contamination with plastic utensils. The flat edge helps deglaze the bottom when building your sauce foundation.
Measuring Tools
For this recipe, precise measurements matter. I use OXO Good Grips measuring cups and spoons—they’re durable and the markings are easy to read. The 1 tablespoon measure gets heavy use here for the lemon zest and mustard. 💡
Fat Separator
If you want extra-rich sauce, a fat separator helps remove excess fat from the cooking liquid. I pour the juices through mine before reducing the sauce. It’s a small step that makes a difference in the final texture.
Quick-Read Thermometer
Though not strictly necessary, I always check my chicken with a ThermoWorks instant-read thermometer. The thighs should reach 165°F internally. It gives me peace of mind, especially when cooking for guests.
Serving Dishes
I love serving this in a wide, shallow bowl to showcase the chicken and sauce. The Le Creuset stoneware I inherited from my grandmother retains heat beautifully. It’s the perfect vessel for this comforting dish. 💛
Nutrition Facts
Frequently Asked Questions
Can I use chicken breasts instead of thighs?
Yes, but reduce pressure cooking time to 6 minutes. Breasts dry out faster than thighs. For best results, brine them for 30 minutes in salted water first to keep them juicy.
How do I thicken the sauce if it’s too thin?
After cooking, set Instant Pot to Sauté and simmer uncovered for 3-5 minutes. For faster thickening, mix 1 teaspoon cornstarch with water and stir in. The sauce will continue to thicken as it cools.
What if I get the burn notice?
Quickly release pressure, then scrape the bottom thoroughly. Add ½ cup extra broth and stir well. Avoid using less liquid than the recipe specifies. The flour helps prevent sticking.
Can I make this ahead of time?
The flavors meld beautifully overnight. Store in an airtight container for up to 4 days. Reheat on Sauté function, adding a splash of broth to loosen the sauce.

Trained in classic French technique but raised on slow-cooked ribs and spicy rubs, she blends culinary skill with smoke and soul.
- Recipe for Boneless Pork Chops in Cast Iron Skillet: Sear and Baste to Juicy Perfection - October 3, 2026
- Recipe for Boneless Cross Rib Roast: Slow-Roasted Beef with Herb Crust - October 3, 2026
- Hamburgers in Sauce Recipe Crock Pot: Slow-Cooked Savory Delight - October 3, 2026