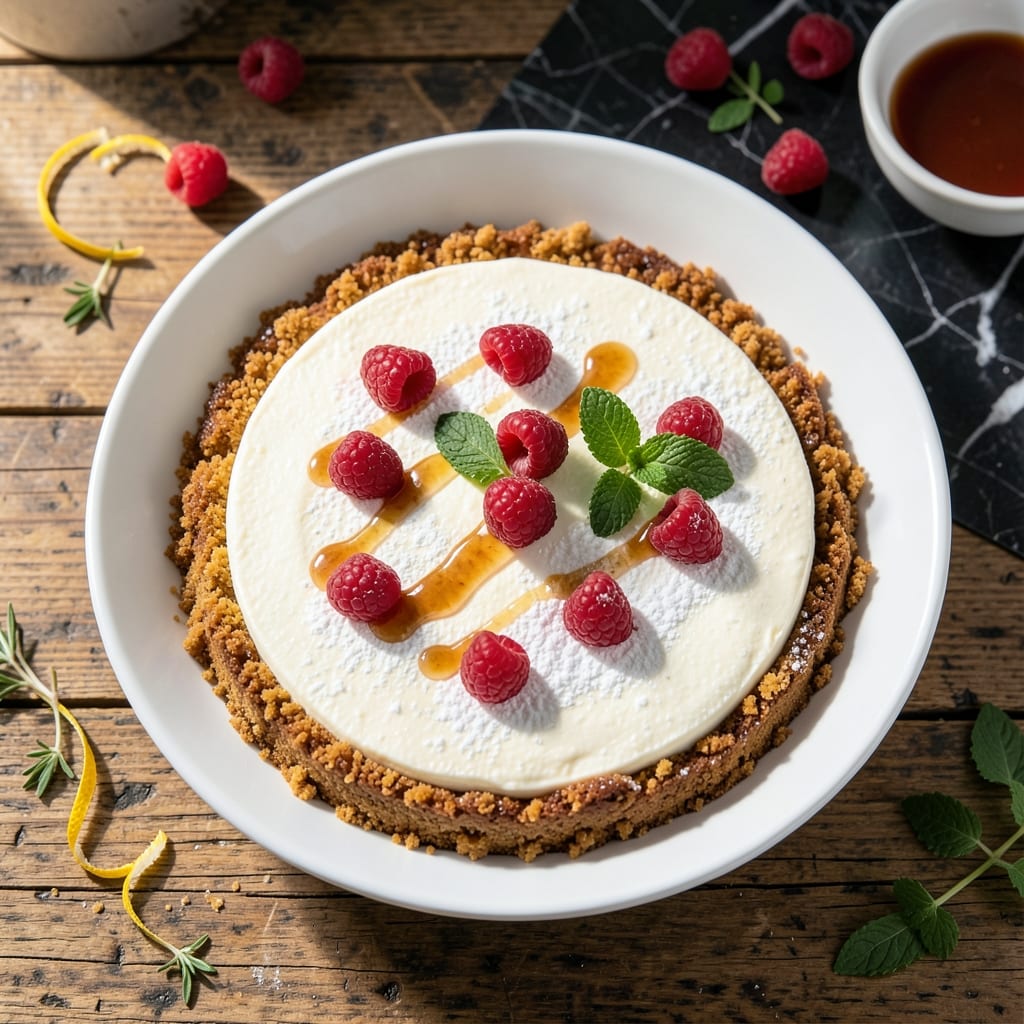
I developed this no-bake cheesecake after years of testing lighter dessert options that don’t sacrifice texture or flavor. The result is a silky smooth creation that sets perfectly in the fridge without needing an oven.
The base uses a simple graham cracker crust, while the filling relies on light cream cheese and whipped topping for that airy consistency. Fresh berries on top add a bright contrast to the creamy layers below.
No water baths, no cracking, no stress—just a foolproof method that delivers professional results every time. The hardest part? Waiting the 4 hours for it to chill completely.
Perfect for warm weather or when you need a make-ahead dessert. This version proves you can have richness without the guilt.
Ingredients for Light Cheesecake Recipe No Bake
Simple crust, creamy filling, and fresh berries make this light dessert unforgettable.
| Ingredient | Amount | Notes |
|---|---|---|
| Graham Cracker Crumbs 🍪 | 1 ½ cups | Fine crumbs, about 12 full crackers |
| Unsalted Butter 🧈 | ⅓ cup | Melted for crust binding |
| Granulated Sugar 🍚 | ¼ cup | For crust sweetness |
| Light Cream Cheese 🧀 | 16 oz | Room temperature, two 8-oz packages |
| Powdered Sugar 🍬 | ¾ cup | Sifted for smooth filling |
| Vanilla Extract 🌿 | 1 tsp | Pure vanilla for best flavor |
| Frozen Whipped Topping 🥛 | 8 oz | Thawed, such as Cool Whip |
| Fresh Strawberries 🍓 | 1 cup | Sliced, for topping |
| Fresh Blueberries 🫐 | ½ cup | Whole, for topping |
| Fresh Raspberries 🍇 | ½ cup | Whole, for topping |
| Lemon Juice 🍋 | 1 tbsp | Freshly squeezed for brightness |
[recipe_ingredient_scaler]
The cream cheese is the star here. Philadelphia Light gives that perfect texture without the guilt. Use full-fat if you prefer a richer filling, but the light version works beautifully. Room temperature is key—cold cream cheese won’t blend smoothly. For the graham crumbs, Honey Maid or store-brand both work, but avoid the cinnamon variety unless you want that extra flavor.
No light cream cheese? Regular cream cheese at half the amount (8 oz) works but adds calories. Swap whipped topping for homemade whipped cream if you’ve got time. Fresh berries can be swapped for thawed frozen berries (drained well) or a quick berry compote. The lemon juice balances sweetness—use bottled in a pinch, but fresh is brighter.
The crust can be made a day ahead and stored at room temperature. The filling needs 4 hours in the fridge to set completely. Leftovers keep for 3-4 days covered in the fridge. Add berries just before serving to keep them fresh.
Why You’ll Love This Recipe
- No Oven Needed: I just mix, chill, and serve—no baking, no stress, and my kitchen stays cool.
- Velvety Lightness: The light cream cheese and powdered sugar blend into this smooth, not-too-sweet filling that melts in your mouth.
- Potluck Hero: Between us, I bring this to every gathering and it’s always the first to disappear.
- Keeps for Days: Honestly, it tastes even better after a night in the fridge, and I’ve never had leftovers last long.
Step-by-Step Instructions for Light Cheesecake No Bake
This no-bake method delivers a creamy, dreamy dessert with minimal effort and maximum flavor.
Step 1: Create the Graham Cracker Crust
Combine the 1.5 cups graham cracker crumbs with the 0.25 cup granulated sugar in a medium bowl, stirring until evenly distributed. The sugar adds just the right amount of sweetness to complement the buttery crumbs.
Pour in the 0.33 cup unsalted butter (melted) and mix with a fork until the crumbs resemble wet sand and hold together when pressed. This texture ensures your crust will set properly in the fridge. Press the mixture firmly into the bottom of a 9-inch pie dish or springform pan, creating an even layer.
Use the bottom of a measuring cup to compact the crust well—this prevents it from crumbling when sliced. Chill in the refrigerator for 15 minutes to set while you prepare the filling.
Step 2: Whip the Light Cream Cheese Filling
In a large mixing bowl, beat the 16 oz light cream cheese (at room temperature) with an electric mixer until completely smooth. Room temperature cream cheese is critical here—cold cream cheese will leave lumps no matter how long you beat it.
Gradually add the 0.75 cup powdered sugar, mixing on low speed until fully incorporated. Then add the 1 tsp vanilla extract and mix for another 30 seconds. The vanilla enhances the creamy flavor without overpowering it.
Fold in the 8 oz frozen whipped topping (thawed) with a spatula until no streaks remain. The filling should be light, airy, and spreadable. Avoid overmixing, which can deflate the whipped topping and make the filling dense.
Step 3: Assemble and Chill the Cheesecake
Spoon the cream cheese mixture over the chilled crust and spread it into an even layer with an offset spatula. Smooth the top as much as possible—this will be the base for your berry topping.
Cover the dish with plastic wrap and refrigerate for at least 4 hours, or preferably overnight. The longer chilling time allows the flavors to meld and the texture to firm up perfectly. You’ll know it’s ready when the filling holds its shape when gently pressed.
Step 4: Prepare the Fresh Berry Topping
Combine the 1 cup fresh strawberries (sliced), 0.5 cup fresh blueberries, and 0.5 cup fresh raspberries in a bowl. Drizzle with the 1 tbsp lemon juice and toss gently to coat. The lemon juice brightens the berries and balances their natural sweetness.
Let the berries sit for 10-15 minutes to macerate slightly, releasing some of their juices. Spoon the berry mixture over the chilled cheesecake just before serving, allowing the vibrant colors to cascade over the creamy filling. Serve immediately for the best texture and flavor.
Pro Tips For Making Light Cheesecake Recipe No Bake
- Chill the Base: Press the graham cracker crumb and butter mixture into the pan, then refrigerate for at least 20 minutes—I learned this the hard way after my first crust crumbled apart when slicing.
- Soften the Cream Cheese: Let the light cream cheese sit out for 1-2 hours before mixing, or microwave in 10-second bursts at 50% power. Cold cream cheese leaves lumps no amount of whisking can fix.
- Skip the Overmixing: Fold the powdered sugar in just until combined—overworking the filling introduces air bubbles that make the texture uneven after setting.
- Use a Springform Pan: Sounds obvious, but a springform pan makes removal effortless and guarantees clean slices. I was skeptical until I tried it, and now I won’t make no-bake cheesecake any other way.
Essential Equipment for Great light cheesecake recipe no bake
Springform Pan
A 9-inch springform pan is my go-to for no-bake cheesecakes. The removable sides make serving clean slices effortless. I use Wilton brand—they’re affordable and last forever. Avoid glass pie dishes if you can, as the springform gives better support for the filling. 💡
Electric Mixer
An electric mixer ensures lump-free filling every time. I prefer my stand mixer with the paddle attachment for hands-free mixing, but a hand mixer works just as well. The key is room temperature cream cheese—cold blocks won’t blend smoothly no matter how powerful your mixer is.
Offset Spatula
An offset spatula is perfect for spreading the filling evenly over the crust. The angled blade lets you smooth the top without disturbing the graham cracker base. I’ve tried using regular spoons, but the spatula gives that professional finish.
Measuring Cups
Accurate measurements matter for the crust’s texture. I use stainless steel measuring cups for dry ingredients like graham crumbs and sugar. For the melted butter, a liquid measuring cup with a spout prevents spills when pouring into the crust mixture.
Food Processor
If you’re making your own graham cracker crumbs, a food processor pulverizes them perfectly in seconds. I pulse 12 full crackers for about 10-15 seconds to get fine, even crumbs. No food processor? A rolling pin and ziplock bag work too, but it’s less consistent.
Plastic Wrap
Use heavy-duty plastic wrap to cover the cheesecake while chilling. Press it directly onto the surface to prevent a skin from forming. I like Glad Press’n Seal for its tight seal. This step keeps the top smooth and fresh-tasting.
Nutrition Facts
Frequently Asked Questions
Can I use regular cream cheese instead of light?
Yes, but reduce the amount to 8 oz to keep the texture similar. Regular cream cheese is richer, so the flavor will be more decadent. Just ensure it’s at room temperature for smooth blending.
What if my filling won’t set?
This usually means the chilling time was too short. Allow at least 4 hours in the fridge, preferably overnight. Also, ensure your whipped topping was fully thawed before mixing.
Can I make this ahead of time?
Prepare the crust and filling up to 2 days in advance. Add the berry topping just before serving to keep it fresh and vibrant.
Is there a substitute for graham cracker crumbs?
Try digestive biscuits, vanilla wafers, or even crushed cereal like cornflakes. Use the same 1.5 cups measurement and adjust sugar to taste.

Trained in classic French technique but raised on slow-cooked ribs and spicy rubs, she blends culinary skill with smoke and soul.
- Recipe for Boneless Pork Chops in Cast Iron Skillet: Sear and Baste to Juicy Perfection - October 3, 2026
- Recipe for Boneless Cross Rib Roast: Slow-Roasted Beef with Herb Crust - October 3, 2026
- Hamburgers in Sauce Recipe Crock Pot: Slow-Cooked Savory Delight - October 3, 2026